The Manage Files tool is a file management system for your course. You can use this tool to organize and upload files associated with your course offering. We recommend that you organize your files into folders, creating a folder for each module of content.
Any document, PowerPoint file, PDF, image, or other files you upload to your course can be found in this tool. All the files that you create in your course can be found here as well.
1. Locate: Manage Files
Locate Manage Files tool from either Course Admin or Content
Option 1: Locate the Manage Files tool within Course Admin.
- Select Course Admin from your course navbar.

-
Select Manage Files .

Option 2: Locate the Manage Files tool from the Content Area.
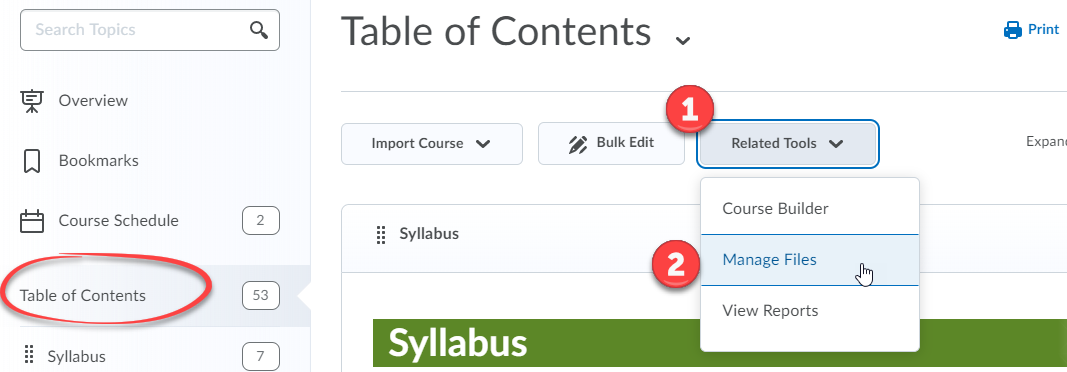
- Choose the Table of Contents from the Contents Tool.
- Click the Related Tools button (1) and choose Manage Files (2).
2. Create: Content Module Folder and Default Path
Create a default folder and path for each Content module.
To quickly and easily find content you've created or uploaded in any course, it is recommended that you create a New Folder in the Manage Files tool for each module in your course content and then Set a Default Path to that folder for all content you create or upload within that module.
Note: You can easily do both of the above as you are creating course content.
- Click the down-caret next to the module name to open the actions menu (1) and select Set Default Path (2).

- Click the Change Path button.
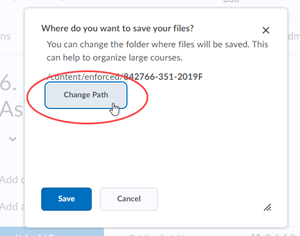
- The folder for our Content module hasn't been created yet, so click New Folder to create one.
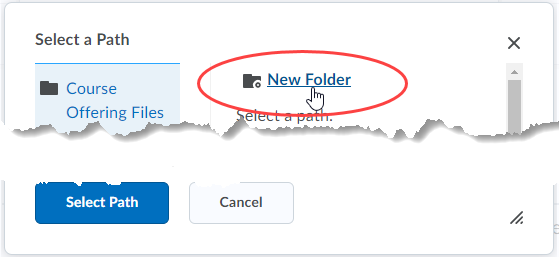
- The window used to create a new folder generally doesn't open large enough to display all the content. Drag the triangle in the lower right corner of the window to enlarge it until you see all the options to create a folder.

- Type in the name of your folder (1) using the same name as your Content module, then click Create (2).
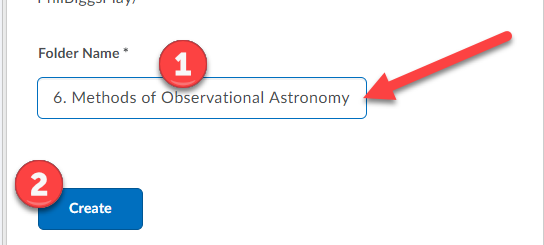
NOTE: Always name the folder in the Manage Files tool with the same name as your course module.
Continue on to Section Three, instruction three to learn to set the Default Path for the Content Module.
3. Set: Default Path for Content Module
Set the Default Path to direct where all files for a Content Module will be saved in D2L.
- Click the down-caret next to the module name to open the action menu (1) and select Set Default Path (2).

- Click the Change Path button.

- Locate the folder you created for the Content Module in the list and click it (1). Then click Select Path (2) to set it to be the folder all files used in this Content module will be saved by default.
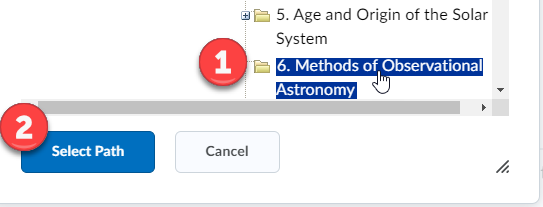
- Click Save.
- All files that you create or upload in this module from now on will be saved in this folder in the Manage Files tool.
4. Create: New Folder
Create folders directly in the Manage Files tool.
- Select the folder you within which you want to create a new folder in the tree structure in the left pane. In this example, we are creating a folder at the top level.
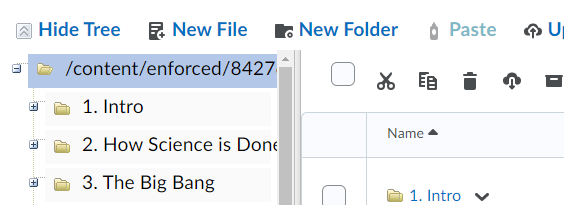
- Click New Folder.

- Type a name for the folder (1). Use a name that clearly identifies the folder with a module, preferably the same name for both.
- Click Save (2).

- Your folder will appear in the tree structure in the left pane and contents in the right pane in alphabetical order.

NOTE: By default folders are listed before individual files.
5. Upload: File
Import a file into a folder in the Manage Files tool.
- Click on the folder you wish to copy into.
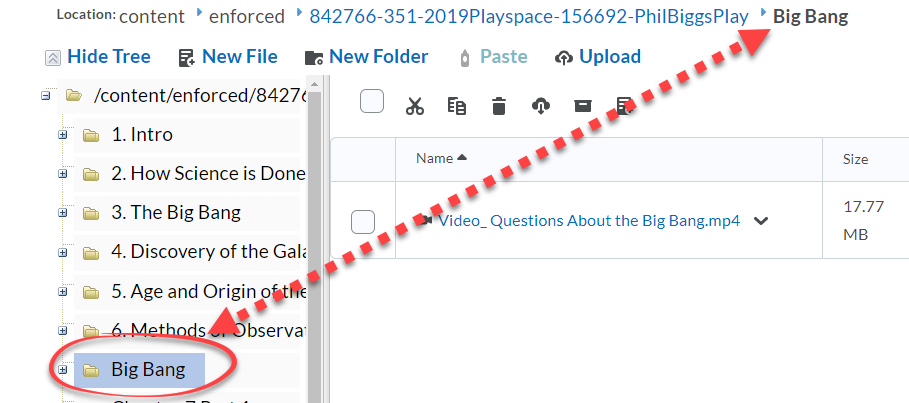
- Click the Upload link above the folder contents listing.

- Drag the file from the folder on your computer to the upload box and click Save.
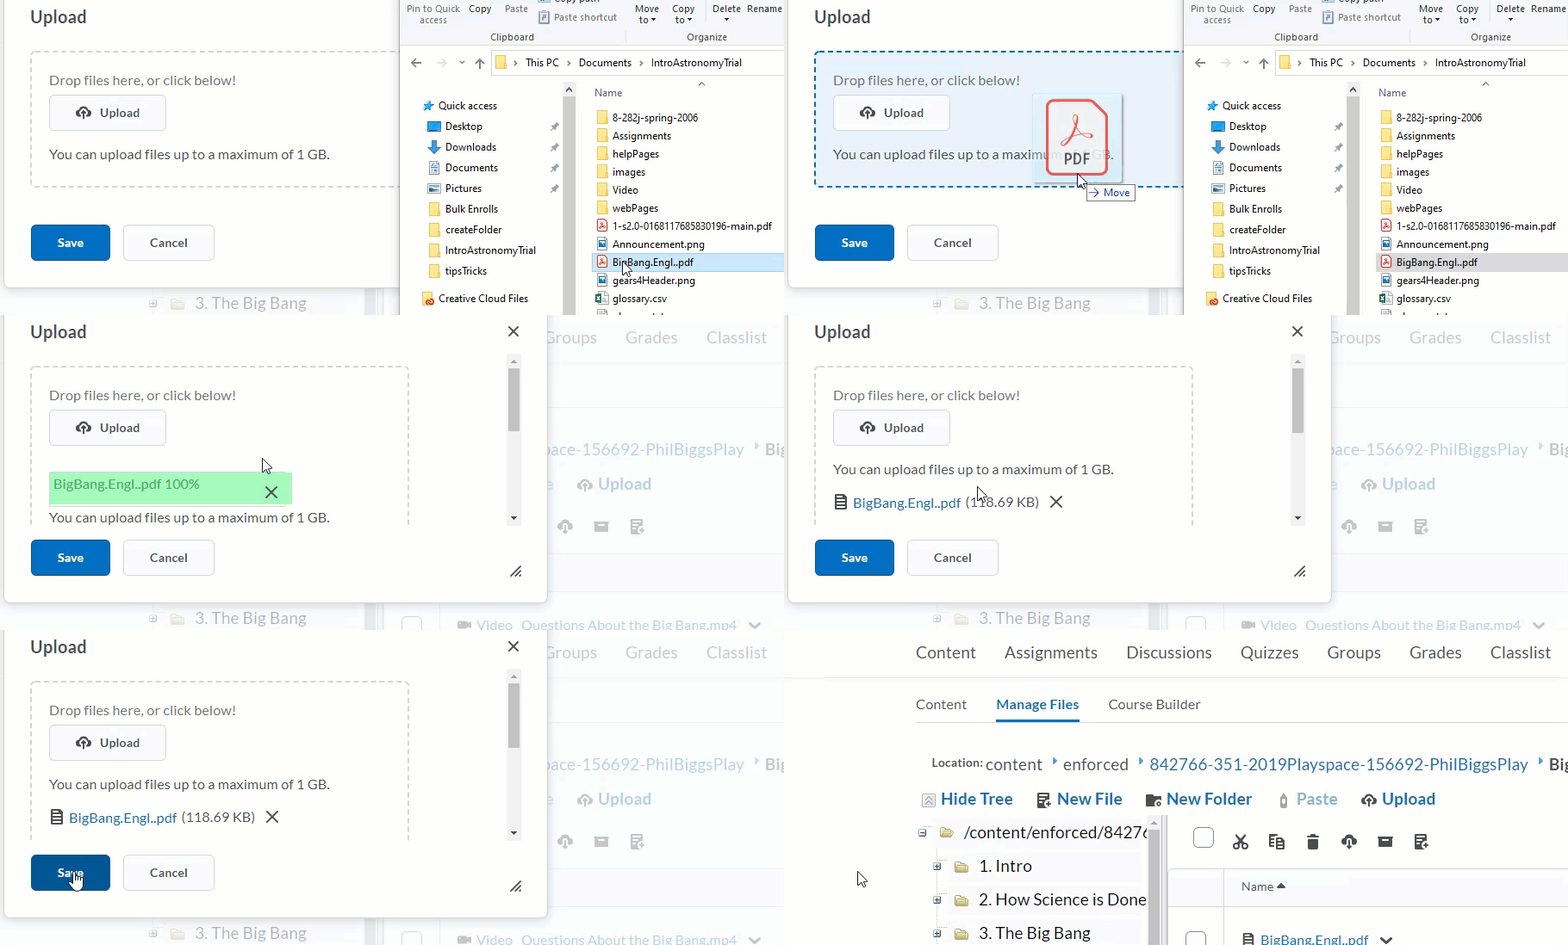
- Look in the Folder contents area to ensure your file was properly uploaded.

6. Create: New HTML File
Create a new HTML file in a folder in the Manage Files tool.
- Open the folder in which the file will be saved.
- Click the Create File link above the folder contents area.

- You'll need to click on the triangle in the lower left corner of the popup window to enlarge it. This will allow you to see all the HTML editor tools and options. Click here to learn more about creating files with the HTML editor.
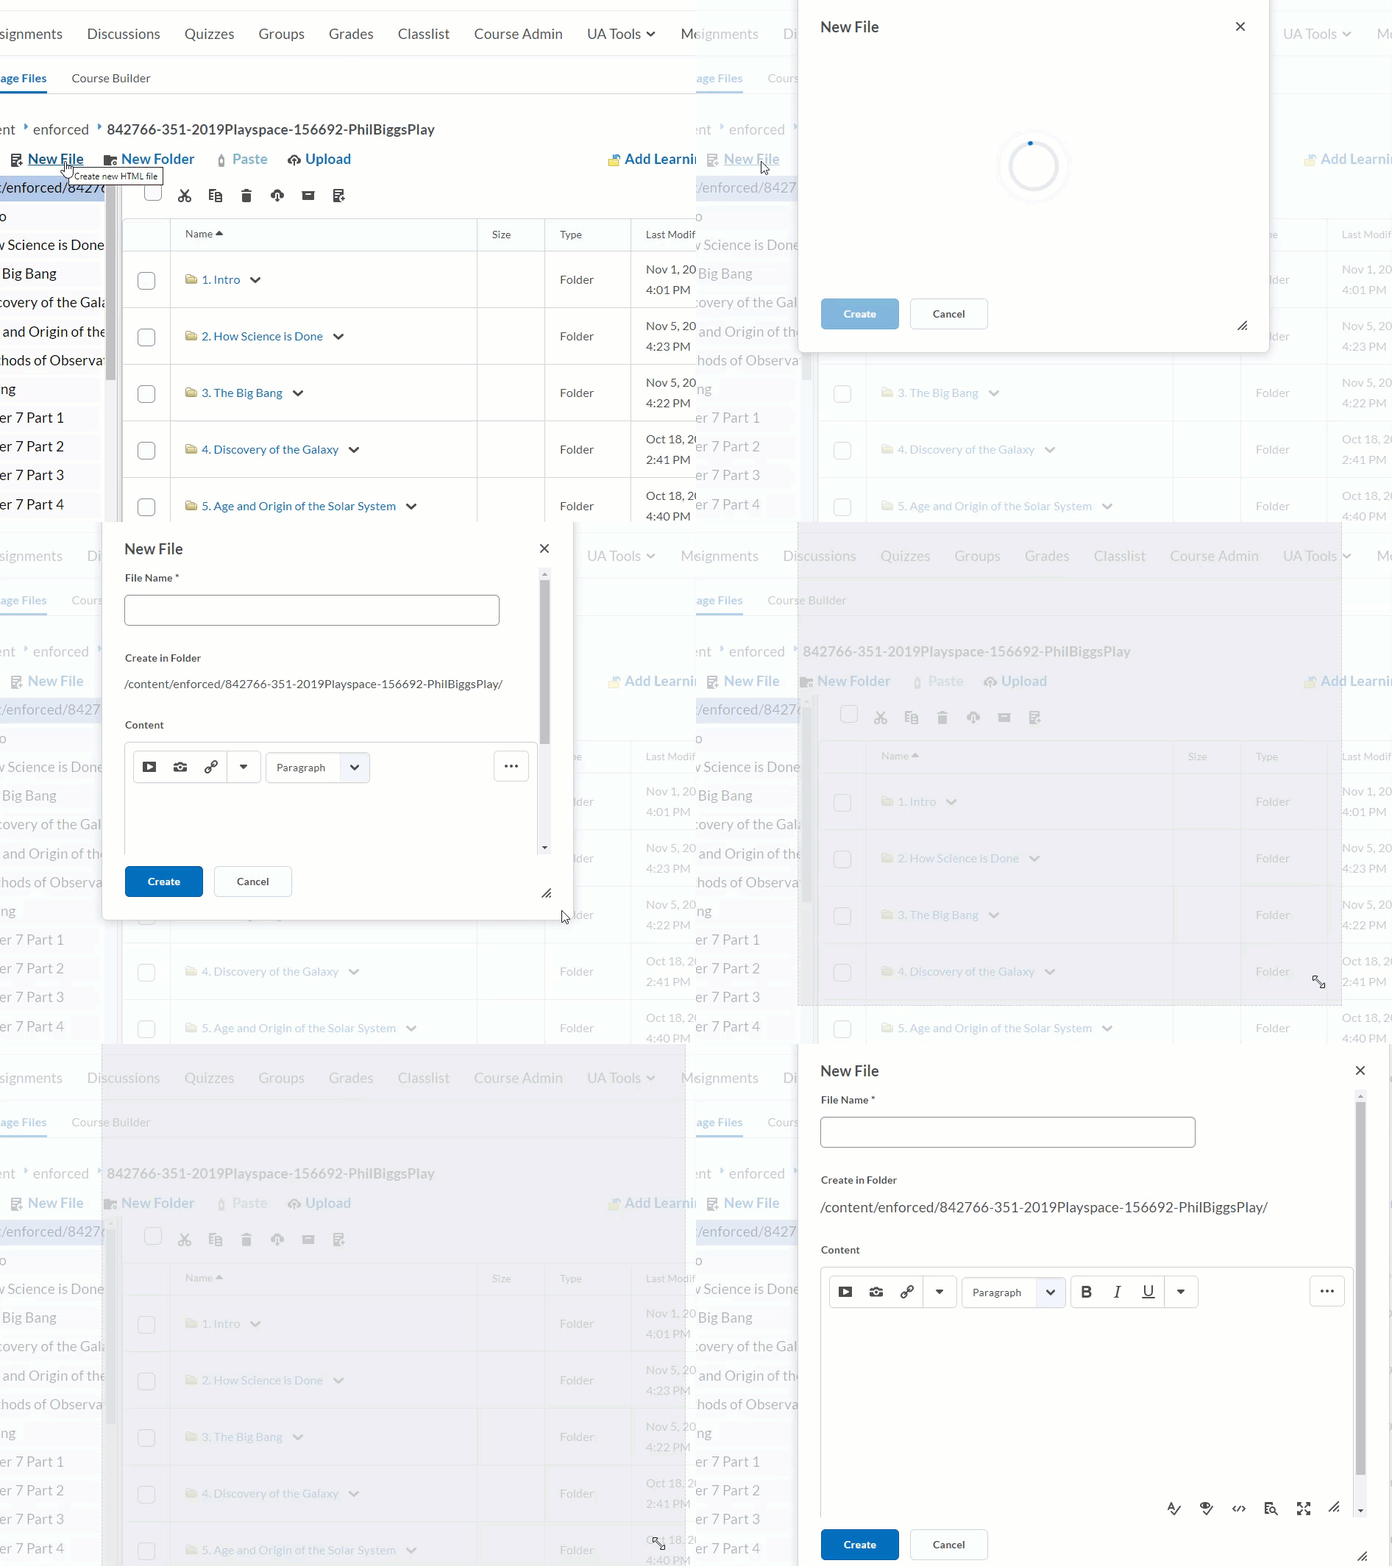
- When you have finished the file, click the Create button.

7. Move: Content to Other Folders
Move files to different folders in the Manage Files tool with cut and paste.
- Locate the file you wish to move.
- Click the down-caret next to the file name to open the actions menu (1) and select Cut.
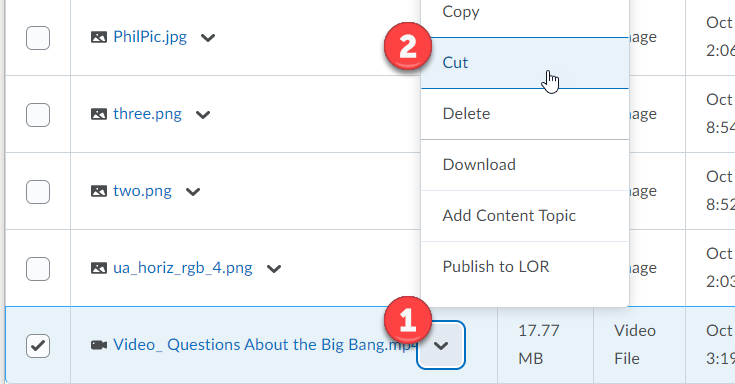
- Now locate the folder to move the file to.
- Click the down-caret next to the folder name to open the actions menu (1) and choose Paste Here.
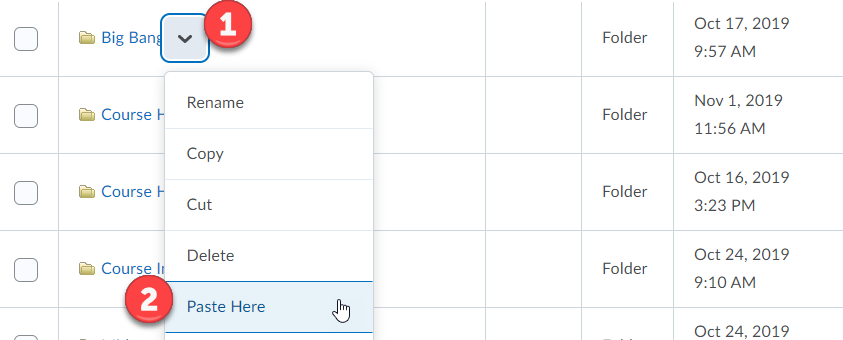
- Open the folder and you'll see that your file has been moved into that folder.

8. Sort: Content Table
Sort the content in Manage Files table view by any column.
- To sort the content by any of the columns in the content listing in the right pane, click the header of that column.

NOTE: Click a second time on the column header to toggle the sort between ascending (![]() ) and descending (
) and descending (![]() ) order. The triangle to the right of the column name will tell you on which column the table is sorted and in what order.
) order. The triangle to the right of the column name will tell you on which column the table is sorted and in what order.
9: Tips and Troubleshooting
Answers to common questions when using the Manage Files tool.
Q: How do I know what files are being used in my coures?
A: Documents, PDFs, and files that are connected to a Content Topic (in other words, that are linked directly to your Content page) have a chain link icon and the notation "This file is used in a Content Topic".

Q: How do I rename a folder:
A: If you change the name of the Content Module, the folder you created for it will not change its name. You will need to
- Locate the folder in the Manage Files tool and change it there.

- Type in the new title (1) and then click the Save button (2)


