The Groups tool allows instructors to create groups of students. Groups can then be attached to specific tasks or activities, such as Discussions or Assignment folders, to restrict access based on Group enrollment.
Access Groups by first clicking on the Course Admin link on the Course Navbar. Select the Groups link.
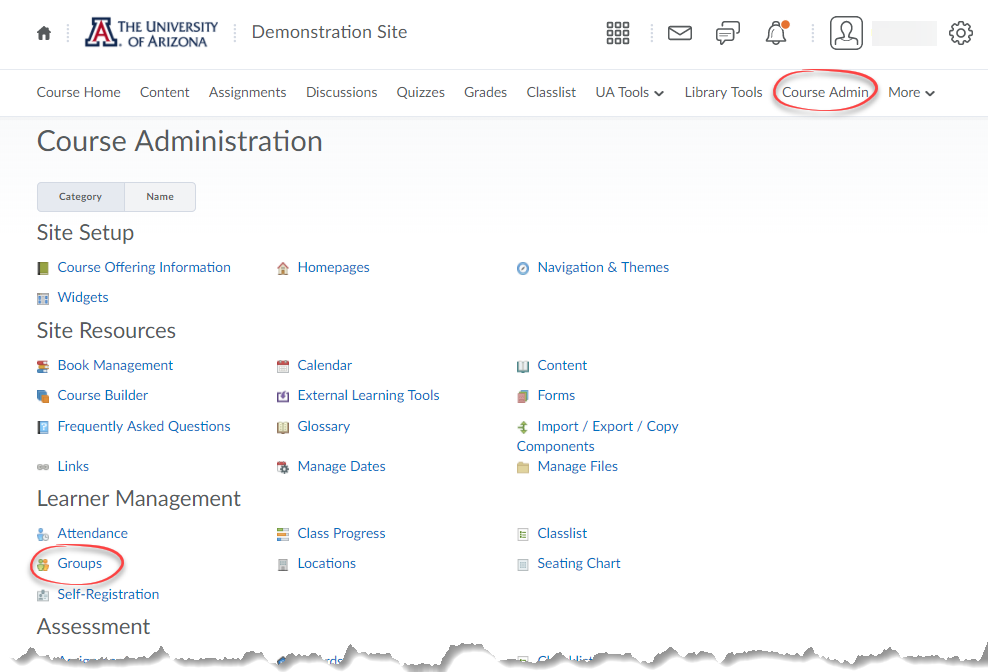
1. Create: Groups of Participants
Create one or more categories of Groups.
Note: As of April 2022, Group creation and enrollment has become a background task, facilitating large bulk enrollments. When an Instructor creates and saves a new group category, a Group creation in progress message will be highlighted at the bottom of the Groups tool. While group creation is in process, it will not be possible to make changes to groups or enrollments. Instructors will receive an alert by the bell icon in their course minibar at the time the groups for their courses are created.
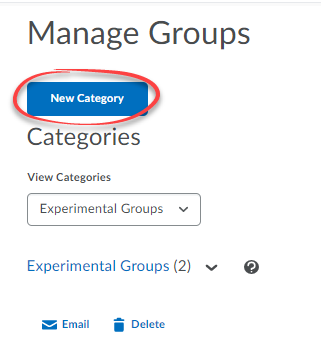
- Click on the New Category button at the top of the Manage Groups page.
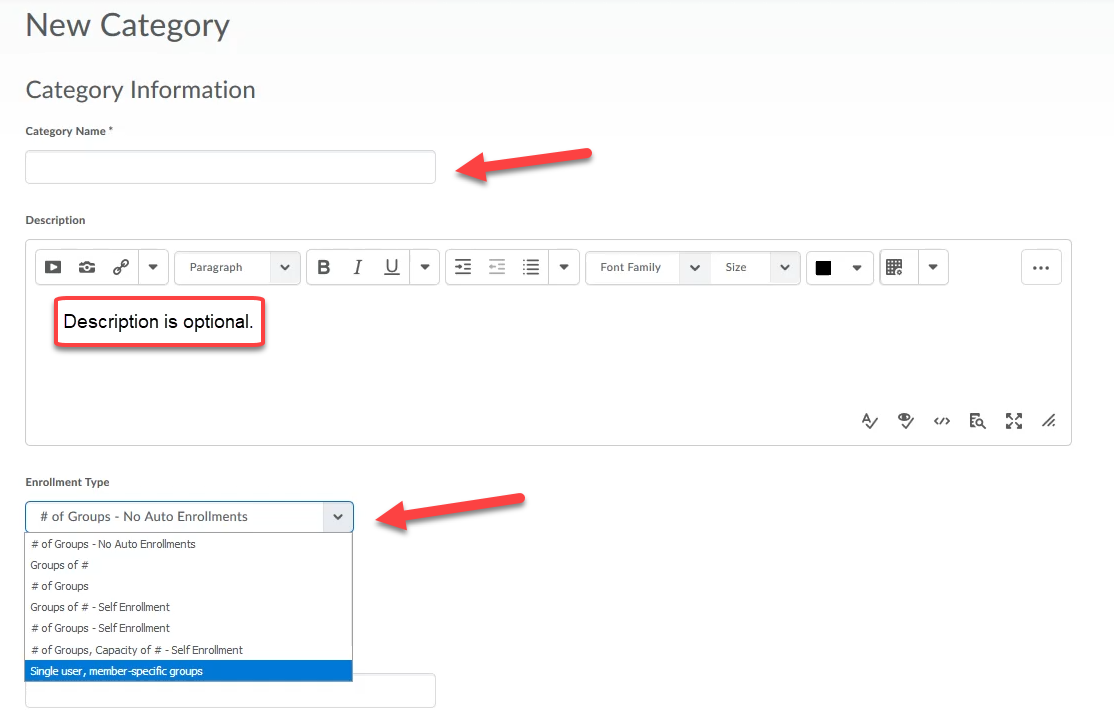
- On the New Category page, enter a Category Name that describes the purpose of these Groups, for example Discussions or Group Project Teams.
- If you write a Description, you have the option to make it visible to group members if you want.
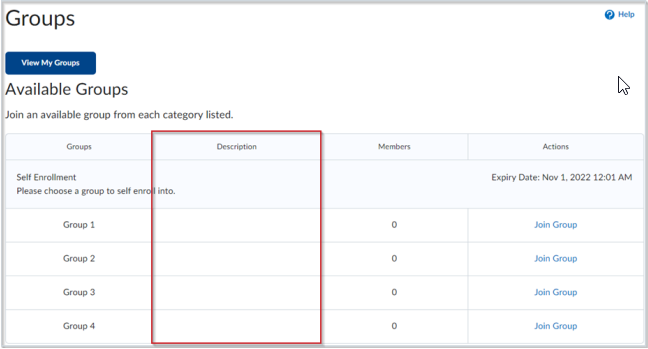
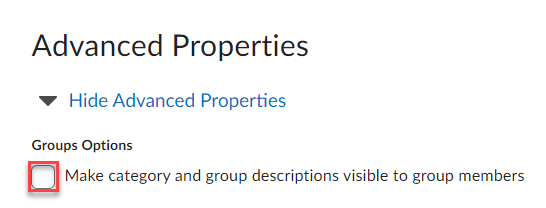 For the Self Enrollment groups (see Step 4), the description will show for the students before they select the group to enroll in.
- Select the down arrow in the Enrollment Type field to choose how you will configure the Groups:
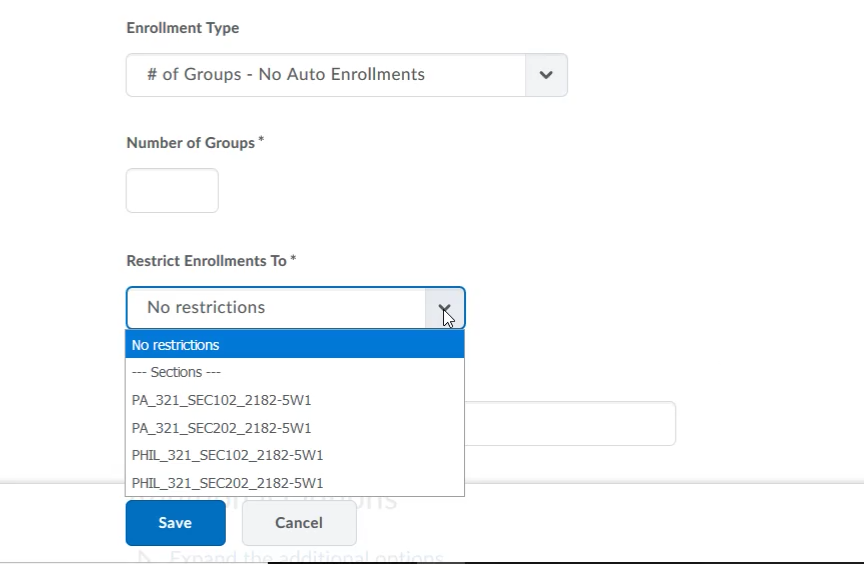
- # of Groups - No Auto Enrollments: You choose how many groups and manually enroll participants.
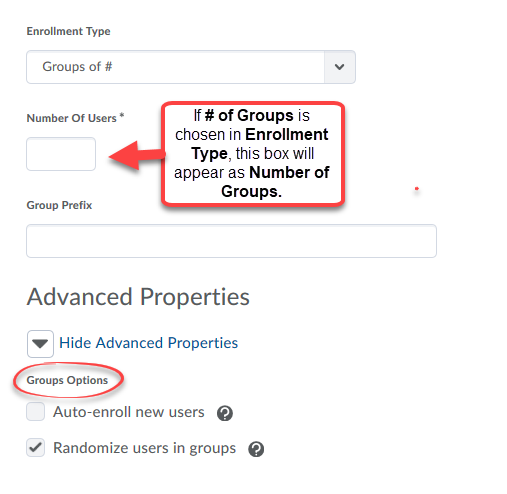
- Groups of #: You choose how many participants you want enrolled in each group. D2L will auto-enroll participants.
- # of Groups: You choose the number of groups you want created. D2L will auto-enroll participants.
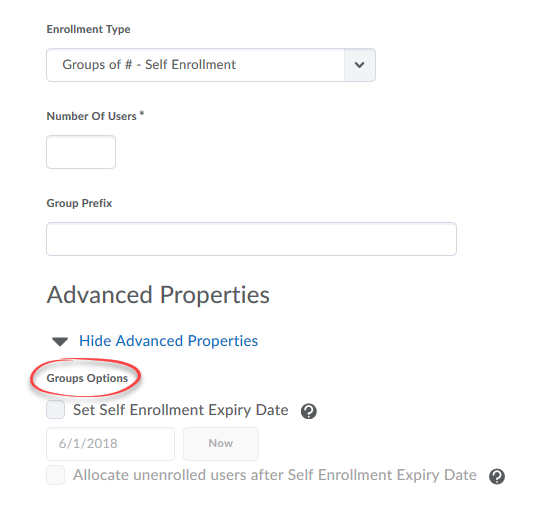
- Groups of # - Self Enrollment: You choose how many participants you want enrolled in each group. D2L will create the appropriate number of groups. Participants select which group to enroll in.
- # of Groups - Self Enrollment: You choose the number of groups you want created. Participants select which group to enroll in. Please note that there is no way to cap enrollments if you choose this option.
- # of Groups, Capacity of # - Self Enrollment: You choose the number of groups you want with a maximum number of students in each group. Participants can enroll in a group until capacity is reached.
-
Single user, member-specific groups: You can create a group for each individual student in the course. This option allows each student to have a private area in the Discussion tool for activities such as one-to-one discussion with the instructor or individual journaling that only the instructor can read and respond to. This choice is also useful for restricting Content to one user via Release Conditions.
- Enter the Number of Groups and/or the Number of Users, depending on the type of enrollment you have chosen.
- Click on the Show Advanced Properties link if needed to see the Groups Options. If you have chosen an auto-enroll option, you may choose to automatically enroll participants who join the class after the Groups have been created and/or to randomly assign users in Groups (default is alphabetical order by last name).
-
If you have chosen one of the Self-Enrollment options, the Groups Options will allow you to set an expiration date for self enrollment and to assign unenrolled students into Groups after the expiration date.
-
Remember to Save at the bottom of the page.
2. Modify: Group Categories
Change the name or make minor edits to Group Categories.
- Click on the name of the Group Category you wish to rename.
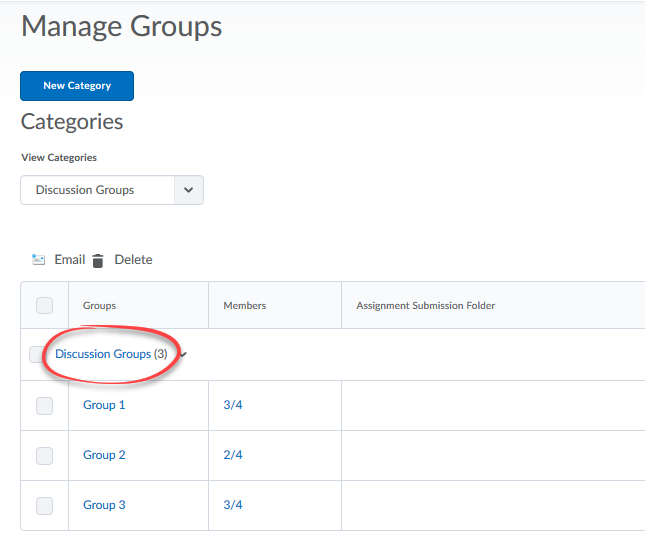
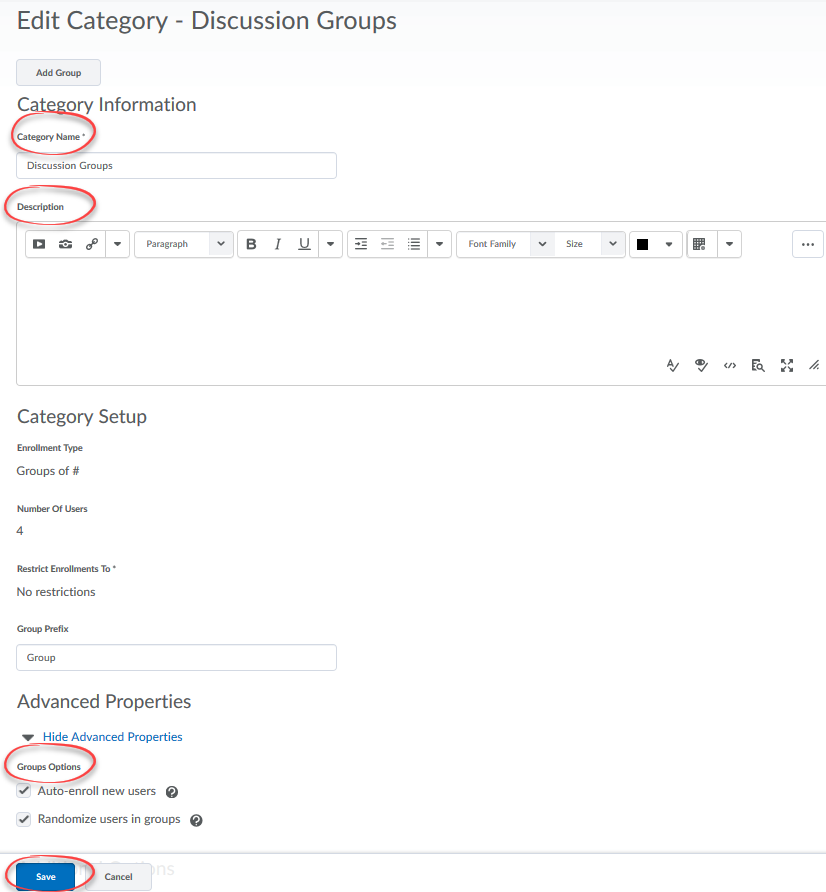
- Type the desired name in the Category Name field.
- You may change or add information in the Description field.
- You may also choose to change the Groups Options in Advanced Properties by checking or unchecking the boxes for Auto-enroll or Randomize users.
- Note that the fields for Enrollment Type or Restrict Enrollments cannot be edited. Once Groups have been created these options cannot be changed.
- Remember to Save.
3. Modify: Groups
Change the name, add, or delete individual Groups.
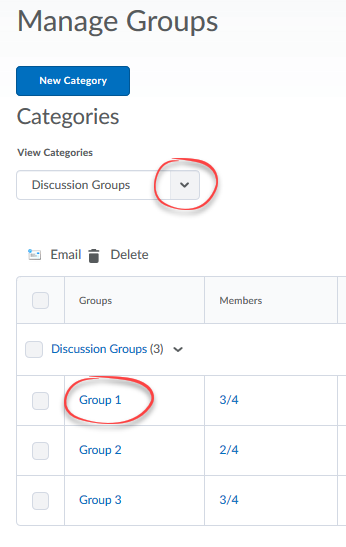
- To change the name of a Group or Groups, first click on the View Categories drop-down menu and select the category of Groups you want to change.
- Click the name of the Group you want to change.
- Enter the new Group Name.
- You can enter or edit text in the Description field. This information appears under the Group Name on the Manage Groups page.
- Click the Save button.
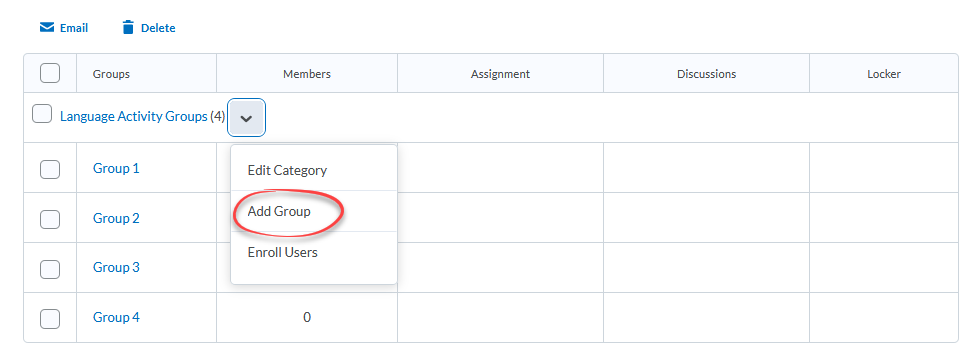
- To add a Group to an existing Category of Groups, click on the down arrow to the right of the Category name and select Add Group.
- When the pop-up window appears, change the Group Name.
- Click the Save button.
- To delete a Group, check the box to the left of one or more individual group names. You will see a dialog box alerting you to how many activities are linked to any group you choose to delete.
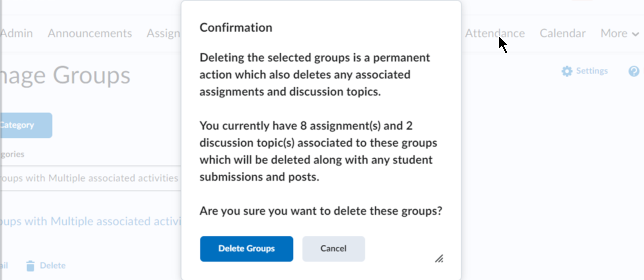
- Click the Delete/Trash Can icon at the top of the list of Groups.
4. View: Enrollments
Quickly view the participants enrolled in a Group.
- Click on the View Categories drop-down menu to select the category of Groups you want to view.
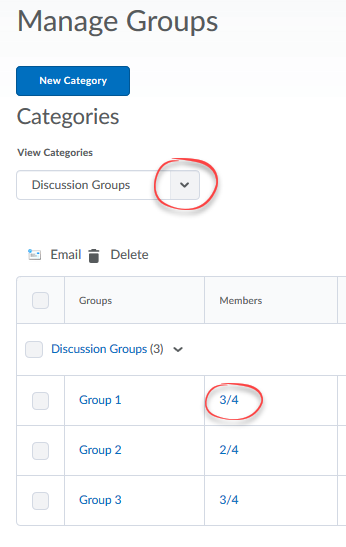
- Click the number in the Members column to the right of the name of the Group.
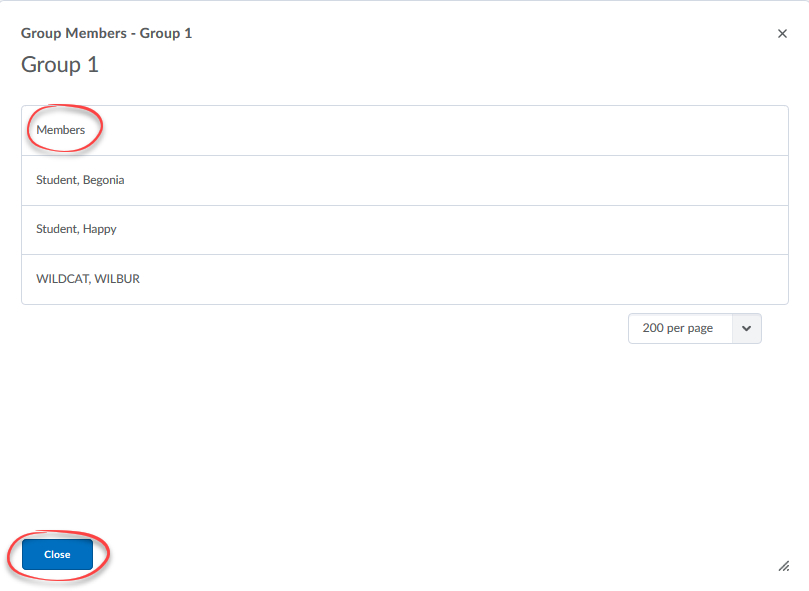
- A new window will open, displaying participants enrolled in that Group. Click the Close button to return to the Manage Groups screen.
5. Modify: Enrollments
Add or remove Group participants.
- Click on the View Categories drop-down menu to select the category of Groups you want to change.
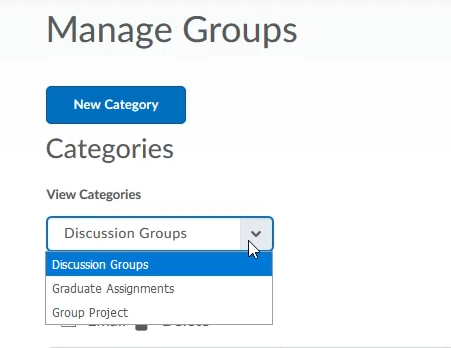
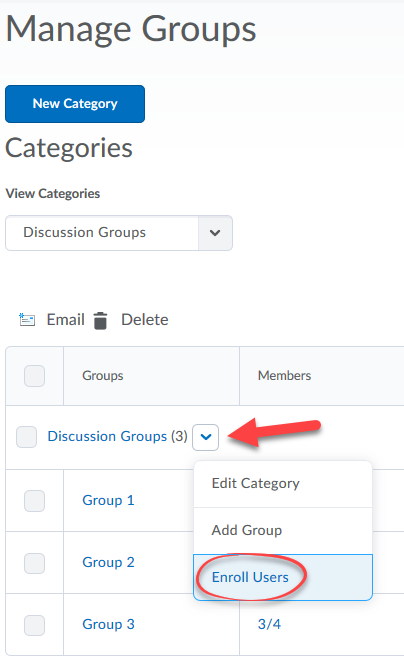
- Click the down arrow to the right of the Category name and select Enroll Users.
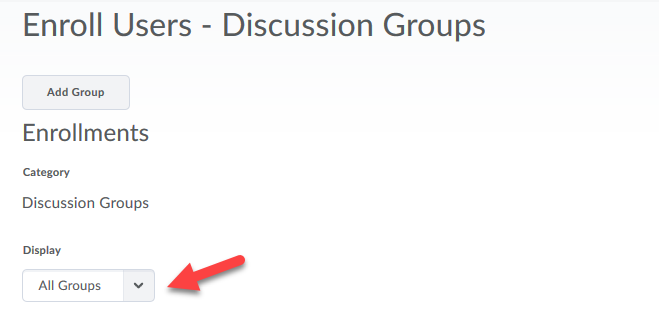
- The Enroll Users page displays all participants and all Groups in this category. If you want to view only one group at a time, use the Display drop-down menu near the top of the screen to select the Group you want to modify.
- To add a participant to a Group, check the box to the right of the participant's name, in the desired Group column.
- To remove a participant from a Group, uncheck the box to the right of the participant's name, in the desired Group column.

- Click the Save button at the bottom of the page when you are finished with all changes.

