1. Locate: Chat Tool
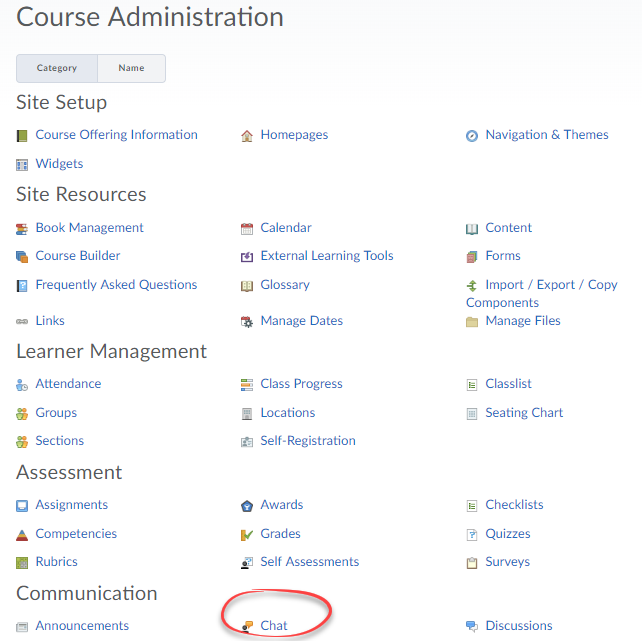
Find the Chat tool within Course Admin.
In order for students to be able to access the Chat tool, you must add the Chat link to your Course Navbar.
- Select Course Admin from your Navbar.
- Select Chat.
2. Create: Chat
Create a chat session for your course.
- Select New Chat.
- Enter a Title for the chat.

- Select what Type of chat you would like to create:
- General Chat: All course participants have access
- Personal Chat: Only participants you choose have access
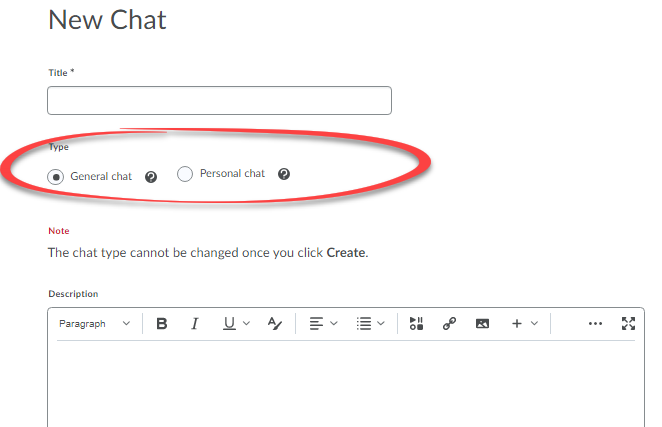
- Enter a Description if you would like to share additional information about the chat.
- Select Create.
3. Edit: Personal Chat
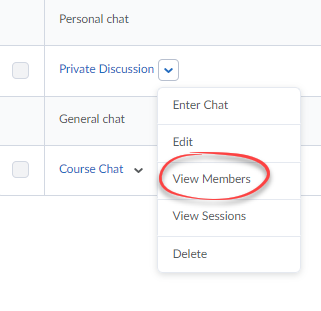
Add participants to a personal chat.
- Select the down arrow to the right of the chat you would like to add participants to and select View Members.
- Select the Add Members button.
- Check the box to the left of each participant's name.
- Select Add.
4. Participate: In a Chat
Participate in a chat with people in your course.
- Select the name of the chat you would like to enter.
- Enter your message text in the box on the bottom of the screen.
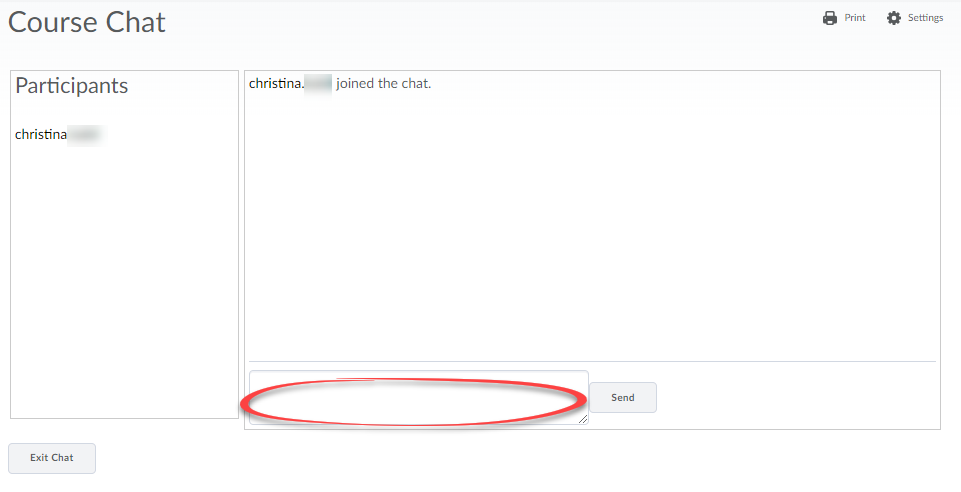
- Use the Send button to send your message.
- You can print chat activity using the Print link on the top right corner.
- Select Exit Chat to leave the chat session.
5. Access: Past Chats
View archived chat messages.
- Select the down arrow to the right of the chat you would like to view archives for and select View Sessions.
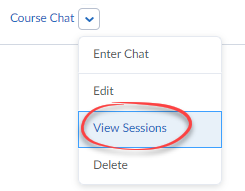
- Select the Start Date of the session you would like to view.

6. Change: Your Chat Alias
Change the name that people see when you post in chat.
- Select the Settings link located in the top right corner of the screen.

- Enter what you would like your new Alias to be. Note that this change only affects what participants see in Chat.
- Select Save to save your changes.

