1. Access: Intelligent Agents
Collect data you can't get elsewhere or send automated emails to students.
Some ideas: send an automated welcome message, congratulate students after they complete the first week's work, or contact individuals who have not accessed your course content in several days, all while having D2L figure out who needs to receive the email.
Note: When you copy your content into a new course page, Intelligent Agents do copy but settings do not. Each semester you'll have to adjust the settings and enable your Agents. This is to prevent Agents from running when they shouldn't.
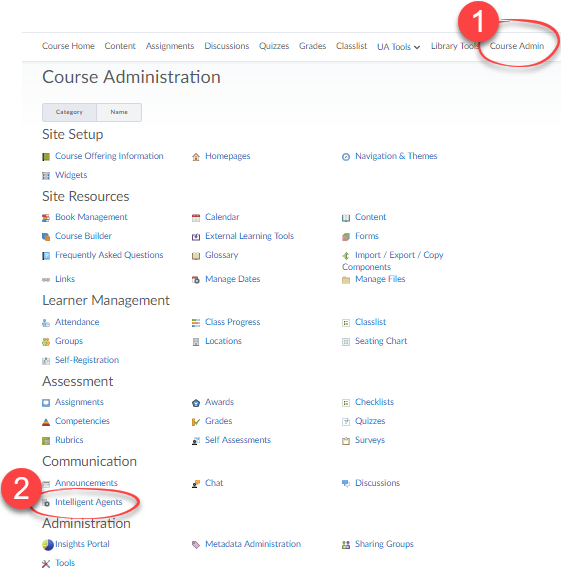
To access the tool, click Course Admin in the course navbar, and select Intelligent Agents from the list of tools.
2. Adjust: Your Settings (Important!)
Create a "reply-to" email address so that students can reply to any email sent by an Intelligent Agent.
Note: Any changes you make to the settings will affect all of your Intelligent Agents.
- Click Course Admin in your course navbar.
- Select Intelligent Agents.
- Click the Settings icon.

- Select Set custom values for this course.

- Enter a name into the Name that emails come from field. We recommend using a proper name and not an email address.

- Enter an email address in the Reply-To address for responses field.

- Click the Save button.

3. Create: A New Agent
There are three parts to creating an Intelligent Agent.
Create the Agent
- Click Course Admin in your course navbar.
- Select Intelligent Agents.
- Click the New button.

- Give your agent a Name.

Note: Only the instructional team will see the name. Use a substantive title that makes it easy to find in a list of agents.
- Optional: Click where it says Edit Description to open the Description field.
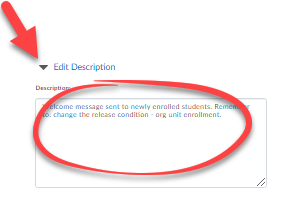
Tip: Use the description field to remind yourself what needs to be changed from term to term, for example settings that need to be changed when copied into a new course site, due dates, office hours, and etc.
- Optional: Select a Category (or click Add Category to create a new category)

- Enable your agent to make it active as soon as you save. It will go "live" once your site is activated, based upon the run schedule you set.

Note: You must enable Intelligent Agents every time you copy them into a new course site. They are disabled by default so they do not start running right away.
Create a Schedule
Note: If you skip this step, you can manually run your agent.
- Select the Frequency.
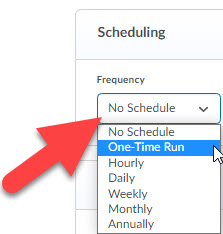
- Depending upon your choice, you will receive further options for scheduling when your Intelligent Agent runs.
Note: Put an end date on your agent to make sure it stops running after your course is closed.
Criteria: Determine Who Should be Contacted
Note: You can mix and match the various criteria to customize the Intelligent Agent to your needs. But, you must select at least one criteria.
- Required: To determine who should be monitored with this Intelligent agent, select one.
-
All users visible in the Classlist: to include everyone.

-
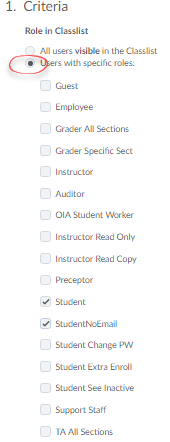
Users with specific roles: to open a list of roles (students, instructors, etc.) from which to choose.
-
-
Optional: To monitor peoples' logins to D2L, select Login Activity. Then select the Login Activity you want to monitor. Enter a number in the "days" field.

Note: Select the Student roles for a welcome message.
-
Optional: To monitor when people access your course, select Course Activity. Then, select the type of access you want to monitor. Finally, enter a number in the "days" field.

-
Optional: Choose Create to create a new release condition, or Browse to use an existing release condition. See the Release Conditions help page for more. Then, click the dropdown arrow to choose one of the following:
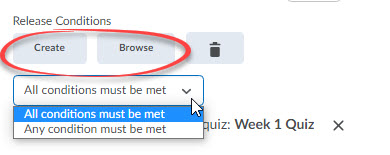
- All of the conditions must be met if all conditions are necessary to trigger the Intelligent Agent.
- Any of the conditions can be met if a single condition is sufficient to trigger the Intelligent Agent.
- (Required) Select an Action Repetition:

- Select Take action only the first time the agent's criteria is satisfied for a user if you would like the agent to identify people only once, and to ignore those people in subsequent runs.
Note: Select Take action only the first time... for a welcome message.
- Select Take action every time the agent is evaluated and the agent's criteria are satisfied for a user if you would like the agent to identify everyone who meets the criteria regardless of whether or not they have been identified by this agent previously.
- Select Take action only the first time the agent's criteria is satisfied for a user if you would like the agent to identify people only once, and to ignore those people in subsequent runs.
Prepare the Email
This is optional. If you do not want an email to go out (you just want to collect data), skip this step.
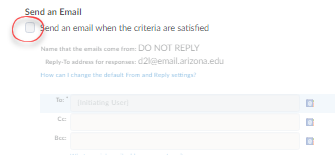
- Select Send an email when the criteria are satisfied.
-
In the To field, enter one of the following:
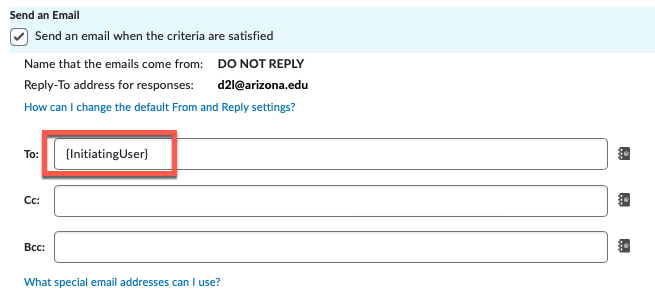
- Your email: if you want the email to come to you (as a way of gathering data).
- {InitiatingUser}: if you want the email to insert the names of participants who meet the intelligent agent criteria.
- Both 1 & 2 above.
Note: If you want students to be able to reply to you, set a custom Reply-To address for responses. For instructions, review section 2 above.
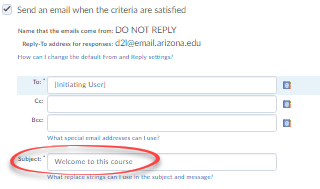
- In the Email Subject field: include a subject line that you want participants to see.
- In the Message field: type or paste the message that you want to send.
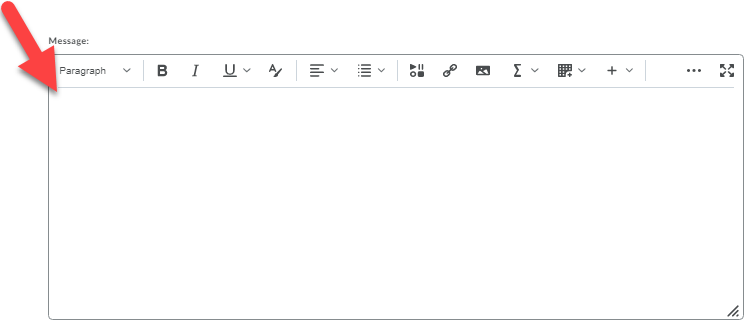
Note: Use Replace Strings to customize the message with the recipient's name, your course's start date (e.g. the OrgUnitStartDate), and etc. D2L will replace the "string" of text with whatever you tell it to. For a list of options, click on "What replacement strings can I use in the subject and message".
- Click Save to save your changes and remain in the agent, or Save and Close to return to the Agent List.

4. Navigate: Your Agent List
Explore some features of your Agent List.
The Agent List is empty until you create an Agent. Once you create your Agent(s), here are some things to note:
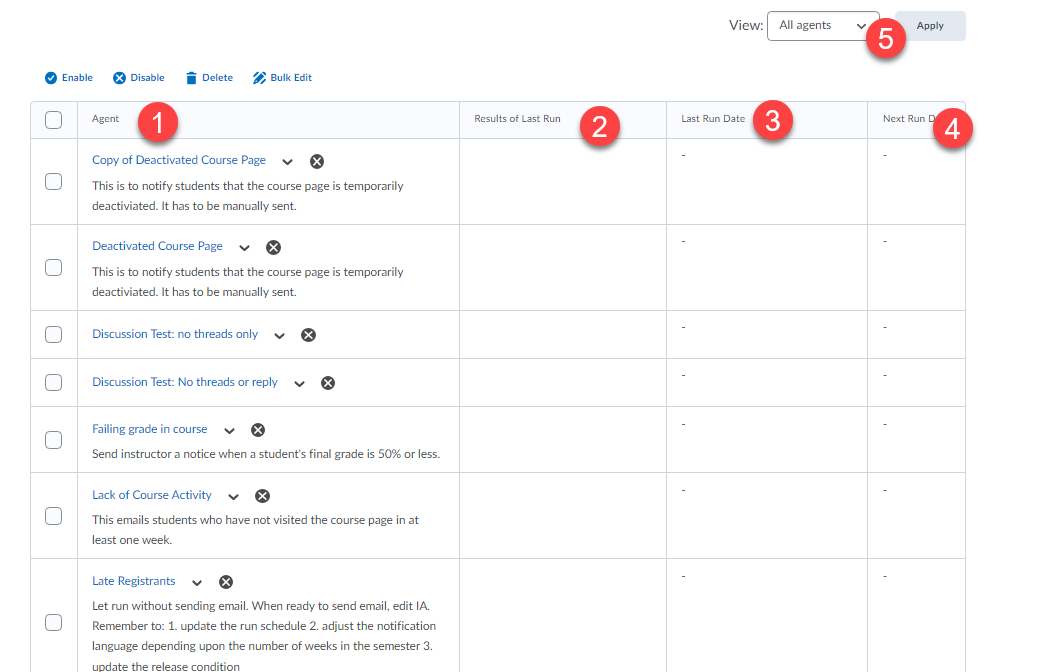
- Agent column: Lists the names and descriptions of your Intelligent Agents. Click on the column header to sort by alphabetical order.
- Results of Last Run column: Indicates how many users met the critera the last time the Agent ran. Click on the # users identified link to open the list of names and the action taken.
- Last Run Date column: Lists the date and time each Agent last ran. Click on the column header to sort by run date.
- Next Run Date column: Lists the day and date the Intelligent Agent is scheduled to run next. Click on the column header to sort by next run date.
- View menu: Click on the view box to filter your agents so you see only those agents that are Enabled or Disabled, then click Apply. This is useful, for example, if you want to mass enable your agents at the start of a new semester.
5. Do: A Practice Run
A Practice Run allows you to test your Intelligent Agent.
For example, if you want a list all of students who have not submitted an assignment, create an Intelligent Agent and do a practice run.
- Click Course Admin in your course navbar.
- Select Intelligent Agents.
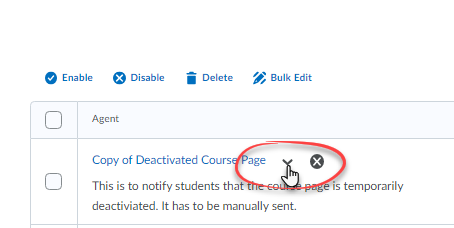
- Open the Actions menu (by clicking the down arrow next to the Agent of interest).
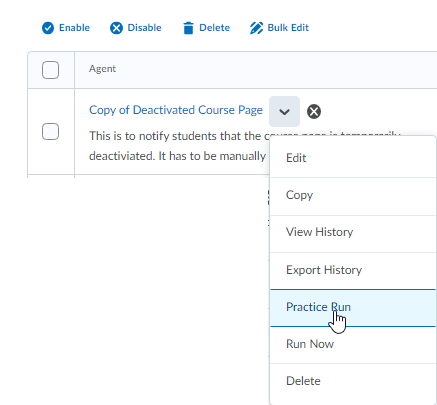
- Select Practice Run.
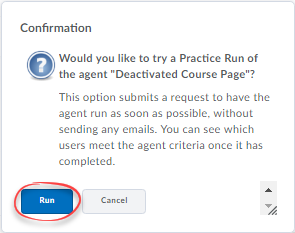
- In the confirmation window, click Run.
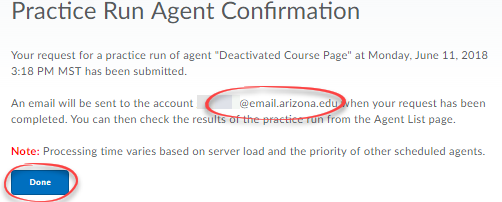
- Note the email account where results will be sent. If you wish to change this account, do so in the Edit Agent field (see section 2 above). If the information is correct, click Done.
- View the results of your practice run through the View History option (see section 10 below).
6: Do: A Manual Run
Send out an email or collect data at any time, with a manual run.
You can do a manual run even when your agent is disabled or your course site is inactive.
- Click Course Admin in your course navbar.
- Select Intelligent Agents.
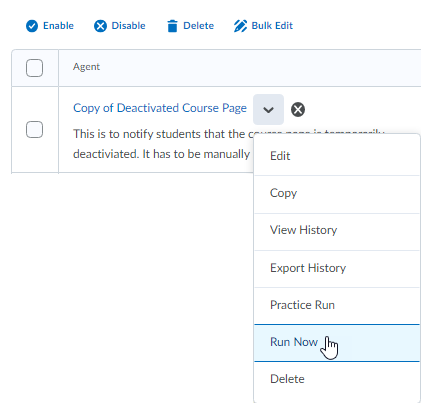
- Open the Actions menu (by clicking the down arrow next to the Agent of interest).

- Select Run Now.
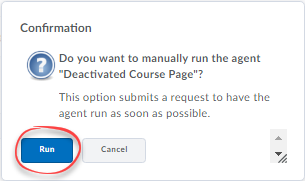
- In the confirmation window, select Run.
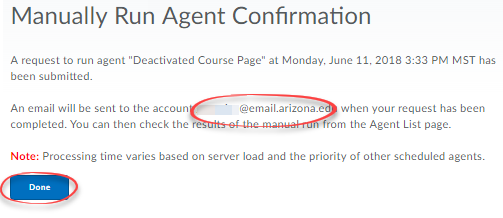
- Note the email account where results will be sent. If you wish to change this account, do so in the Edit Agent field (see section 2 above). If the information is correct, click Done.
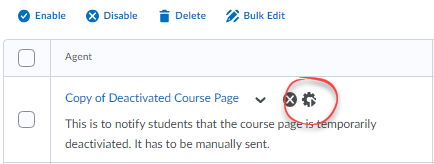
- While your agent is manually running, a "Manually Run" Icon will appear next to your Agent.
- View the results of your practice run through the View History option (see section 10 below).
7. Enable: (or Disable) Your Agents
Agents have to be enabled to run automatically. When agents are disabled, they will be marked with a "deactivated" icon. When agents are enabled, they will have no icon.
- Click Course Admin in your course navbar.
- Select Intelligent Agents.
- Select the Intelligent Agent(s) you wish to enable/disable.

- Select either the Enable or Disable icon.

8. Modify: Your Agent
Access the edit tool to make changes to your Agent.
- Click Course Admin in your course navbar.
- Select Intelligent Agents.
- Open the Actions menu (by clicking the down arrow next to the Agent of interest).

- Select Edit.
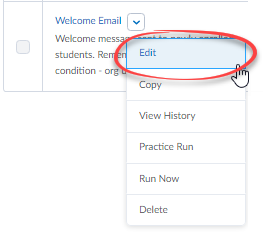
- In the window that pops up, make your desired changes.
- Click Save to save your changes and remain in the agent, or Save and Close to return to the Agent List.

9. Delete: An Agent
Delete one or more Agents at once.
- Click Course Admin in your course navbar.
- Select Intelligent Agents.
- Select the Intelligent Agent(s) you wish to delete.

- Select the Delete icon.

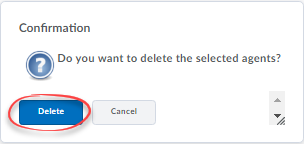
- In the confirmation window, click Delete.
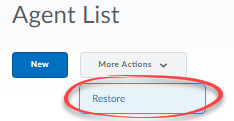
Note: You can restore a deleted Agent by clicking the More Actions button and choosing restore from the menu.
10. View: History
History refers to the the users identified and the action taken (e.g. email sent) during a given run of an Intelligent Agent.
- Click Course Admin in your course navbar.
- Select Intelligent Agents.
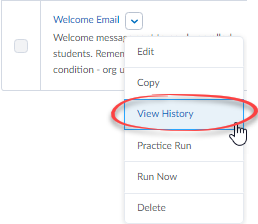
- Open the Actions menu (by clicking the down arrow next to the Agent of interest).

- Select View History.
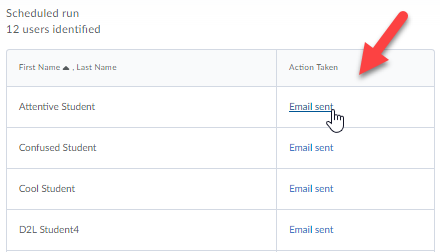
- To see who met the criteria for an Intelligent Agent run, click on the # users identified link.

- In the window that appears, you can click on any link in the "Action Taken" column for more details.
11. Export: History to a Spreadsheet
Export data to a CSV file, which you can open in Excel or other spreadsheet software.
- Click Course Admin in your course navbar.
- Select Intelligent Agents.
- Click the down arrow next to the Intelligent Agent of interest.
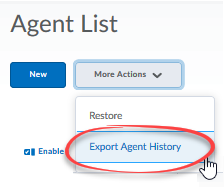
- Click More Actions.
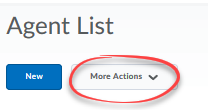
- Choose Export Agent History.
- Select the Agent, or leave it on All to export the results of all of your Intelligent Agent runs.
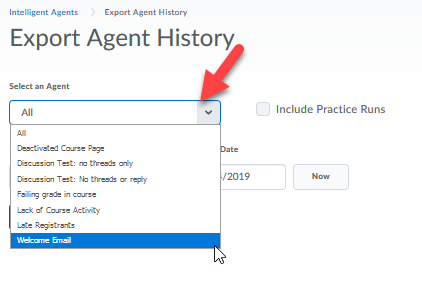
- Enter a date range. The spreadsheet will show the results of all runs between the "from" and "to" dates.

- Click the Export button.

12. Accessibility Tips
Help blind and low vision students easily navigate your Intelligent Agent email.
Sighted learners can scan email to quickly find what they need. Students who use text-to-speech software must listen to an entire email from start to finish. And, they must go through every email, one at a time.
You can help.
Solution
- Keep your emails as simple as possible
- Use content-specific subject lines
- Use the HTML editor to create headers and link out to additional content
For more tips on creating accessible emails, visit the DRC's IT accessibility webpages.

