The Surveys tool allows you to solicit feedback from users regarding any aspect of your course. For example, surveys can be used as a method of collecting course evaluations, mid-year reviews, or researching participants' learning styles and content delivery preferences.
Setting up surveys is similar to setting up Quizzes in D2L, but surveys cannot be scored or connected to the D2L grade book.
1. Create: Surveys
Create surveys for your students.
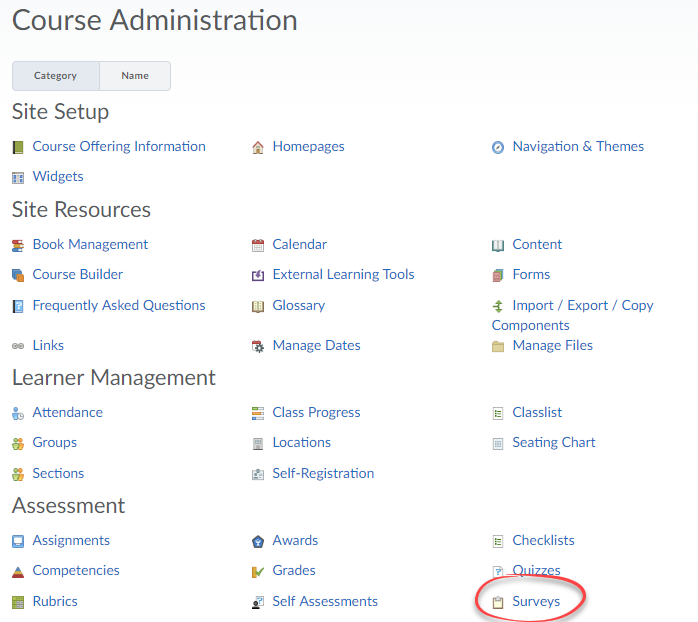
- Select the Surveys link in Course Admin.
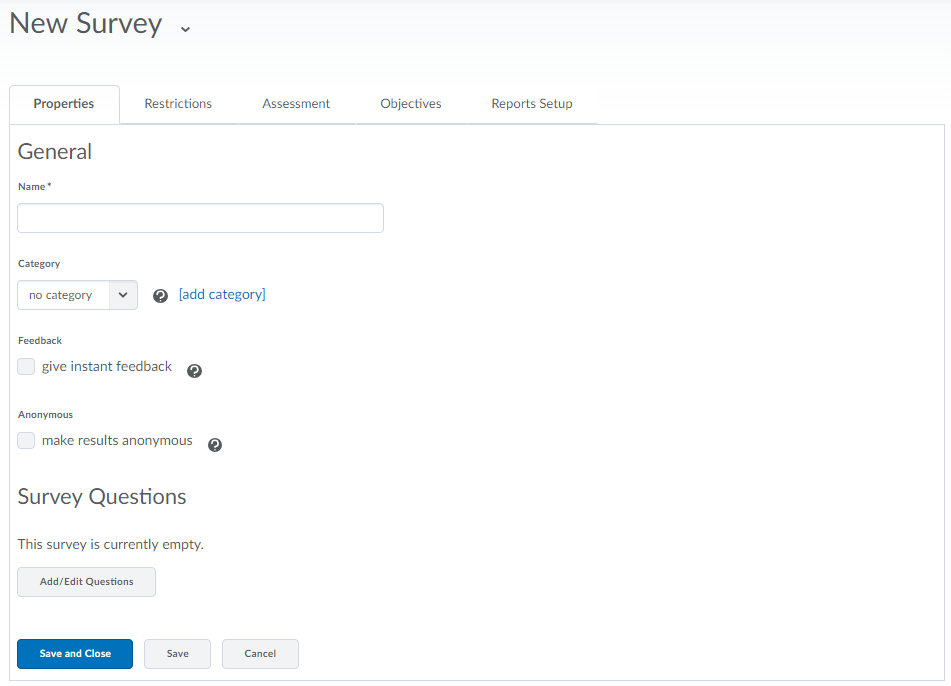
- Select the New Survey button.

- Enter the Name of the survey.
- Select Add/Edit Questions if you want to add questions to the survey. See instructions below for more detail.
- Select one of the Save options at the bottom of the screen to save your changes. Moving to a different tab of the survey will also save.
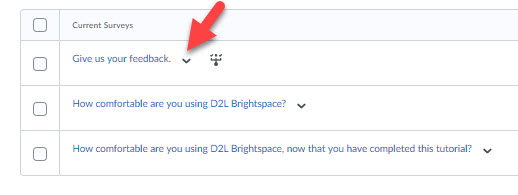
- To preview your survey, click the caret to open the Actions Menu.
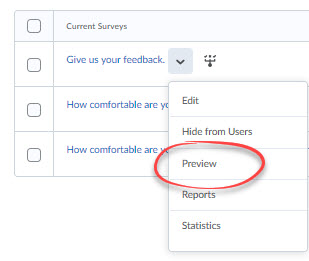
- Select Preview.
- You will need to make the survey available to students, either by adding the Surveys link to the course navbar or by adding the survey to Content through the Existing Activities button.
2. Edit: Survey questions and pages
Add, edit, and format the questions for your survey.
Note: Editing survey questions after participants have already begun taking the survey will result in submitted attempts that are not accurate. If you need to edit a survey question, it is best to make a copy of the entire survey, edit the question in the new survey, and have remaining participants complete their attempts on the new version.
- Click on the survey to open it.
- Select the Add/Edit Questions button.
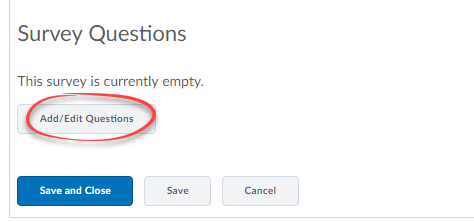
- Select the New button to begin building questions for your survey, or the Import button if you've already created the questions in your Question Library.
- Once you've added questions to your survey, you will have additional options for layout. To break the survey into several pages, type a number into Questions per page and select Apply.
- If you do not want participants to be able to move backwards through the pages of the survey, check the box to the right of Paging.

- Select Save.
3. Edit: Restrictions
Set restrictions on the survey for availability and how many times participants can take the survey.
- Click on the survey to open it.
- Select the Restrictions.

- Uncheck Hide from Users to make your quiz visible to students.

- Click the check boxes next to Has Due Date, Has Start Date, and/or Has End Date in order to add dates.
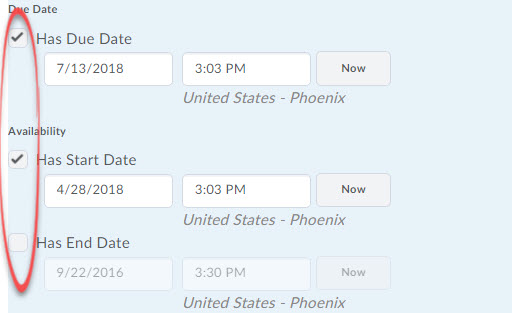
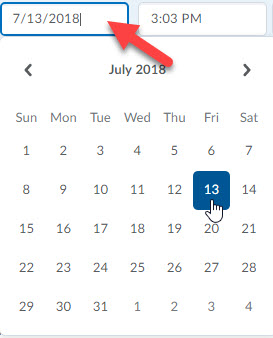
- Click on the date field to open a calendar and select a date.
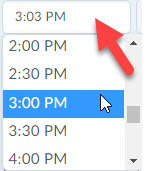
- Click on the time field to open a menu from which to select a time.
- Check the box to the left of Display in Calendar if you would like the survey dates added to your course calendar.
- Use the Attempts Allowed drop down menu to select how many times participants can take the survey: Unlimited, Single attempt that is editable, or Limited (set a specific number of attempts).
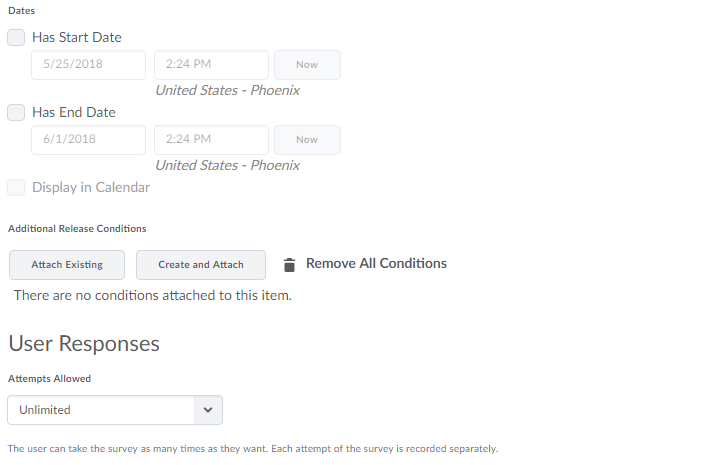
- Select one of the Save options at the bottom of the screen to save your changes.
4. Allow: Special access
Assign different availability dates and times for specified participants.
You can assign special access while building the survey, or while editing an existing survey.
- Click on the survey to open it.
- Select the Restrictions.

- Select Allow selected users special access to this survey.
- Select Add Users to Special Access.

- In the date and time fields, either manually enter the desired special access date(s) and time(s) or click your cursor in those fields to activate the calendar and time drop down menus.
- Select the participant(s) you want the special access to apply to by checking the box to the left of their name(s).
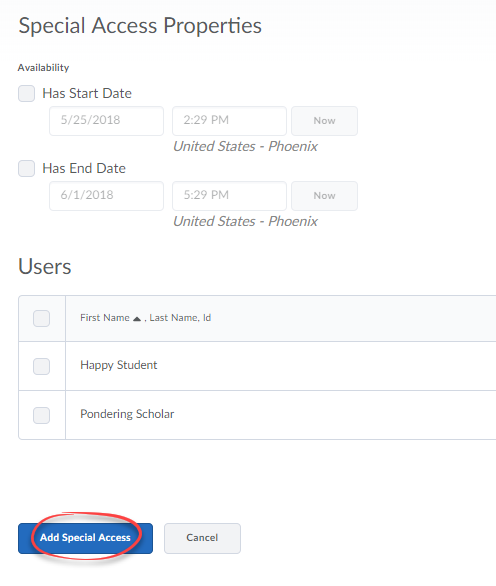
- Select Add Special Access to save your changes.
5. Create: Survey reports
Create and run reports that will provide you statistics for completed survey attempts.
- While editing your survey, select the Reports Setup tab.

- Select Add Report.
- Enter a Report Name.
- Select the Report Type:
- Summary Report: Shows summary data of all responses
- Individual Attempts: Data is broken down by attempts
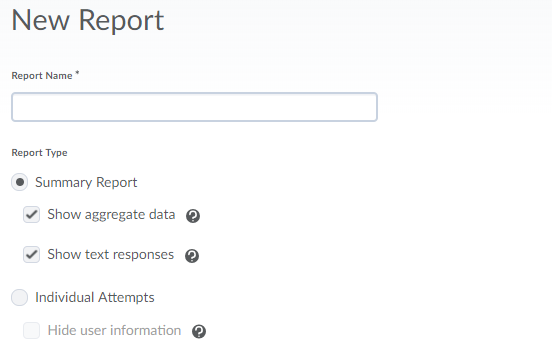
- Select when to Release the report.
- Select which roles in the course you'd like to Release Report To. If you do not select any roles, then the report will not be available to ANYONE in the course, including instructors.
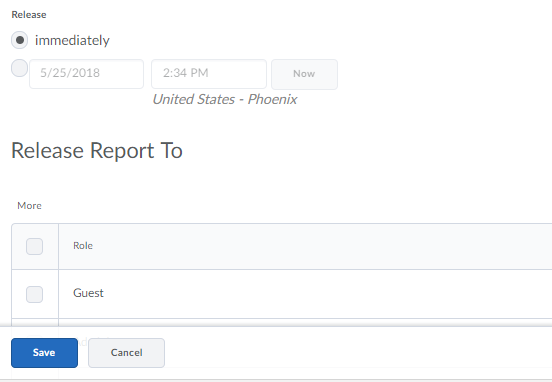
- Select the Save button to save the report.
- To run a report, click the caret next to your survey and select Reports.
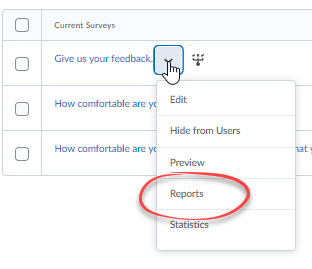
- Select the name of the report you'd like to run.
- If you would like to generate a report that can be opened in a spreadsheet program like Microsoft Excel, click Generate CSV Report. If you would rather view the report in the browser, click Generate HTML Report. Once run, the HTML Report will give you the option to print the report or export it to a CSV file.
6. Manage: Existing surveys
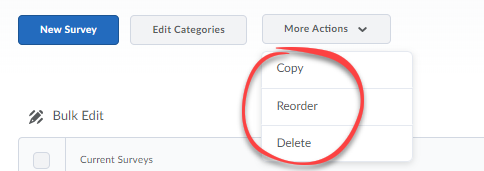
Reorder, copy or delete your surveys.
- Navigate to Surveys from Course Admin.
- Select More Actions.
- Choose the appropriate option, and make your changes.
- Select Save or Yes to complete.

