1. About: Fonts
The HTML Editor works similarly to a word processing program, with similar built in tools for formatting your text, creating headers, and adding bullets, numbered lists, horizontal lines, subscripts, superscripts, and more. This page describes the font tools.
Note: If you paste text into the HTML Editor, choose the option to remove formatting. Then, use the built-in tools to format your content. This will prevent formatting problems and facilitate screen readers.
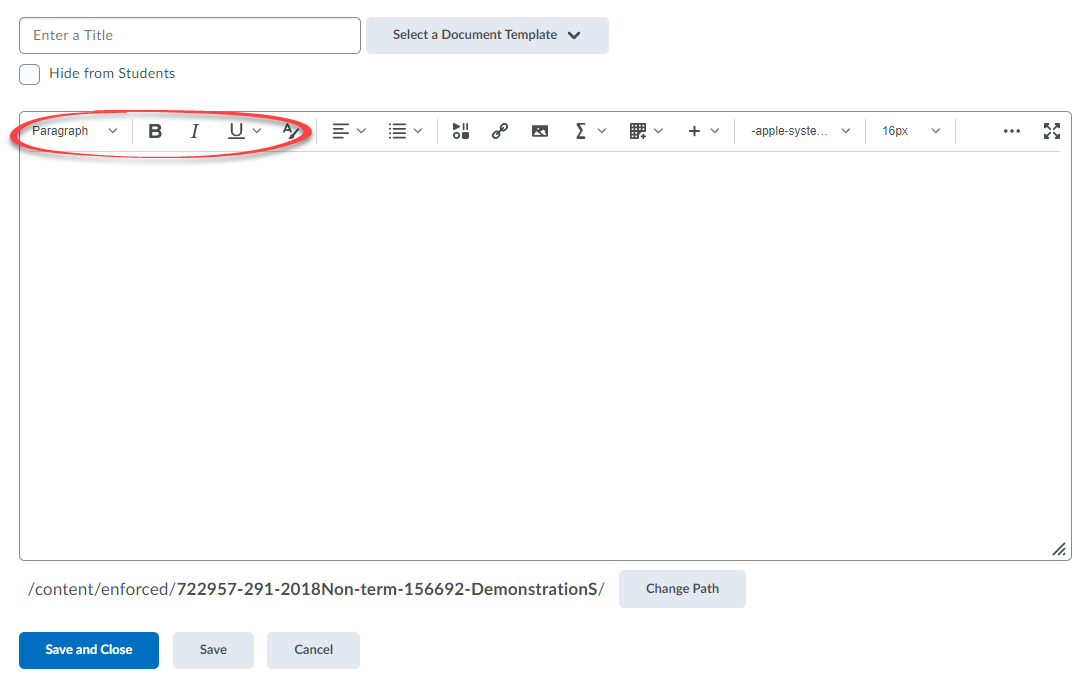
Note: We recommend using the default font style and size. This ensures that users with visual impairments can customize their fonts, including using OpenDyslexic and Huge font types. For instructions on customizing fonts, visit our Account Settings help page.
2. Add: Headers
Headers do double-duty. They add formatting and they provide an index for screen-readers. With headers, visually-impaired people do not have to start at the top and read through all of the text every time they want to access something on a page.
Note: Headers hierarchically organize content. Think about the organization of a book: a Header 1 would be the book title; a header 2 would be a chapter title; a header 3 would be a section; a header 4 would be a sub-section, and so forth.
- Click anywhere on the line of text you wish to format.
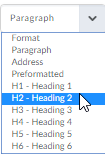
- Click on the format dropdown-menu to open it.

- Select the appropriate level of heading.
- When you are finished, use the Publish (or Update) button to save your work.

Note: To remove a heading, follow the same steps but select the "paragraph" option from the menu.
3. Add: Bold Type, Italics, or Underlines
When it comes to adding bold, italics and underlines, the HTML editor works similarly to a word processing program.
- Highlight the text you wish to format.
- Click the button(s) to bold, italicize, and/or underline your text.

- When you are finished, use the Publish (or Update) button to save your work.

Note: If you prefer, in lieu of step 2, you can use shortcut keys (e.g. Ctrl+B, Ctrl+I, Ctrl+U)
4. Add: Strikethrough, Subscript, or Superscript
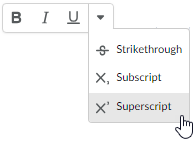
You can add strikethrough text and sub- or super-script.
- Highlight the text you wish to format.
- Click the text formatting down-arrow (right of the underline button).

- Select the option you want from the menu.
- When you are finished, use the Publish (or Update) button to save your work.

5. Add: A Symbol
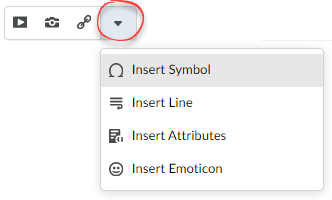
The Quicklink dropdown menu allows you to embed special characters and symbols into your text.
Note: Mathematical equations and characters are inserted using a different HTML Editor tool. Learn more by visiting our Math and Scientific Expressions help page.
- Place your cursor where you want to insert the symbol.
- Click on the Insert Quicklink dropdown menu and select Insert Symbol.
- In the "Select Symbol" box, click on the symbol you want to insert.
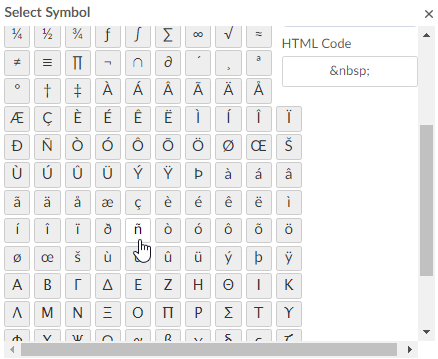
- Click the Create button.

- When you are finished, use the Publish (or Update) button to save your work.

6. Change: Font Color
Use the toolbar to change the color of your font.
- Highlight the text you wish to change.
- Click on the Font color tool to open the menu of options.

- Click on the color you wish to use.
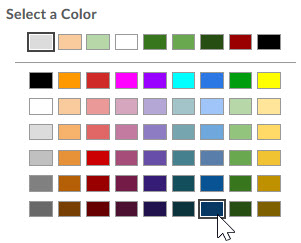
- Use the slider to change the contrast.

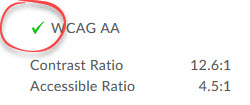
- Make sure you see a checkmark next to the text "WCAG AA". If you see a "cross" icon, your text might be illegible or invisible to some users.
- Click the Save button.

- When you are finished, use the Publish (or Update) button to save your work.

7. Add: Accessible Tables
Building a table requires multiple steps.
Note: When it comes to tables, simpler is better.
To ensure that your table is accessible to as many students as possible, proceed in this order:
Step 1: Create the Table
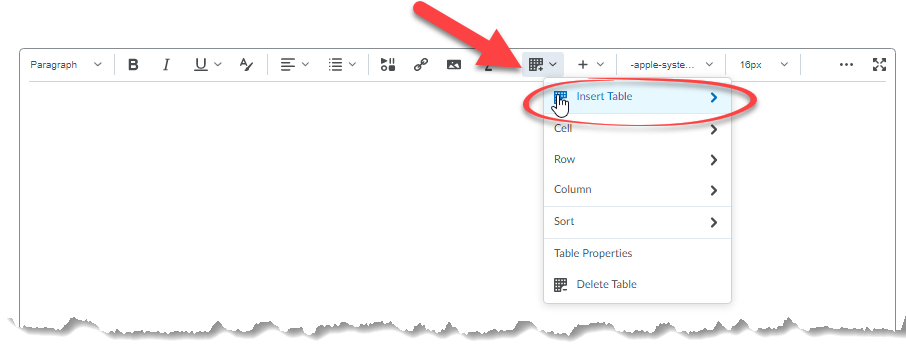
- Click the Table Button and select Insert Table.

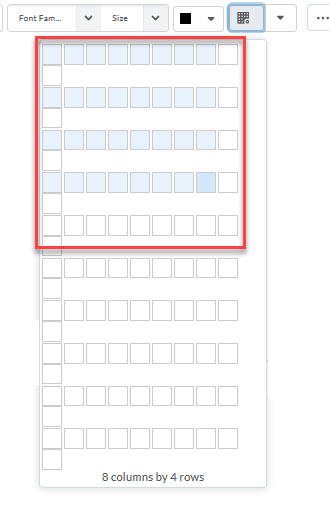
- Highlight the number of cells you would like in your table.
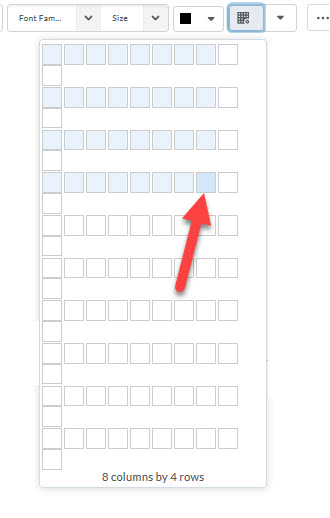
- Click on the last cell to insert your table.
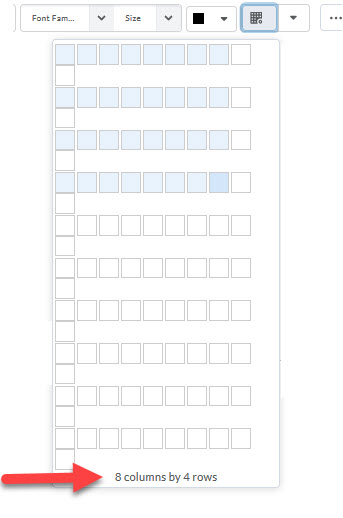
Note: You can track the number of columns by rows you have selected.
Step 2: Add Your Content
Note: Because the cells are collapsed, it can be difficult to navigate an empty table. The easiest way to move around your table is to use your keyboard. The Tab key will move you to the next cell. Arrow keys will move you in any direction.
- Navigate to an empty cell.
- Add your content.
Note: The table will resize to fit your content.
Step 3: Format the Headers
Note: Important! This step is critical. Do not skip it!
- Click the cell you wish to format.
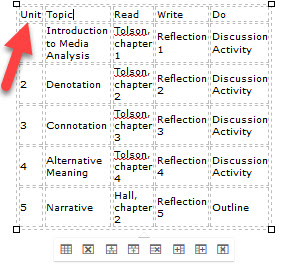
- Click the Table Icon.


- Select Cell
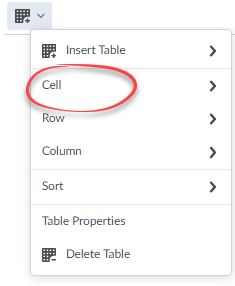

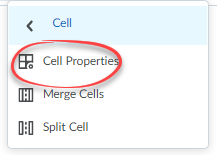
- Select Cell Properties from the list.

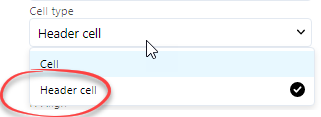
- For "Cell Type", select Header cell.

- For "Scope", select: (if you have column headers nested under this header).
- Row (if you have one header per row).
- Column (if you have one header per column).
- Row Group (if you have row headers nested under this header).
- Column Group (if you have column headers nested under this header).
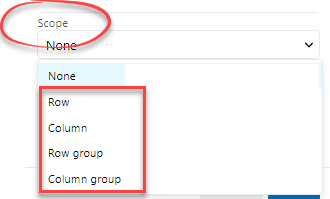

- Repeat this process for every column and row header in your table.
Note: The cell will be formatted for you. Do not add bolding, underlines, or other aesthetic elements to make your headers stand out, unless there is a compelling reason to do so.
