1. About: Multimedia Tools
If you embed media, it will appear/play within D2L, rather than link students out to Panopto, YouTube or any other such website.
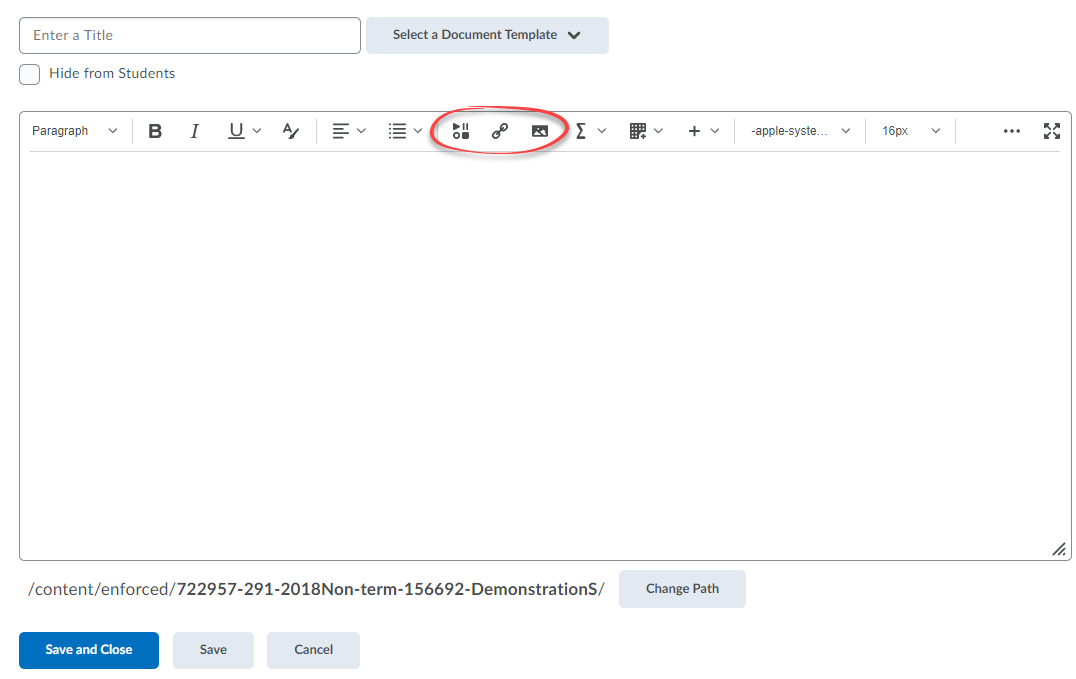
2. Add: General Media
The Insert Stuff button allows you to embed multi-media, from Panopto lectures to YouTube videos, Flickr images, or recordings you do right from your computer. Here's what a video would look like in D2L:
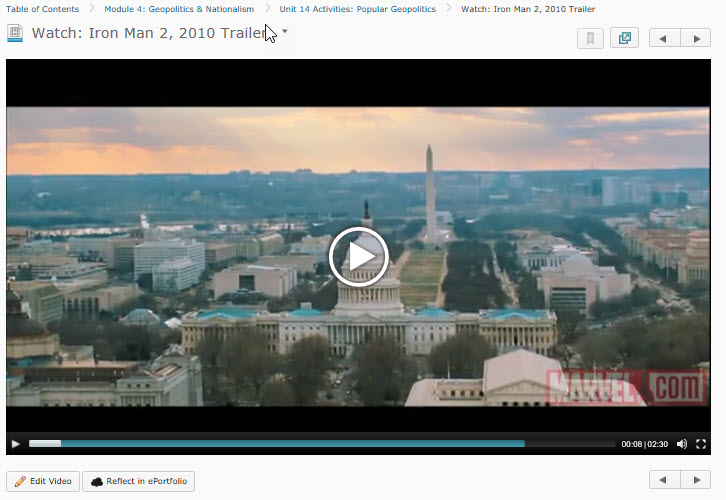
Note: To use the new D2L Audio-Video Player and Editor to upload video and for more information about the advanced editing capabilities, including auto-generated captions, see Sections 2 and 3 on the Add Multimedia Help Page.
- Click the Insert Stuff button.

- Tell D2L where the media is located, by clicking on an item in the menu.
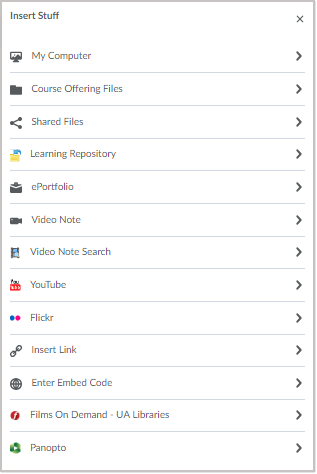
- Depending upon your selection in step 2, you will be instructed what to do next.
Note: If you would like specific help on embedding Panopto videos, visit our Panopto help page.
- When you have located the content you wish to embed, click the Insert button.

Note: Due to security measures, D2L will only allow you to embed from a secure source. For example, D2L accepts URLs starting with HTTPS (which signals to your browser to use special encryption), but may not allow you to embed a URL starting with HTTP.
- Click Publish (or Save) to make the content available to learners, or Save as Draft to save your unpublished work. (Note: the buttons change depending upon the tool you are using.)

3. Add: Video Note
Use the Insert Stuff button to insert video notes into your course.
- In the html editor, click on the Insert Stuff icon.

- Click on the Video Note option.
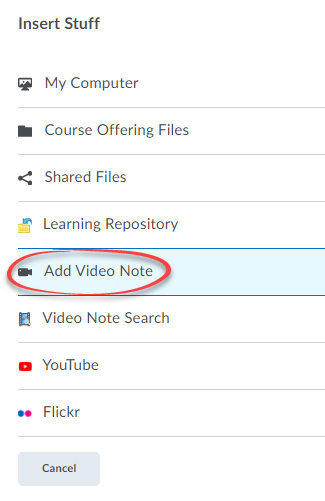
- Allow your browser to access your webcam and microphone
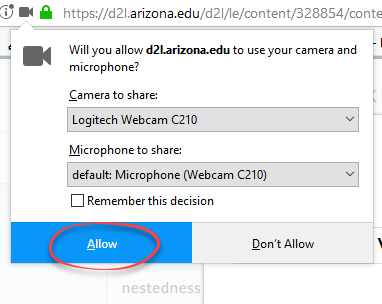
- Click on the New Recording button to start recording. If you don't see the New Recording button, it is because the window is too small. Enlarge the window by dragging the lower right corner down and to the right.

Note: On a mobile device, click on the Choose File option and then select Take Video.
- Record your video note (maximum 30 minutes). Click Stop Recording when you are finished.

- You can preview the video by clicking on the play button. Re-record by clicking on the New Recording button again.
-
When you are satisfied with the video, click on the Next button.
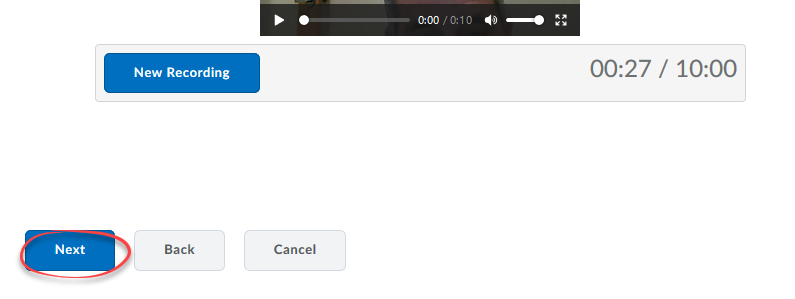
- Enter the Title and Description of your video. This is important if there are visually impaired students in the class.
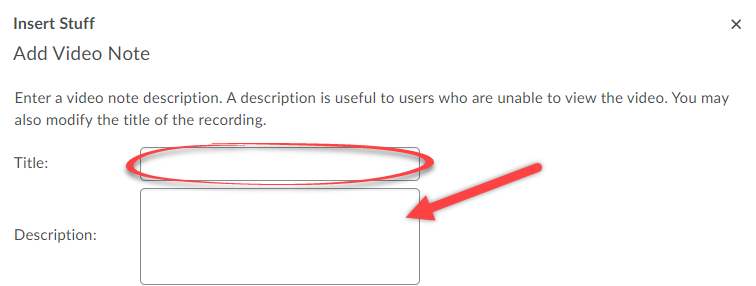
Note: A screen reader will read the title and description of the video note.
- Change the Audio Language to the language you spoke when you recorded your Video Note.
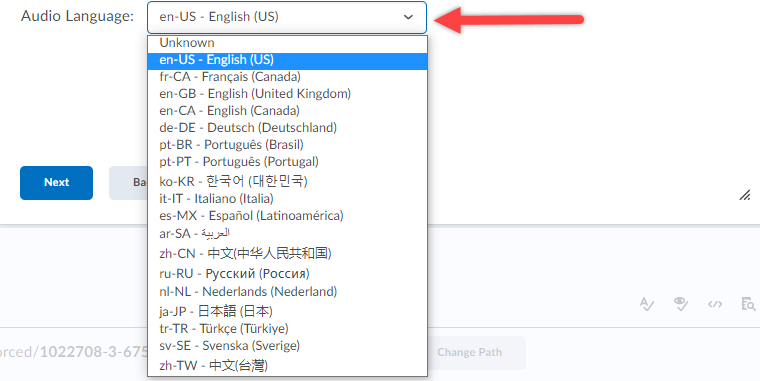
- Select Automatically generate captions from audio.
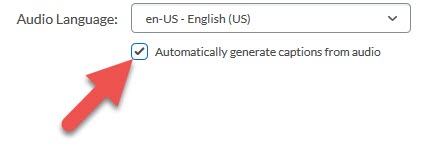
- Click on the Next button.

- You may see a message that the video is processing; it is not necessary to wait for the video to render. You can finish by clicking the Insert button.

- You be returned to the html editor, where you will see your video (or the processing message). Click the Save button.
- Click the Admin Tools icon.

- Select Video Note Captions.
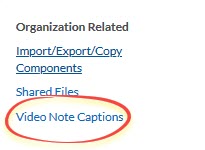
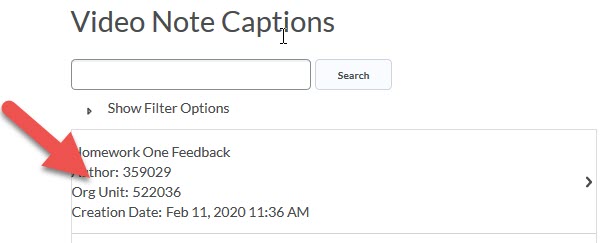
- Click on the Video Note to open it.
- Click the Play button to listen to the recording.
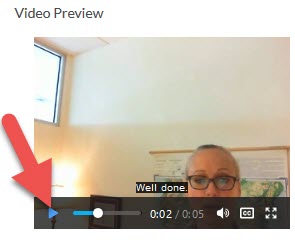
- Make changes to the caption text as needed.
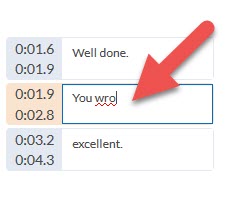
- Click Save Captions.

4. Add: An Image
When you use the Insert Image tool, you literally insert a picture into your text.
Note: Resizing an image within the HTML editor does not reduce the actual file size. Large files will still take longer to load, even if they appear smaller. It is preferable that you resize an image before uploading to D2L using a program such as Microsoft Paint or Adobe Photoshop.
- Click on the Insert Image button.

- Click My Computer to upload a file from your computer or device.
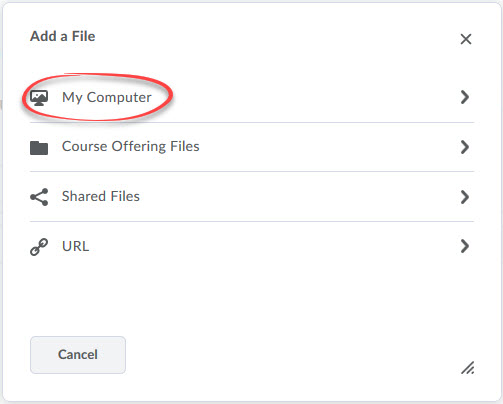
Note: You can also link to an image on the web. To get the URL, right click on the image and select copy link.
- Drag and drop your image into the window or click Upload to locate the image on you computer or device.
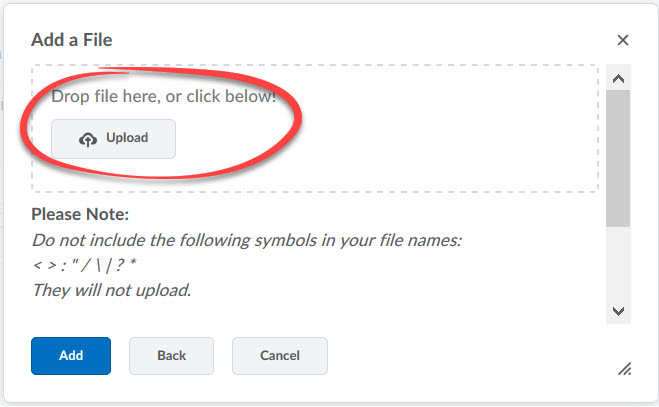
- Click the Add button.

- In the Provide Alternative Text box:
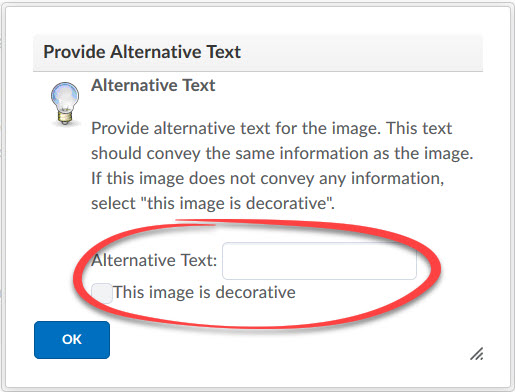
- Select This image is decorative, or
- In the Alternative Text box, enter descriptive text for use by participants with visual impairments
- Click Add.
Note: Do not skip this step. This is what makes your images accessible to people with visual impairments who use assistive technology. Visit the WebAIM website for tips on using Alternative Text.
- To edit your image, click directly on it. This makes a new toolbar available to you. With this toolbar, you can (from right to left in the order that the tools appear):

- Rotate the image counterclockwise
- Rotate the image clockwise
- Flip the image vertically
- Flip the image horizontally
- Open the Image Editor with which you can make other changes like cropping, resizing, or adjusting the color
- Click Publish (or Save) to make the content available to learners, or Save as Draft to save your unpublished work. (Note: the buttons change depending upon the tool you are using.)

5. Add: A Link
Use the Insert Quicklink button to embed links to course material or external websites.
- Highlight the text, image, or symbol on the page that you want to turn into a link.
- Select the Insert Quicklink icon.

- Click on the item to which you want to link.
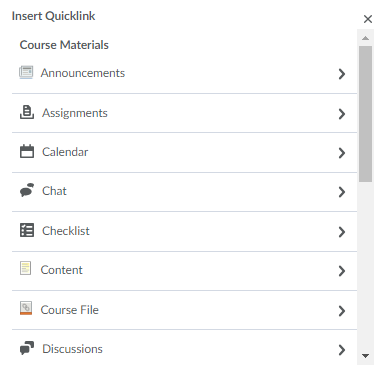
- Follow the prompt specific to the tool which you selected.
- To link to a website:
- In the URL box, paste or type the link.
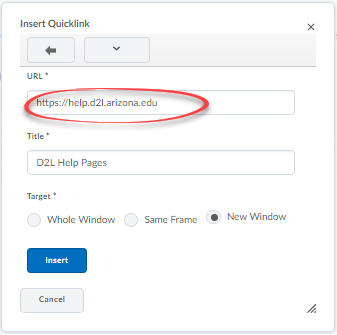
- In the Title box, include a description of the link.
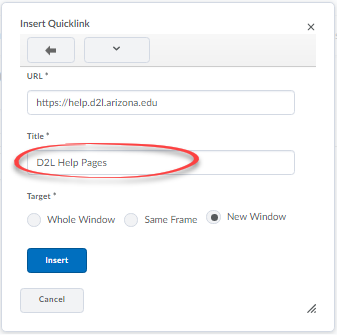
Note: To make your content as accessible as possible, use meaningful text in the title box. Phrases such as "Read More" that are out of context can be ambiguous. For tips on creating meaningful link text,click here to open the WebAIM page on Links and Hypertext in a new window.
- Choose one of the following as your Target. The "target" tells D2L where to open the webpage.
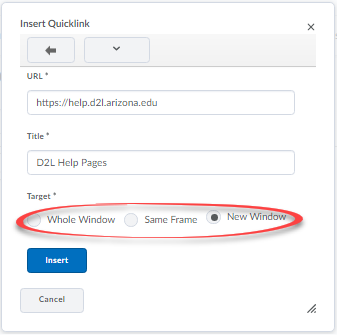
- Whole Window: opens the page full-screen (students will have to use the "back" button to navigate back to D2L).
- Same Frame: opens the page, but it appears within the D2L "window" (students can still use the D2L navigation buttons, but the webpage appears in place of the D2L content).
- New Window: (Recommended) opens the page full-screen, but in a new tab, allowing students to have D2L and the new page open at the same time.
- In the URL box, paste or type the link.
- Click the Insert button.
- Depending on the tool you are using, click Publish (or Save) to make the content available to learners, or Save as Draft to save your unpublished work.
To preview, edit, or break the link while in HTML Editor, click on the link to pull up the quick edit menu.
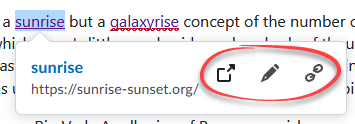
Note: While in HTML Editor, if you highlight text, you will also be presented with a shortcut for embedding links to external websites. Be aware that the shortcut link (image below) will not open into a new window.


