1. Techniques
There are a lot of techniques for making your Zoom meetings accessible.
The Disability Resource Center (DRC) has created this resource to help you conduct Zoom meetings that are as accessible as possible. For questions or more information, please contact the IT Accessibility team.
2. Add: Captions
Add captions to your meetings to ensure they are accessible to deaf and hard-of-hearing students.
Who this helps
- Anyone with mild to profound hearing loss
- People with with decreased hearing due to aging
- People with damaged hearing from exposure to loud noises
- People with infections or injuries who may experience temporary or permanant hearing loss
- People taking medications that can affect hearing
Who this also helps
- Foreign language learners who may have diffculty understanding spoken words
- People working in noisy or sound-sensitive environments
- People with learning disabilities, attention deficits, and autism who use captions to help maintain concentration
- Everyone who may have trouble comprehending mumbled words, fast speech, or dialogue when there is background noise
You can add captions while the meeting is occuring ("real-time") or use the auto caption feature to add captions to recordings.
Add: Real-time captions
Note: Real time captioning takes skill and practice, so you may want to hire a professional. To help, the University of Arizona has contracts with captioning vendors.
Steps
- Start the meeting.
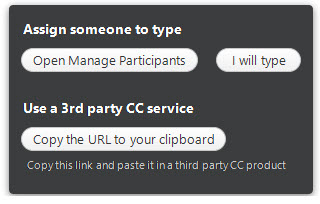
- Click on the captions icon in the task bar.

- Choose one of the following:
- Open Manage Participants: if a meeting participant will add captions during the meeting.
- I will type: if you plan to add captions during the meeting.
- Copy URL to your clipboard: if you plan to send the meeting address to a captioning service.
Add: Auto-captions
Note: You must record meetings to the cloud in order to add captions to your recording.
Steps
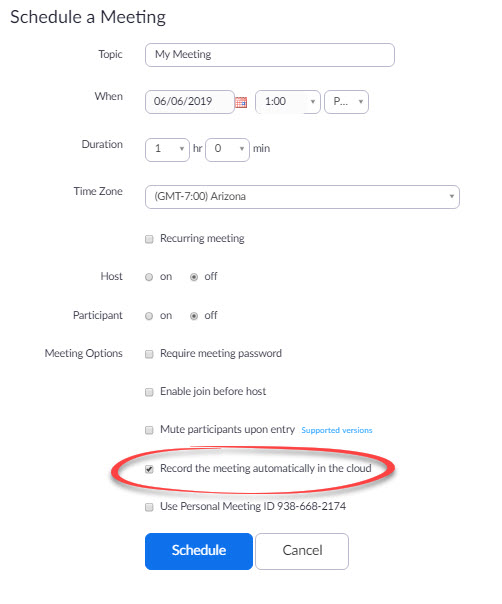
- When you create your Zoom meeting, select the option to Record the meeting automatically to the cloud.
- After you end your meeting, Zoom will automatically make a transcript, using a VTT format.
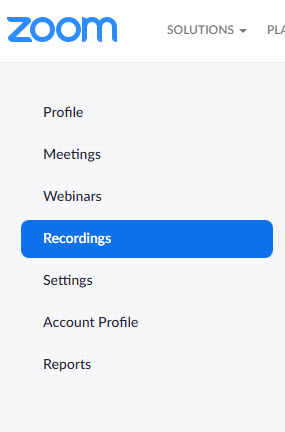
- Access your video through the Zoom web portal.
- Choose Recordings.
- Click on the Meeting Name.
- Click on the Video's Tile.
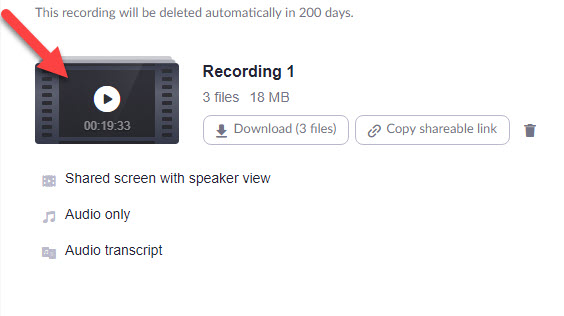
- Check your captions. Hover over a caption and click the pencil icon to edit.
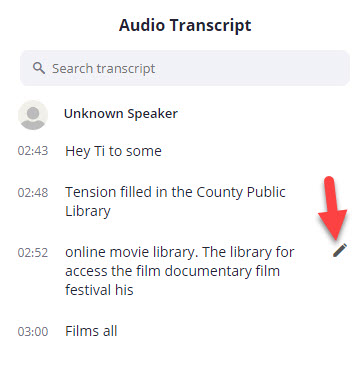
Note: If you auto-generate captions, review them for accuracy. Zoom (like all auto-captioning software) does not always get it right.
Note: Zoom also creates a transcript, which you can download as a VTT file.
3. Add: Live Autotranscription
UA is beta testing Zoom's live autotranscription feature.
Although this feature can be helpful, it is not a substitute for professional captions and does not replace disability accommodations.
Note: This feature cannot identify who is speaking.
Note: Meeting content must be sent to an external server that converts it to text. You should not use this feature if your meeting includes senstive or HIPAA-protected information.
Who this helps
- Anyone with mild to profound hearing loss
- People with with decreased hearing due to aging
- People with damaged hearing from exposure to loud noises
- People with infections or injuries who may experience temporary or permanant hearing loss
- People taking medications that can affect hearing
Who this also helps
- Foreign language learners who may have diffculty understanding spoken words
- People working in noisy or sound-sensitive environments
- People with learning disabilities, attention deficits, and autism who use captions to help maintain concentration
- Everyone who may have trouble comprehending mumbled words, fast speech, or dialogue when there is background noise
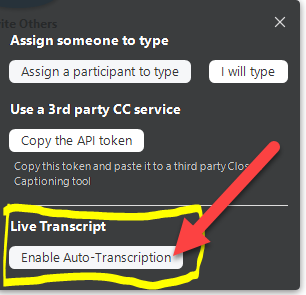
Steps
- Hosts only: click Live Transcript in the toolbar

- Select Enable Auto-Transcription
