Panopto is a video recording and streaming tool on campus that faculty use to manage videos in a course, to record lectures or lab demos, or to live stream events. If instructors allow it can also be used by students to create a Panopto video to post in a Panopto assignments folder for the instructor to review and grade.
For student support related to Panopto please call the 24/7 IT Help Desk at (520) 626-TECH.
1. Access Panopto via D2L
Learn how to access Panopto via D2L to view Panopto videos for your course.
To access Panopto you will need to be inside a course within D2L.
- Log in to D2L by going to https://d2l.arizona.edu and enter your UA NetID and password.
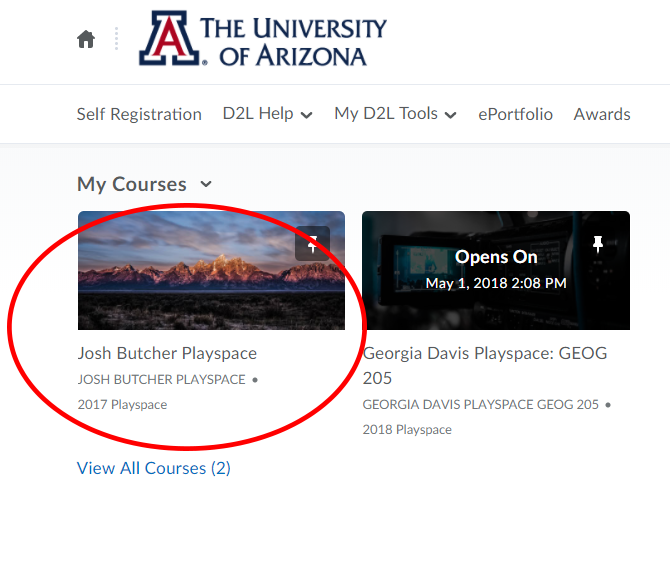
- Access the course you plan to use with Panopto by clicking on the course under My Courses. In this example I am accessing my "Josh Butcher Placespace" course.
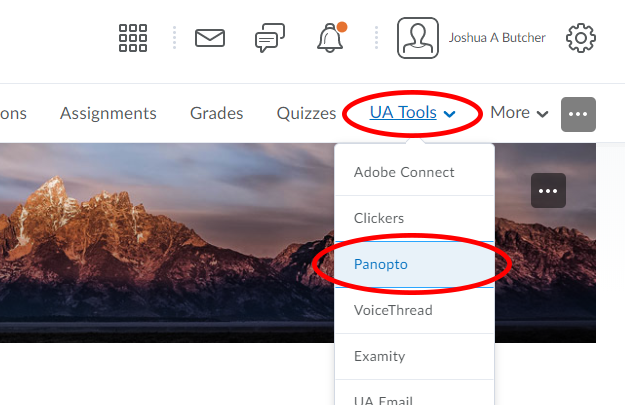
- Click the UA Tools drop down menu on your course navbar and select Panopto.
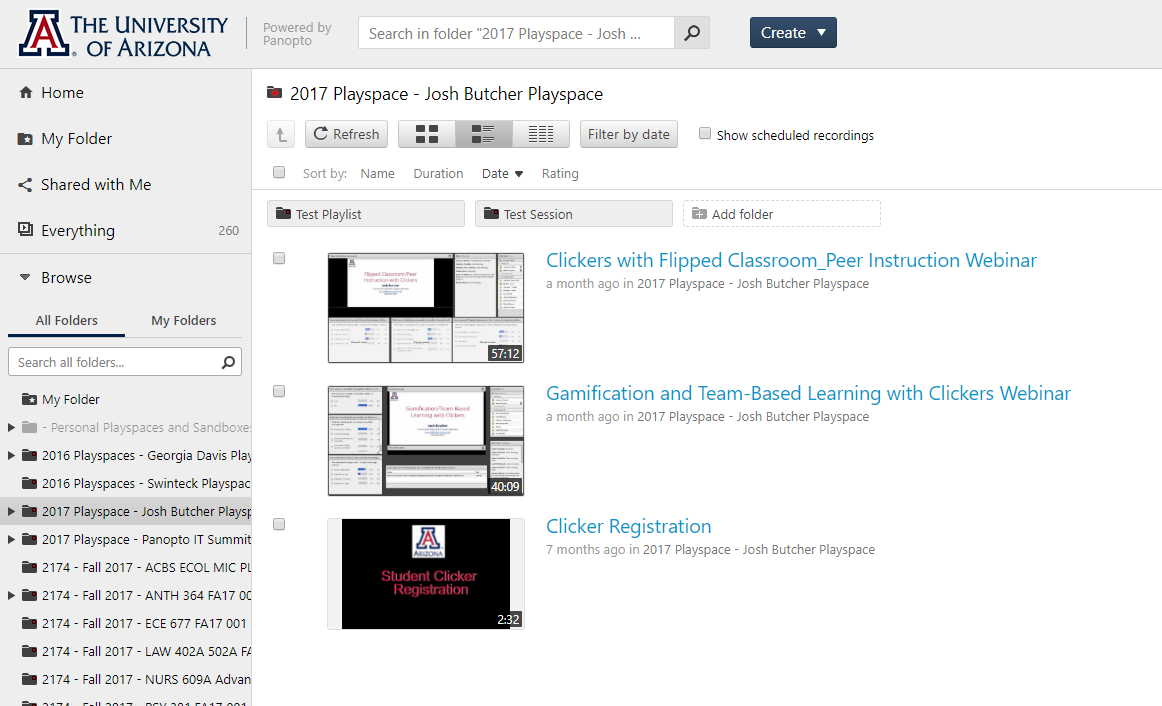
- In a new browser tab you will then be in the Panopto web interface within that course Panopto folder. In this example I am within the "2017 Playspace - Josh Butcher Playspace" folder.
2. View Panopto Videos in Web Interface
Learn how to view course related Panopto videos in the web interface.
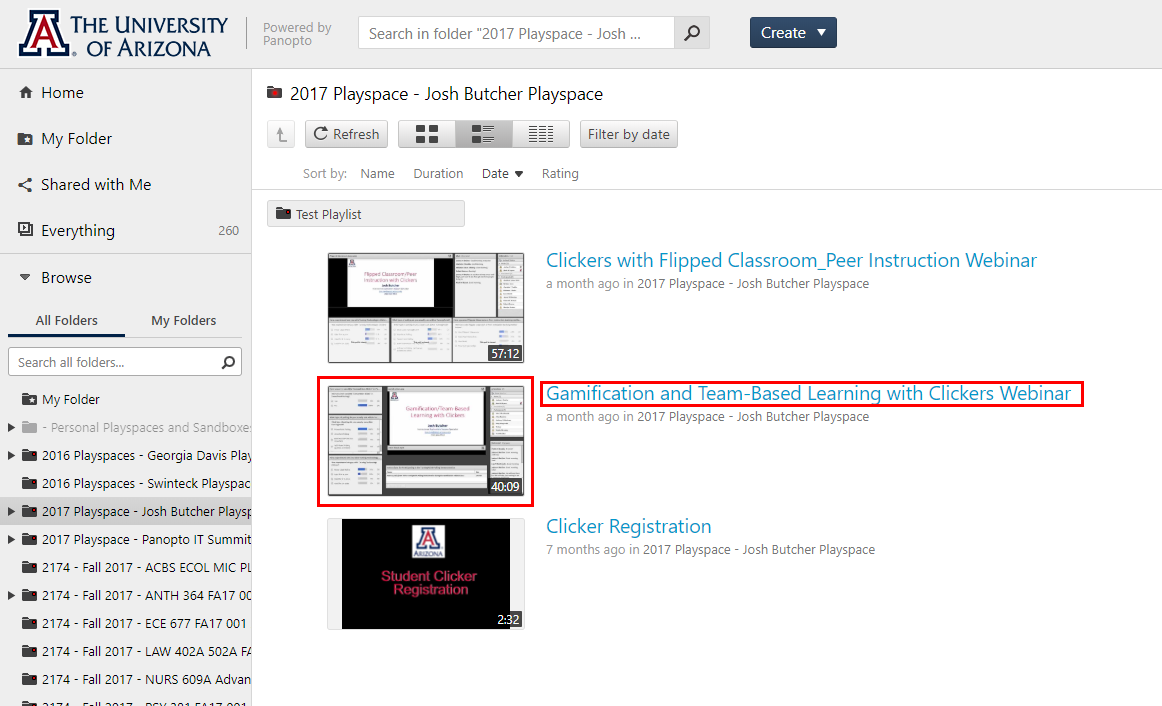
Once you are within the Panopto web interface and in a course folder you will see all the videos that have been posted to that folder. From here you can view any of those videos listed.
- Find the video that you would like to view and click on the thumbnail picture or click on the video title link to open up the video in the Panopto viewer layout.
- The video will open in the Panopto viewer layout in a new browser tab as seen below. For more detailed instructions on what all you can do within the Panopto viewer layout visit Panopto's support documentation on "View a Video".
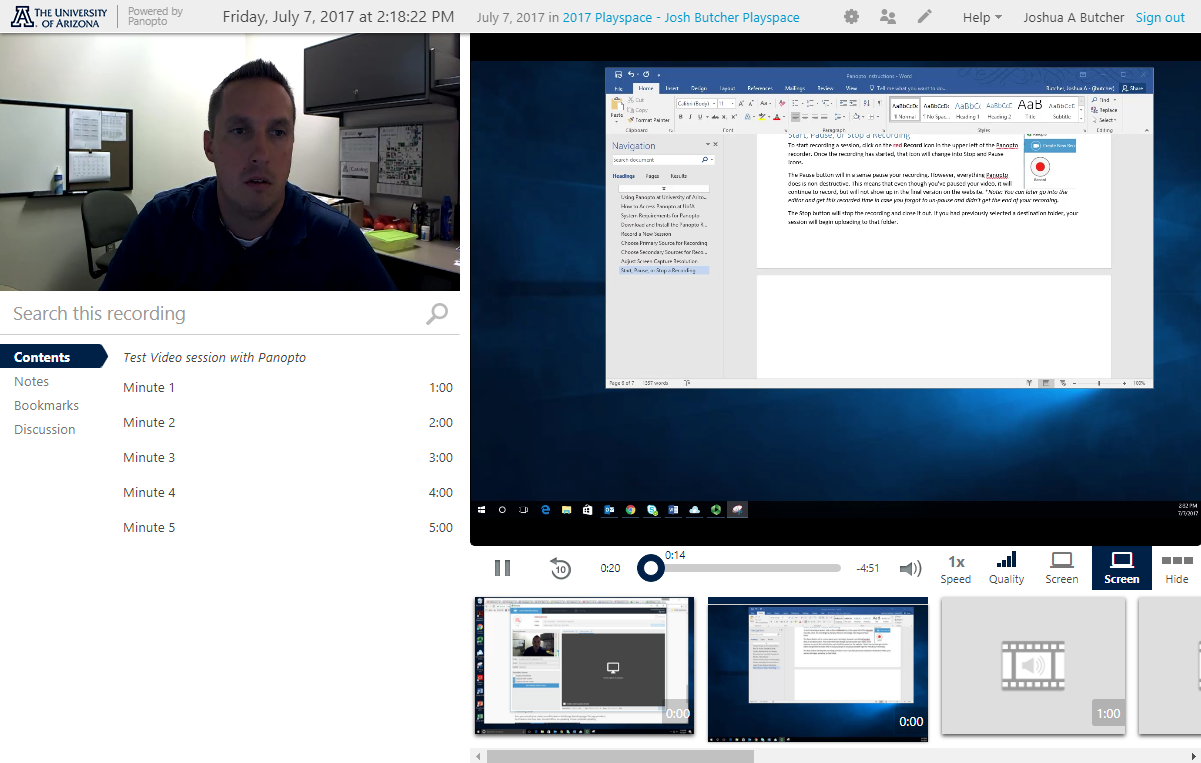
- When you are done viewing the video just close that browser tab and you will be taken back to the listing of videos within the Panopto web interface.
3. View Panopto Videos Embedded in D2L Content
Learn how to view Panopto videos that your instructor has embedded directly into a D2L content module.
Sometimes your instructor may embed the Panopto videos directly into the D2L course content modules. If this is the case follow the instructions below to view those videos.
- Log in to D2L by going to https://d2l.arizona.edu and enter your UA NetID and password.
- Access the course you plan to use with Panopto by clicking on the course under My Courses.
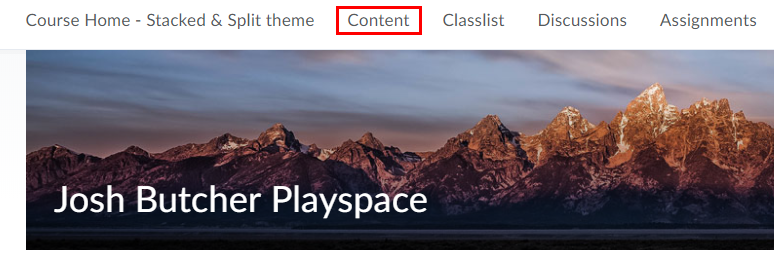
- Click on the Content menu link in the navbar at the top.
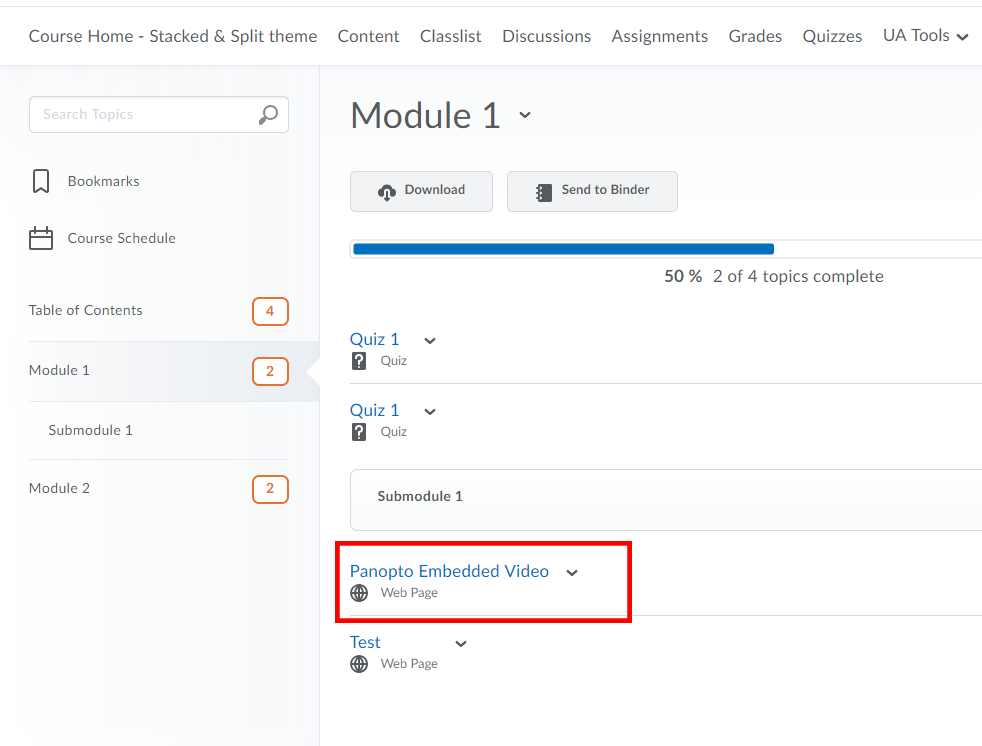
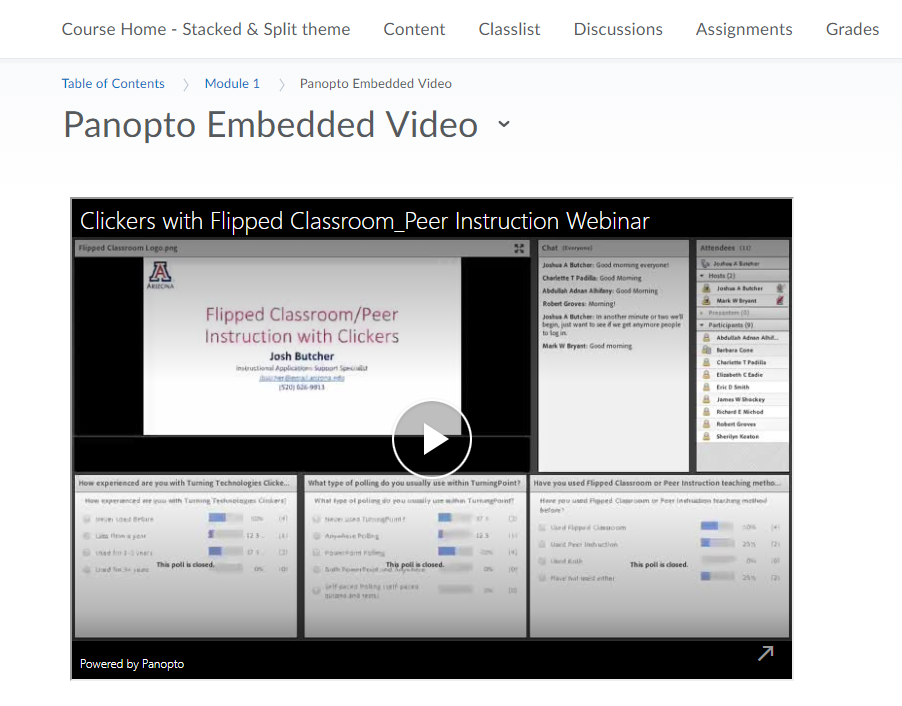
- In one of the content modules find the link to the video that your instructor wants you to view. In this example the video link is labeled "Panopto Embedded Video". Click the video link.
- The video will then appear embedded on the page. Click the Play button in the middle of the video to view the video.
4. Create Video to Post to Panopto Course Assignment Folder
Learn how to create a Panopto video and post it to your course Panopto assignment folder.
Sometimes your instructor might want you to create a Panopto video and post it to the course's Panopto assignment folder. The instructions below will take you through that process. To preface, this will only work if your instructor has created a folder (called an assignments folder) within the course Panopto folder. If the instructor has not created a Panopto assignment folder for you to upload/record videos to then the below instructions will not work. So if you run in to issues, that may be the main cause and we'll need to get your instructor to create that Panopto assignment folder for you to upload/record your video.
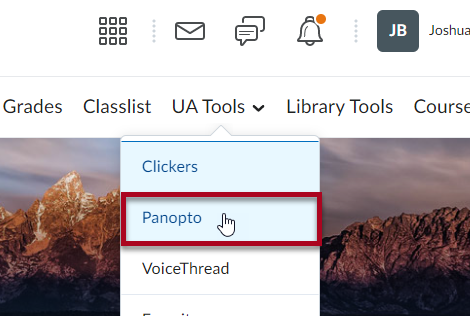
- From within your D2L course, in the navigation bar select UA Tools and then select Panopto.
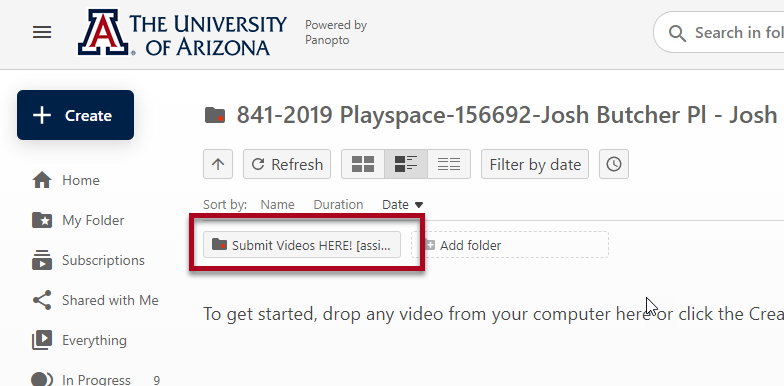
- Select the appropriate "assignment" folder to open that folder.
- There are two different ways you can record within Panopto. You can use Method #1 and download/install the Panopto Recorder software to your computer or you can record your video using Method #2 the Panopto Capture feature which records through your browser. In the below sections, we will show you how you can use either method.
Method 1: Use the Panopto Recorder Software (Download/Install)
Learn how to record a video using the Panopto Recorder software.
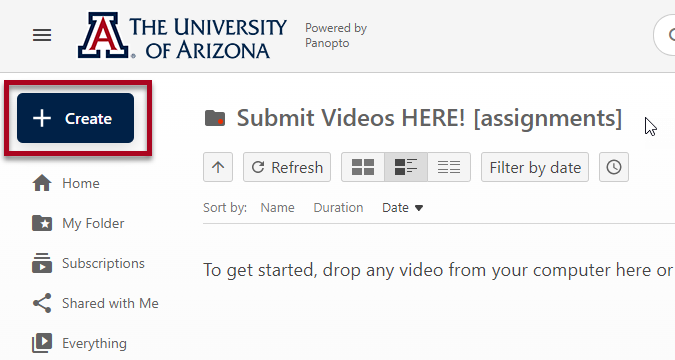
- While within the course Panopto assignment folder select the Create button in the upper left.
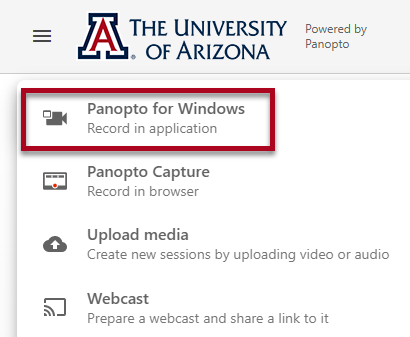
- Select Panopto for Windows or Panopto for Mac option depending on what computer you are using.
- To download the Panopto Recorder application to your computer choose one of the installation options on this screen that appears.
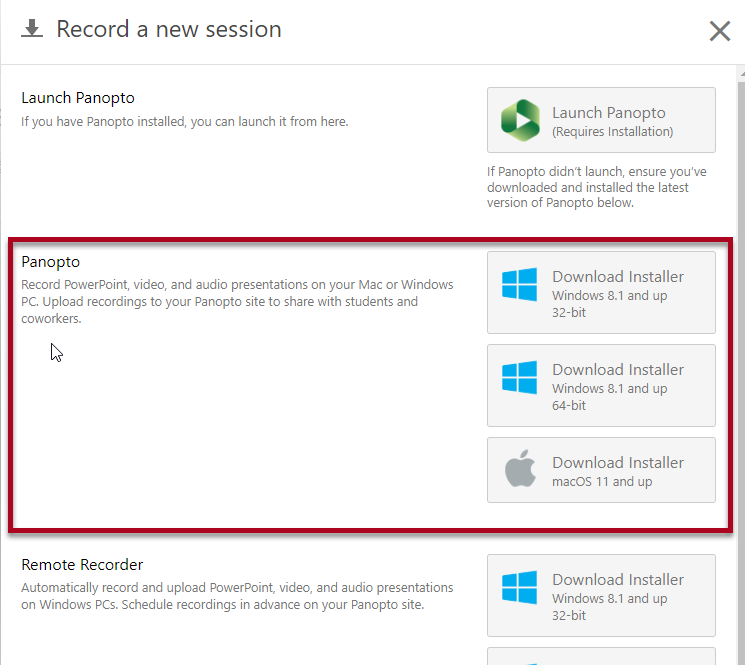
- Click on one of the following links for detailed download/install instructions for the computer operating system you are using.
How to Download and Install Panopto for Windows
How to Download and Install Panopto for Mac
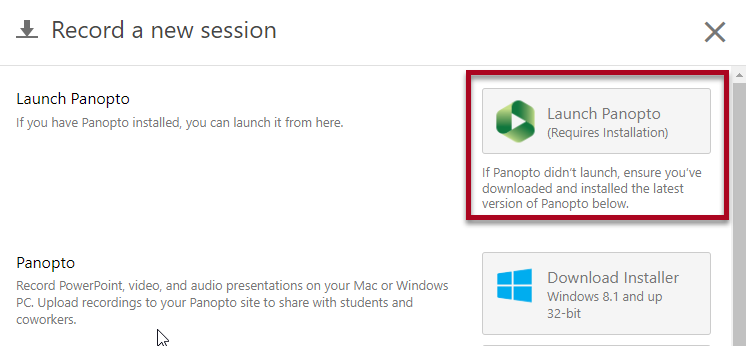
- Once downloaded, select the Launch Panopto button.
You may get an additional prompt asking you to open Panopto Recorder, select Open Panopto Recorder.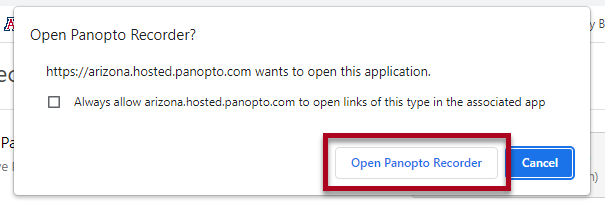
-
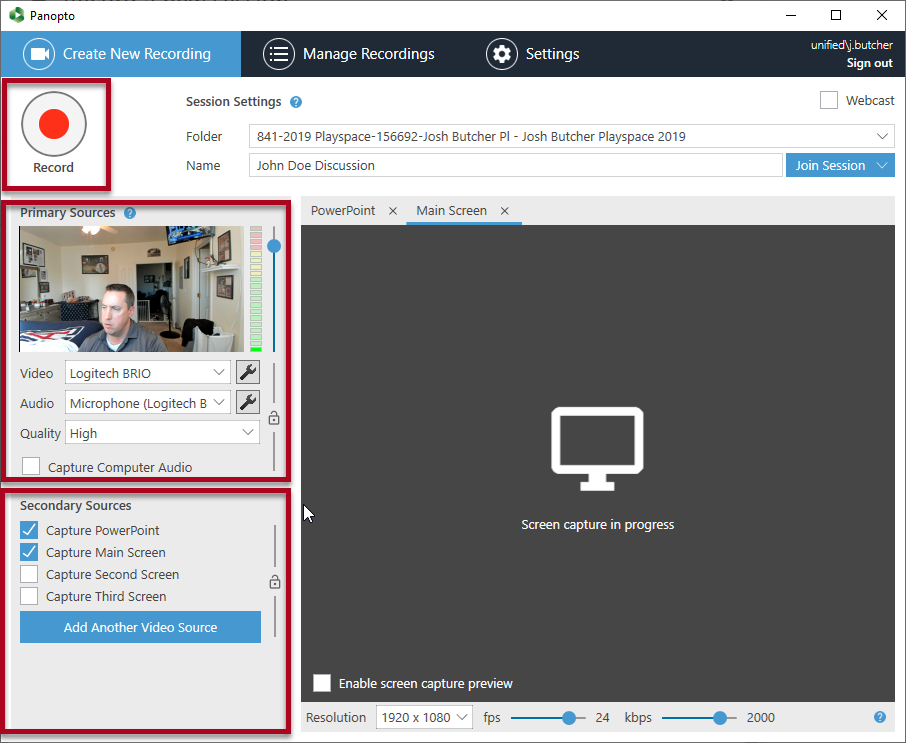
The Panopto Recorder will then launch. Double-check that the folder and name of your video ("session") is correct. Below describes the different sources you can choose to record with.
- Primary Sources
- Video - This will record a video camera feed if you have a video camera connected to your computer.
- Audio - This will record audio from a microphone that is connected to your computer. You MUST have an audio source chosen from your primary sources. Panopto uses this audio source as a baseline to sync all other sources to.
- Quality - Sets the quality of your primary video source. We recommend setting this at HIGH.
- Secondary Sources
- Capture PowerPoint - This will capture still images of your PowerPoint slides and create a table of contents for your video from your PowerPoint slides. This option does NOT capture PowerPoint animation or embedded videos that you may have in your presentation. If you have animation or embedded video in your PowerPoint presentation then you will want to choose to capture the main screen.
- Capture Main Screen - This will capture anything that happens on your desktop screen as a screencast.
- Capture Second Screen (if applicable) - You may see an option to capture second if you have multiple displays connected to your computer. In this example there are two monitors connected to the computer so you are seeing that option here. It will record anything that happens on the second screen as a screencast.
- Primary Sources
- When you are ready to record click the red Record button. Then you can minimize the Panopto Recorder window and bring up your PowerPoint or other content you want to use in your video. After you press record it will begin recording your video feed, your microphone feed, as well as anything you do on your computer screen (if you selected those secondary sources).
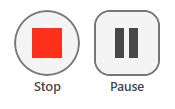
- When you are done recording, bring up the Panopto Recorder software and click the Stop button.
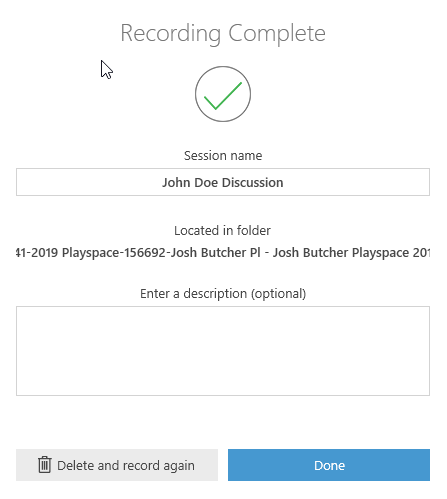
- Click the Done button to upload your recording, or if you aren't happy with the recording you can Delete and Record Again.
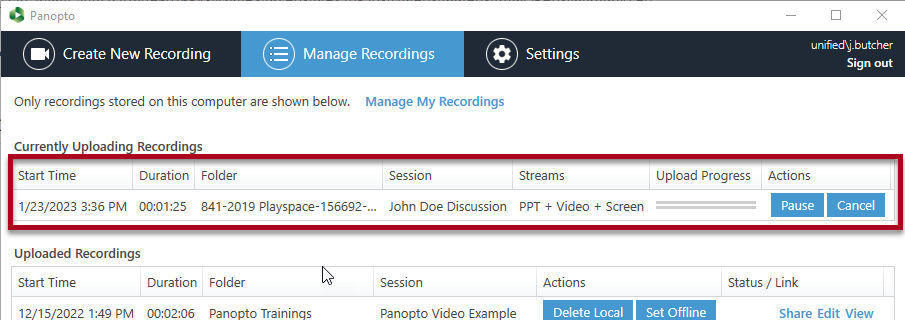
- The video will begin to upload to the Panopto assignment folder and you'll also be able to tell back on your browser that it is processing as well.
Method 2: Use the Panopto Capture Feature (records within browser)
Learn how to record a video using the Panopto Capture feature that records within your browser.
- Click the Create button and select Panopto Capture.
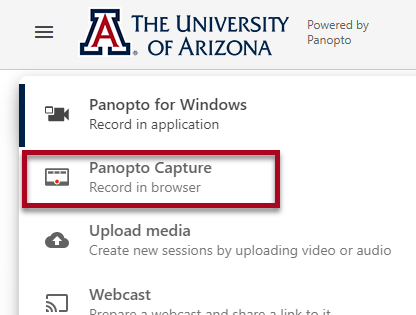
- Panopto Capture launches in a new browser tab.
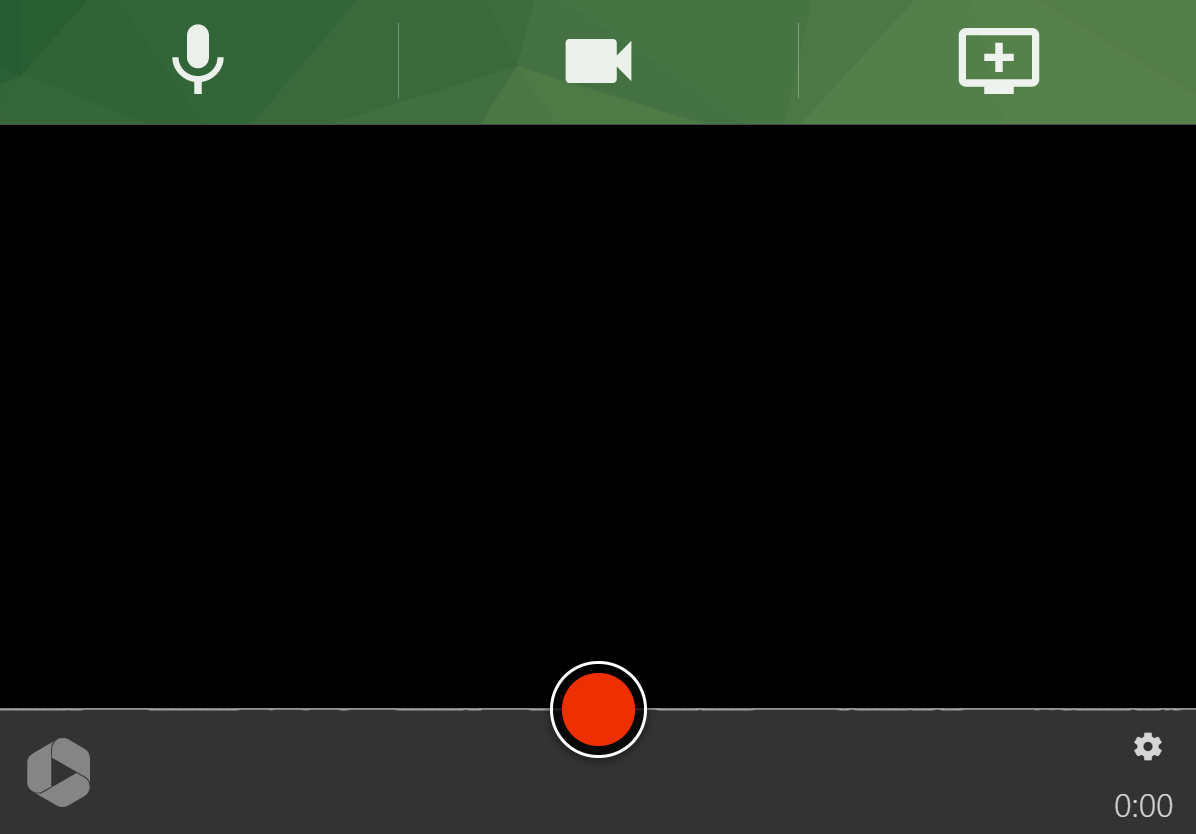
- To create a video, first select a microphone to use with the recording. Click the microphone icon in the upper left corner of Panopto Capture.

- Each microphone connected to your computer will appear as a button in the preview area. Select the desired microphone by clicking on the button.

- Talking at a normal volume will allow you to test your microphones. The bar at the left of each box indicates how well the microphone is picking up audio. Select a microphone that shows green in this bar. If yellow or red is showing, the video's audio may be distorted. If no green is showing, the microphone is not picking up audio.
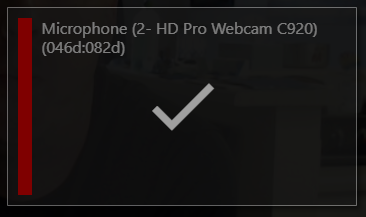
- Talking at a normal volume will allow you to test your microphones. The bar at the left of each box indicates how well the microphone is picking up audio. Select a microphone that shows green in this bar. If yellow or red is showing, the video's audio may be distorted. If no green is showing, the microphone is not picking up audio.
- To record a camera source, select the camera icon in the upper center of Panopto Capture. If you do not want to record any cameras, you can skip this step.

- Each camera connected to your computer will show up as a button in the preview area. Each button will show a preview of each camera. Select the desired camera(s) by clicking on the button(s).
- The first camera selected will be recorded as the primary video source. This source appears in the upper left side of the video viewer and is typically video of a presenter.
- Any additional cameras selected will be recorded as secondary video sources. These appear on the right side of the viewer along with screen or application sources.
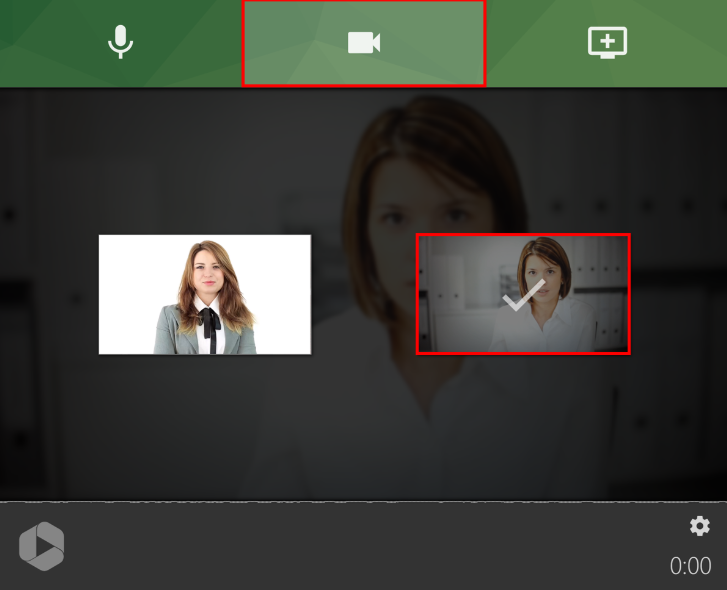
- Each camera connected to your computer will show up as a button in the preview area. Each button will show a preview of each camera. Select the desired camera(s) by clicking on the button(s).
- To record a screen, application window, or individual chrome tab, select the monitor icon with the plus sign in the upper right of Panopto Capture. If you do not want to record any screens or applications, you can skip this step.

- A window will open. Here you can choose the source to record.
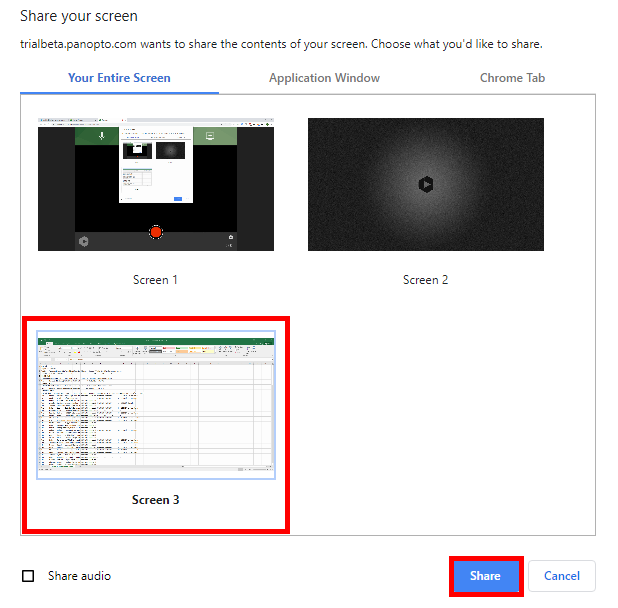
- To record everything that happens on your screen, choose Your Entire Screen. Then, select the screen to record and click Share. Optionally, select Share audio to add the audio from your computer to the recording (i.e. if you are playing a YouTube video).
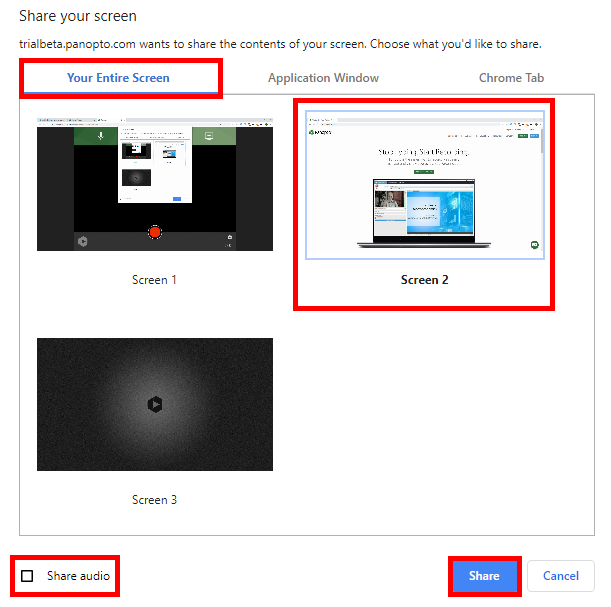
- To record everything that happens in one application window only, choose Application Window. Then, select the application to record and click Share.
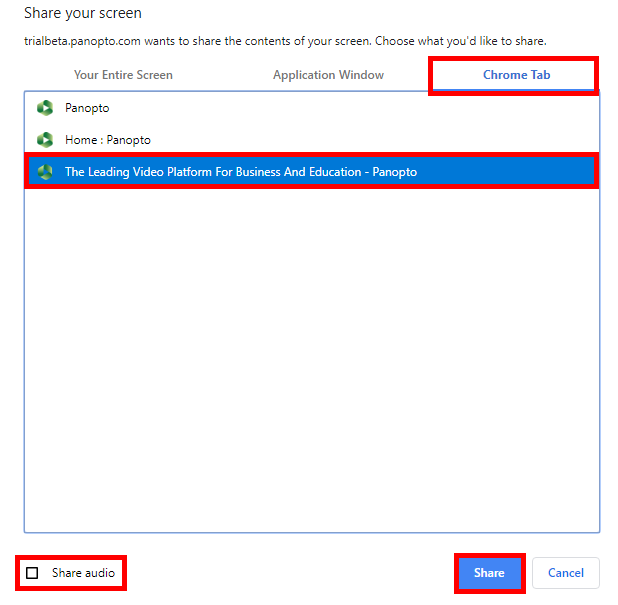
- To record everything that happens in one Chrome browser tab, choose Chrome Tab. Then select the tab to record and click Share. Optionally, select Share audio to add the audio from your computer to the recording (i.e. if you are playing a YouTube video).
- To record everything that happens on your screen, choose Your Entire Screen. Then, select the screen to record and click Share. Optionally, select Share audio to add the audio from your computer to the recording (i.e. if you are playing a YouTube video).
- After choosing one screen or application source, you may add additional sources by selecting the monitor icon again.
- A window will open. Here you can choose the source to record.
- To learn more about different settings you can adjust related to Panopto Capture please see Panopto's help page at https://support.panopto.com/s/article/How-to-Create-a-Video-Using-Panopto-Capture.
- To begin recording your video, click the red circle button at the bottom center of Panopto Capture. If enabled, you will see a 5 second countdown on screen, and then the recording will begin.

- To stop recording, select the red square button at the bottom center of Panopto Capture. The video will immediately begin to upload. Do not close the Panopto Capture browser tab until the upload is complete.

- Once the recording is stopped, the video will immediately begin uploading to your Panopto folder. A new screen appears that shows the video's upload and processing progress. You can also change the title of your video at this stage as well.
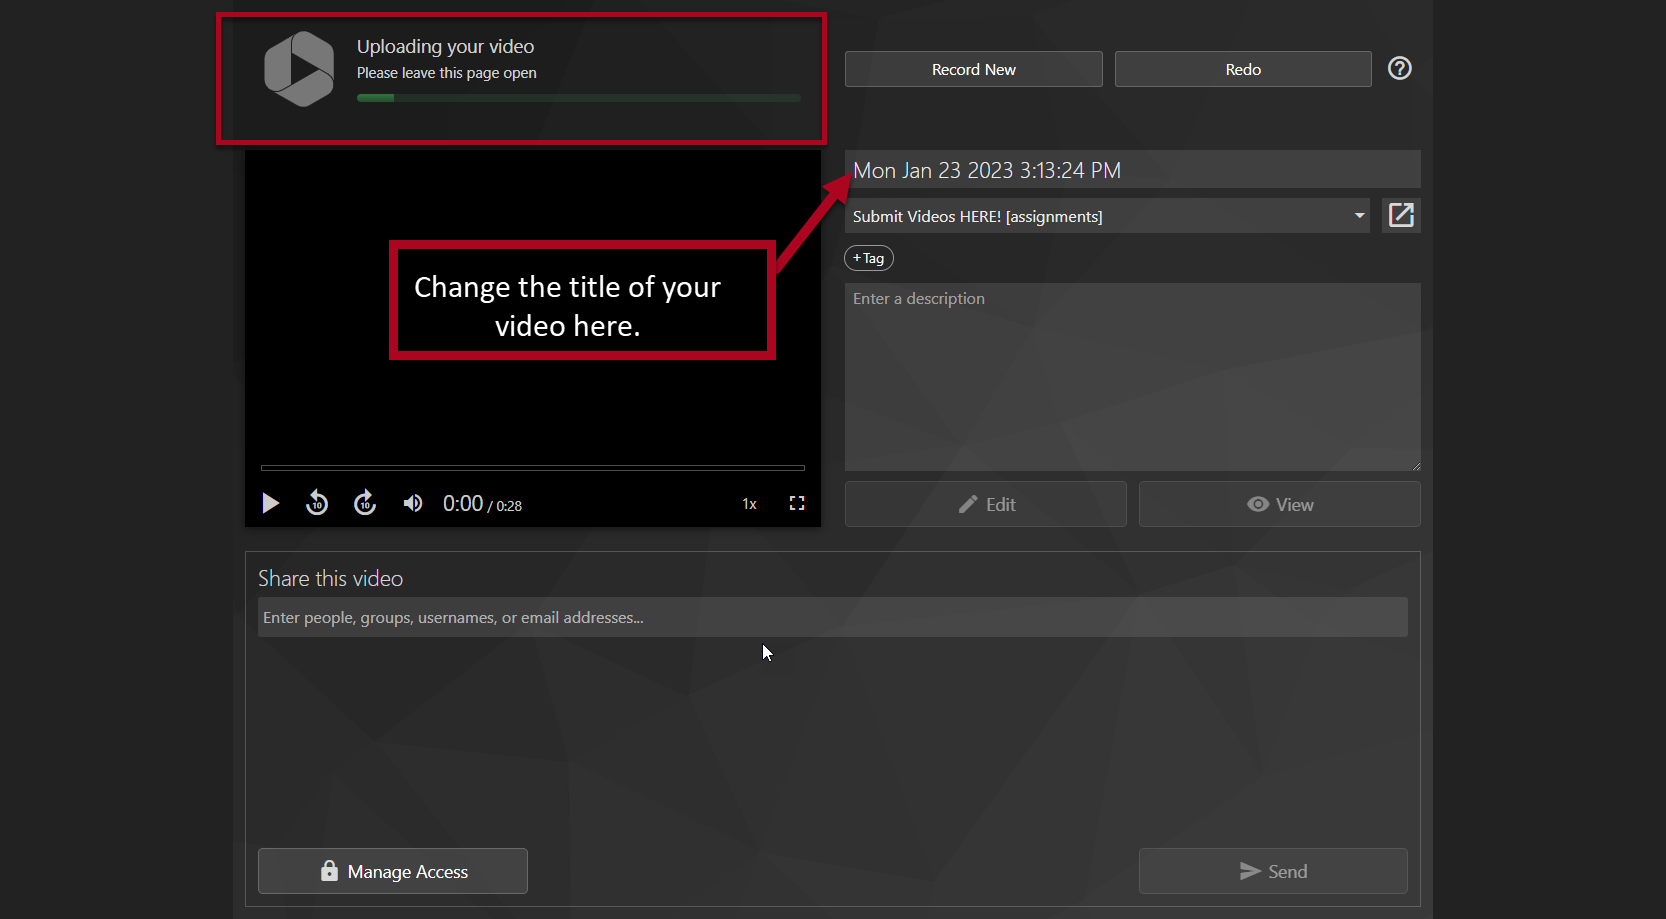
- Do not close your browser tab until uploading is complete. Uploading is complete when the status bar reads "Upload Complete. It's safe to close your browser window".

- If you need to record your video again instead of saving it to your folder, click Redo in the upper right corner.

- If you would like to record another video, click Record New in the upper right corner.

5. Create Video to Post to D2L Discussion, Assignment, or Quiz Response
Learn how to create a Panopto video and post it within various areas within a D2L course.
Sometimes your instructor might want you to create a Panopto video and post it to a discussion post, assignment, or a quiz response within your D2L course. The instructions below will take you through that process. To preface, this will only work if your instructor has created a folder (called an assignments folder) within the course Panopto folder. If the instructor has not created a Panopto assignment folder for you to upload/record videos to then the below will not work. So if you run in to issues, that may be the main cause and we'll need to get your instructor to create that Panopto assignment folder for you to upload/record your video.
Step 1 - Upload or Record Video to Course Assignment Folder
Please see section 4 previous to this section labeled "Create Video to Post to Panopto Course Assignment Folder". That section will walk you through step-by-step on how to upload or record your video to your course assignment folder within Panopto.
Step 2 - Post Video to D2L Discussion, Assignment, or Quiz Response
- Whether it is a D2L discussion post, an assignment, or a quiz response that you are asked to post a video to you will come across an HTML editor (pictured below). Within this HTML editor you will want to click on the first button in the toolbar called the Insert Stuff button.

- From the Insert Stuff popup window, scroll down to the bottom and choose Panopto.
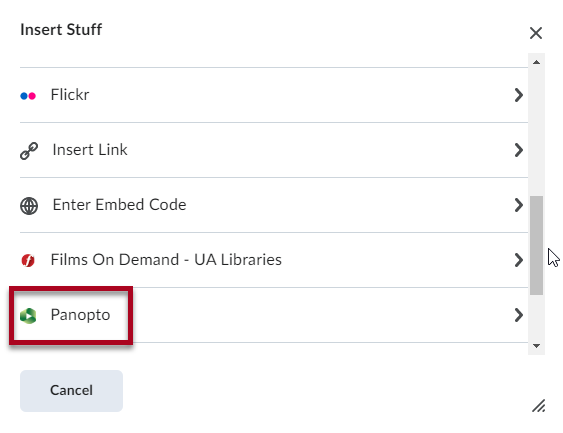
- In the window that appears, select the drop-down arrow to find your course assignment folder to where you'll need to choose your video that you uploaded or recorded.

- Find the D2L Integration folder and select the arrow to the left to expand that folder list. Then, find your D2L course folder and select the arrow to the left to expand that folder list. Find and select the course assignment folder. It may or may not be labeled "Submit" or "assignments" so get the correct name of the folder from your instructor. In this particular example below the course assignment folder is labeled "Submit [assignments]".
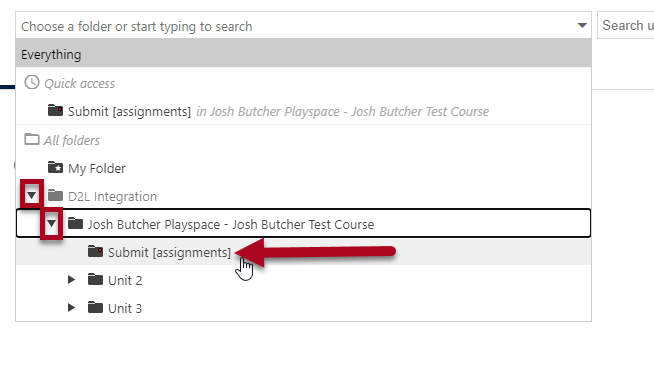
- It should then show you the videos that you have already uploaded or recorded to the course assignment folder. Select the video in the list of videos that appear and then select the Insert button.
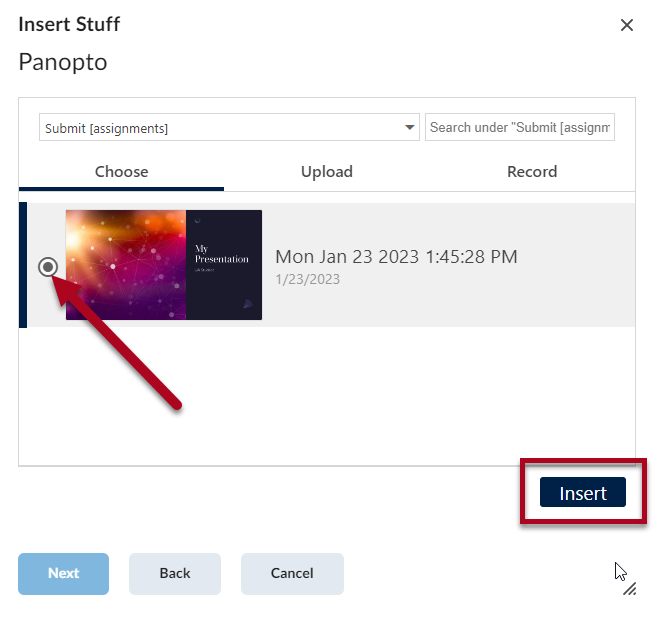
- Select the Insert button again.
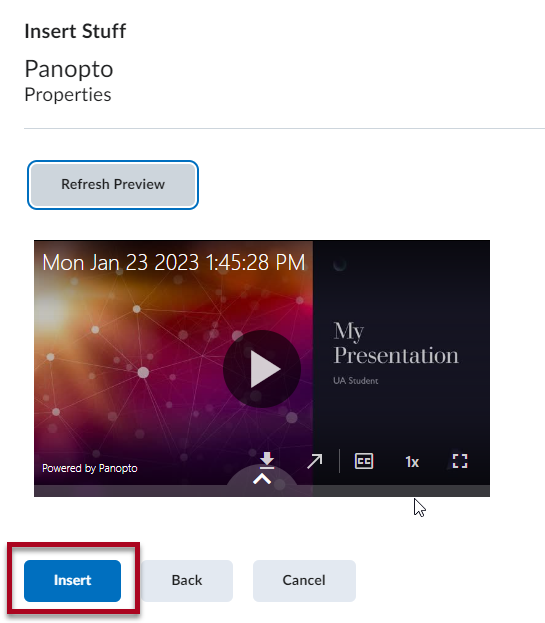
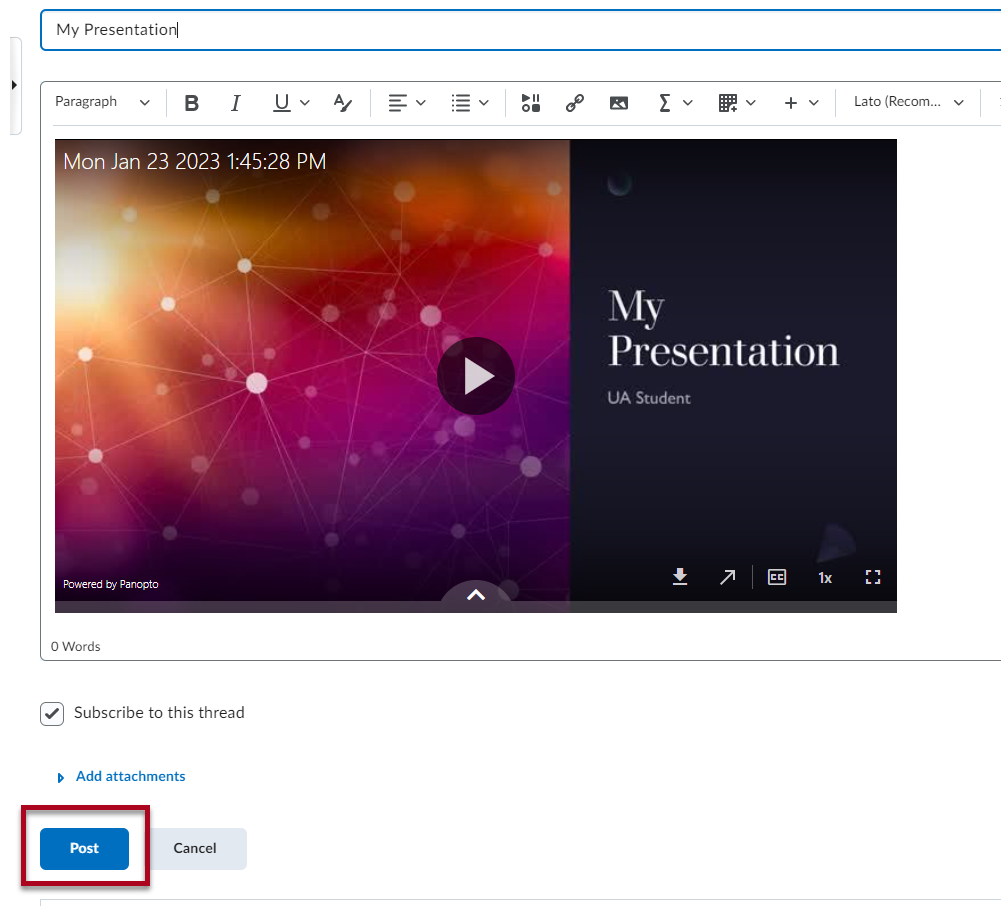
- In this specific example we inserted a Panopto video into a discussion thread post. Select the Post button to publish the discussion post. If it were an assignment you would click the "Submit" button.
