1. Submit: Take and submit a quiz
Start a quiz, answer and save questions, and submit a completed quiz.
- Click on Quizzes in the navbar.
- Click on the quiz name.

- The Quiz Details page provides information about the quiz, how long you have to take it, when it is available, and etc.
Note: If you do not have a Start Quiz button at the bottom, check the information in the Quiz period section. The quiz period may not have started or it may have passed.
- Click the Start Quiz! button.
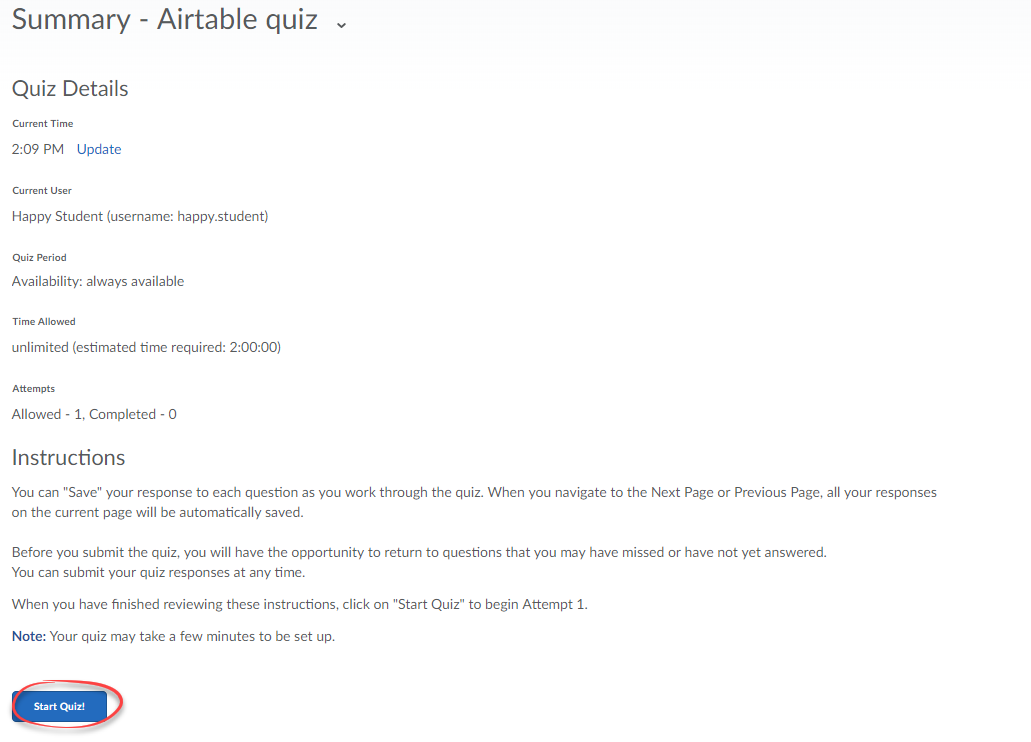
Note: Once you click on the Start Quiz button the quiz timer starts and cannot be stopped. Do not close your browser and plan to return later as you will not be able to once the allowed time has elapsed.
- Enter answers for the questions. You can click the Question icons to navigate between questions.

Note: D2L autosaves your answers once selected, except for written response (essay) questions, which autosaves frequently. Checkmarks indicate that your answer is saved.
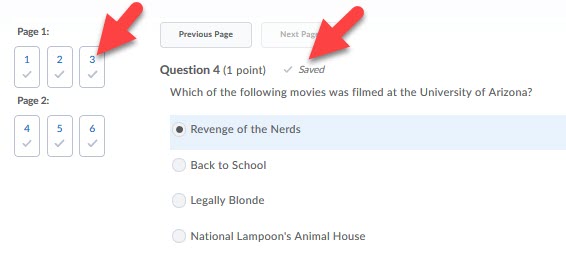
- If your quiz is more than one page long, use the Next Page and Previous Page buttons to move between pages.
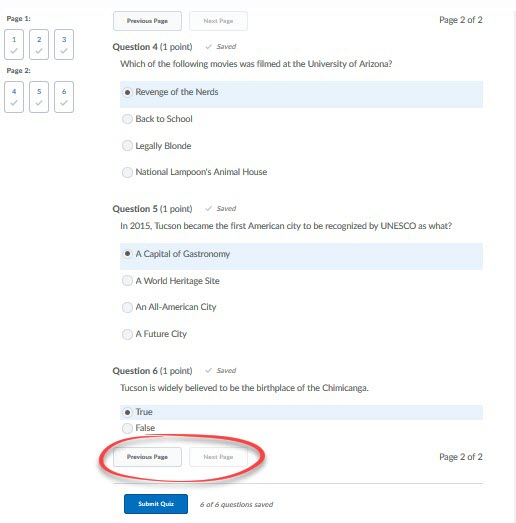
Note: Instructors may choose to restrict movement between quiz pages, in which case you will not be able to move backward and you will need to answer each question before moving to the next question.
- At the end of the quiz, click Submit Quiz.
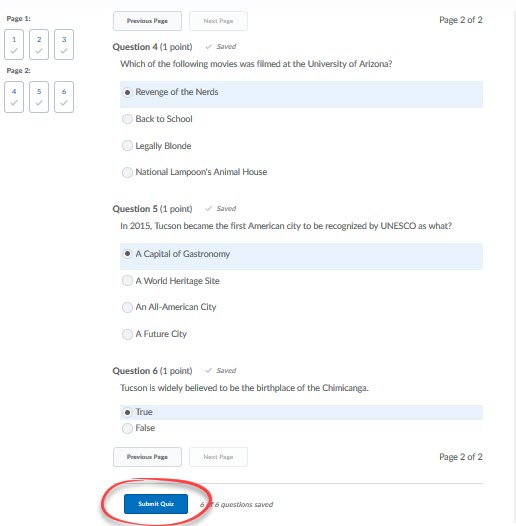
- At this point, you can go still go back into the quiz by clicking the question icons on the left or the Back to Questions button (if the instructor has not disabled backward movement in the quiz).
- To finally submit your quiz, click on the Submit Quiz button.
- Wait until the submission screen appears to that verify that your quiz has been submitted successfully.
2. View: Results of the quiz
After the quiz has been submitted, return to the quiz and view the results.
Your instructor controls what results you see. The default view only shows the score. Instructors can edit the view to show questions and answers, but that is up to each instructor.
- Select Quizzes in the navbar.
- Select On Attempt to the right of the quiz for which you want to see the results (under the column Evaluation Status).

- Select Attempt 1 (some instructors allow for more than one attempt on a quiz)
- You land on the submission view which shows you the information about your attempt that the instructor has released for students.
3. Use: Install and use the Respondus LockDown Browser
Learn about, install, and use the Respondus LockDown Browser.
Note: LockDown Browser does not work with Linux, Android devices (including Kindles), XBox, or iPhones. For Chromebooks, you need to install the new extension.
Some instructors require LockDown Browser to take a quiz. This browser prevents students from using other applications on their computers while taking a quiz.
Install
- Select the quiz from the Quizzes link on the navbar.
- Click Download and install the latest version of LockDown Browser.

- Follow the directions to install and download the file.
Note: Each Internet browser handles downloads differently. For help downloading anything contact 24/7 IT Support
- Return to the quiz.
Take the Quiz
Note: The browser will close unauthorized programs, so it's recommended that you close everything but the browser you access D2L through before starting the quiz.
- Select Launch Lockdown Browser.
- If prompted to close a program (e.g. screen capture, instant messaging), select Yes.
- The quiz will start.
4. FAQs
Frequently Asked Questions
My computer froze during my quiz, what do I do?
- Contact your Instructor immediately. If it is a timed quiz, the D2L clock may continue to run. Take a screenshot (with a timestamp) of any error messages that appear. Once you submit your quiz you cannot edit your quiz attempt anymore.
Help! I cannot submit my quiz!
- Contact your Instructor immediately. D2L saves your quiz attempt from the moment you click the Start Quiz button. If you lose internet connection or your quiz attempt times out, your Instructor can submit your "in progress" quiz attempt.
I'm taking a quiz using Examity and I need help!
- The university has contracted with the Examity company to provide support to students. For assistance, please email support@examity.com or call (855)-392-6489.
5. Insert images or files into a quiz question
Insert files into a Written Response (WR) type question when required.
In some quizzes, you may need to add a picture or file from your computer or phone to an answer. Here are three different ways to accomplish this, as instructors may use a variety of settings.
Method 1: Insert image icon
- In the question, select the Fullscreen icon to expand the HTML editor.

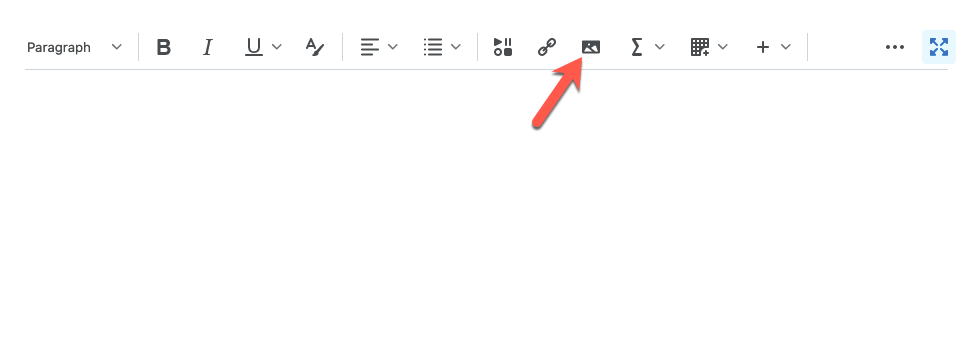
- Select the Insert Image icon.
- Select My Computer.
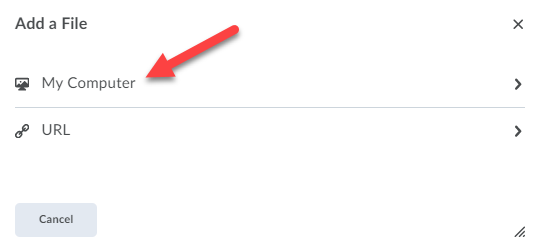
- Select Upload, or drag your file to the box.
- Select Add.
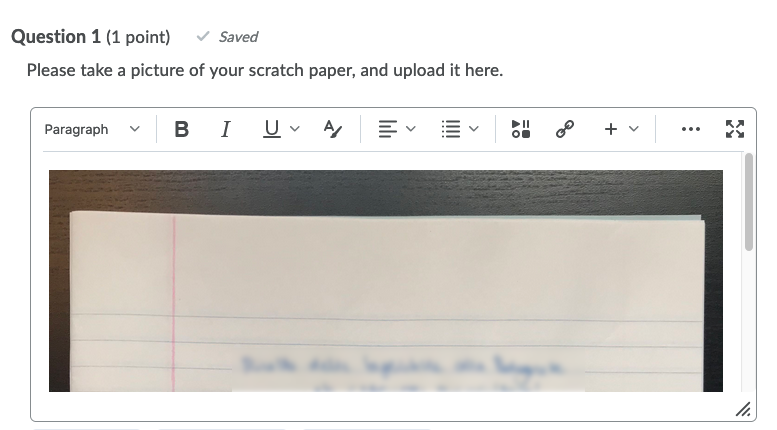
- Provide alternative text (a brief description of the image), then click OK to finish adding the image. Click on the Fullscreen icon to close the expanded view. Your image will show up in the question box.
Method 2: Add a file
- Underneath the question, select the Add a file button.
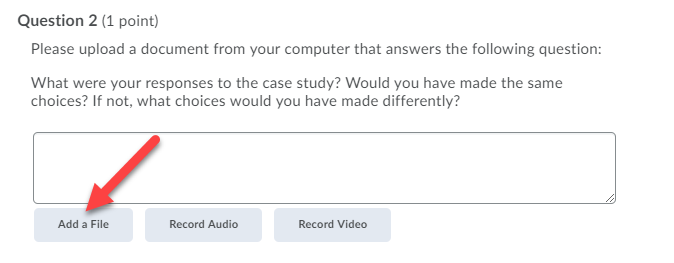
- Select My Computer.
- Select Upload, or drag your file to the box.
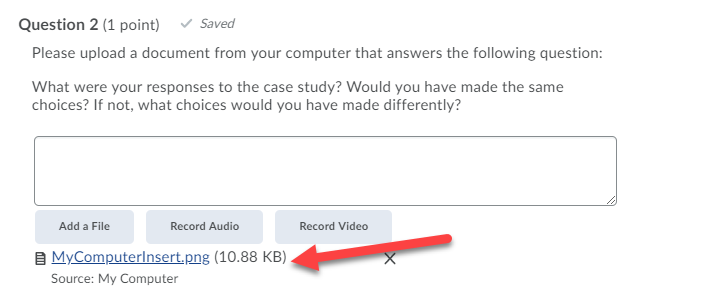
- Select Add. The file will show up as an attachment under the question.
Method 3: Link to a file
If you do not have the options listed above, you may need to attach your file as a link. The simplest way to accomplish this is to save the file to your Google Drive and then add the (shareable) link into the question answer. Make sure you select "Anyone with the link can view" before you copy your link!
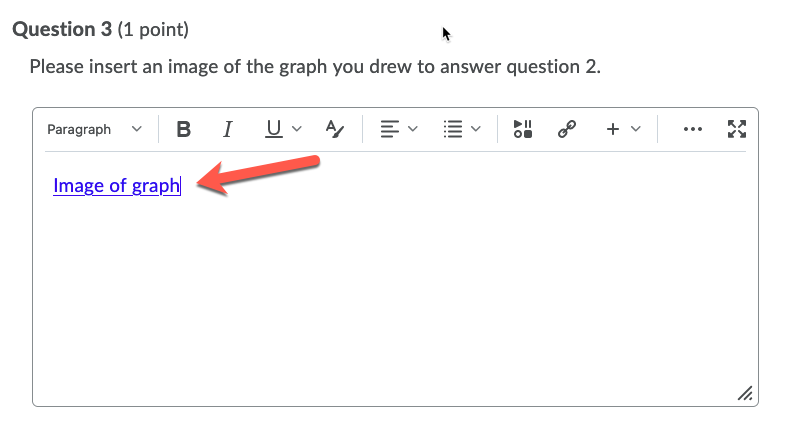
- In the question, select the Insert Quicklink icon.
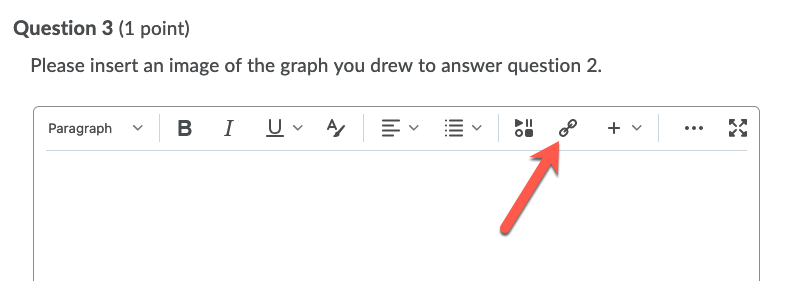
- Select the URL option.
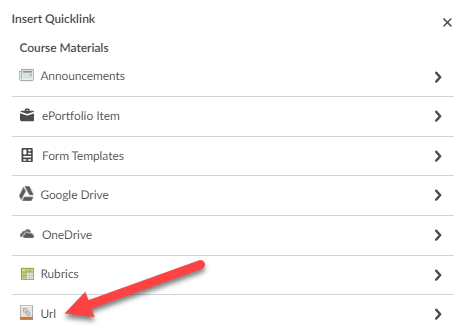
- Under "URL", paste the shareable link from Google Drive.
- Give your link a Title.
- Select Insert.
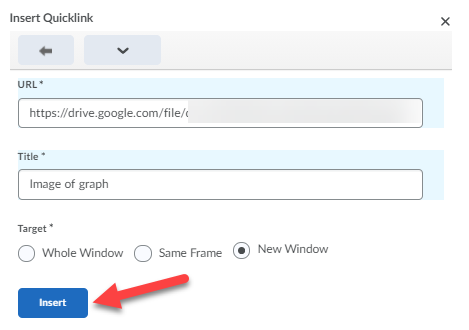
- Your link will show up in the question box with the title you selected.
