1. Create: Upload a file
Use the Upload a File option to add material such as a syllabus to your course.
- In a Module, drag and drop a file from your computer into drop area.
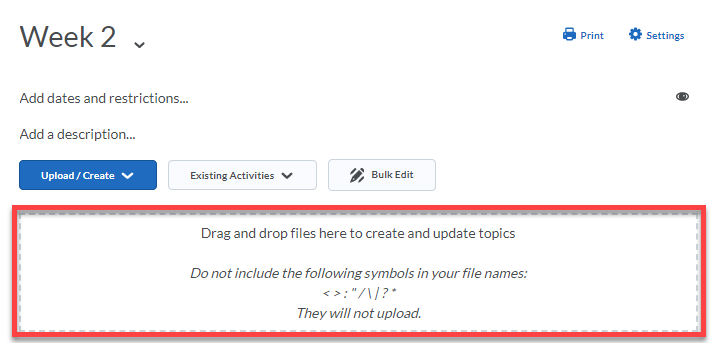
OR
- Click Upload/Create and select Upload files.
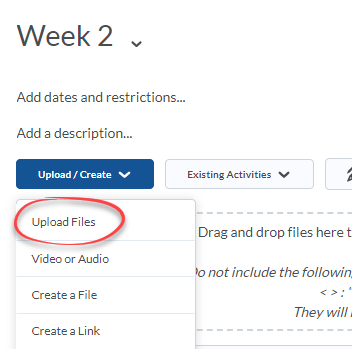
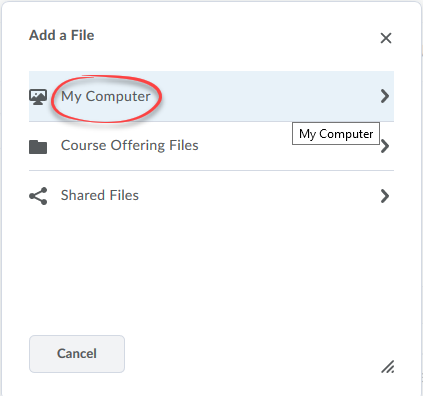
- Select from where you want to upload the file. In most cases it will be a file from My Computer.
- Begin the upload process by either dragging and dropping the file into the drop area or navigate to the file by clicking the Upload button.
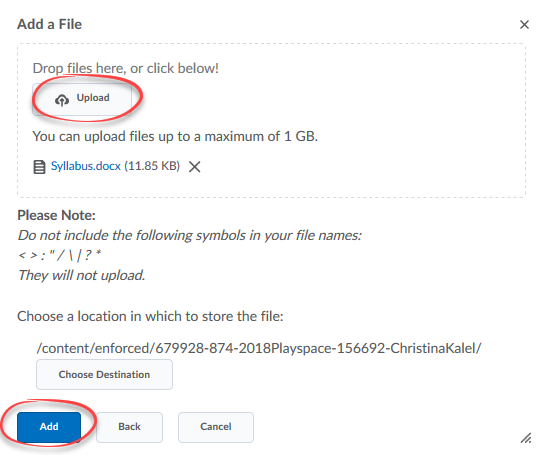
- Once the file is uploaded (complete file name is in the drop area), click Add.
2. Create: Links
Use the Create a Link option to link students directly to an external web site.
- Locate the URL of the web site and copy the whole address including the http://.
- In a Module click Upload/Create.
- Select Create a Link.
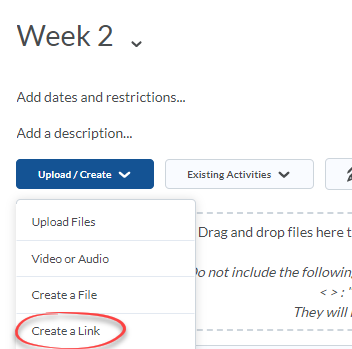
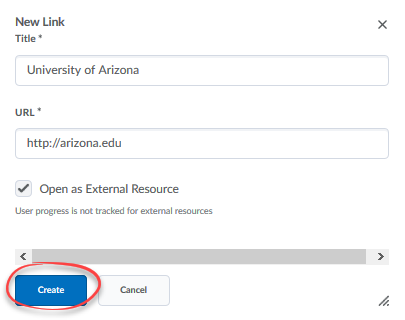
- In Title, enter the text the students will click on to access the link.
- In URL, paste the URL of the site.
- Check the Open as External Resource box (Recommended, many links will not open in D2L).
- Click Create.
3. Create: A file (webpage)
Use the Create a File option to create an HTML web page in Content.
- In a Module, click Upload/Create.
- Select Create a File.
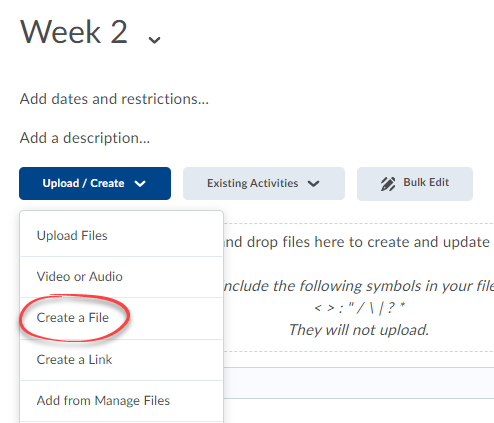
- Enter a title for the page. This is what students will click on to access the page.

- Enter the content you would like on the page. Using the buttons across the top, you can format text, as well as add images and insert links to the page.
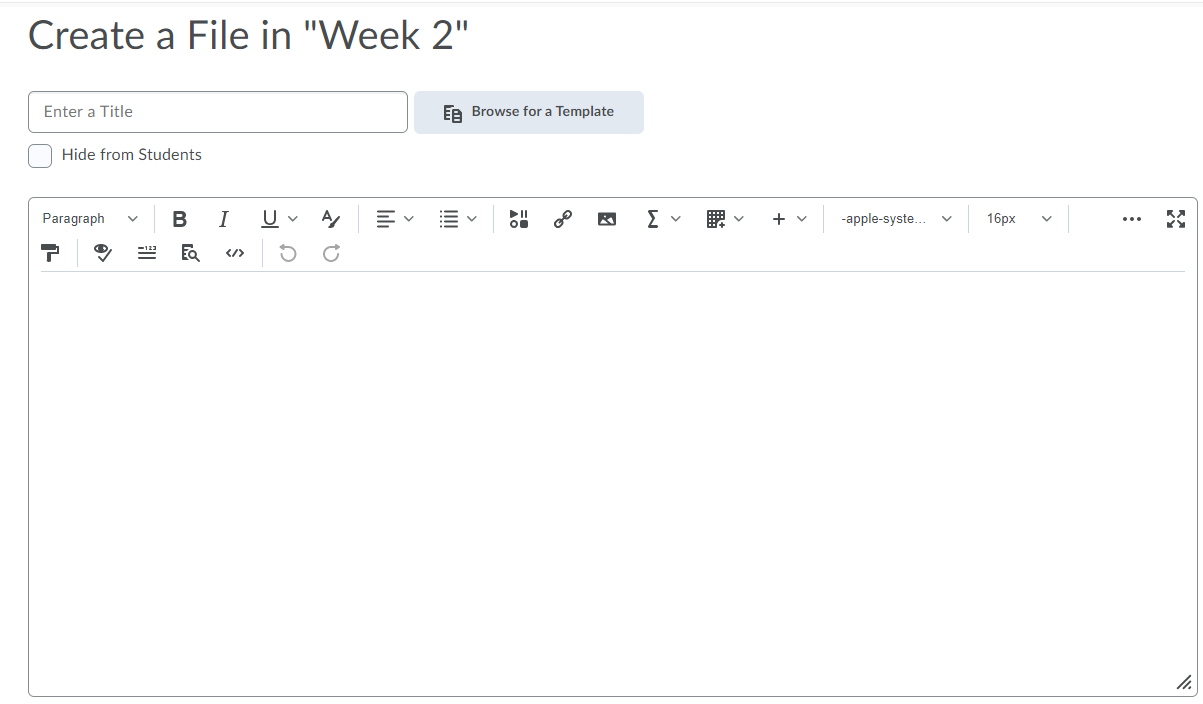
- Check to make sure your page is accessible by using the built-in Accessibility Checker.
- Click Save and Close.

