Audio and video can be embedded in D2L or linked to an outside player such as YouTube.
1. Create: Add video or audio from the web
Use the Video or Audio option to link or embed media (from sources like YouTube, Vimeo, etc.) into your Content.
- Locate the share or embed link of the media you would like to include in Content.
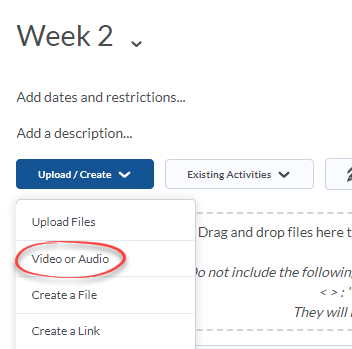
- In a Module click Upload/Create.
- Select Video or Audio.
- Paste the embed code or link into the window.
- Add a Title. This is what students will click on to play the video.
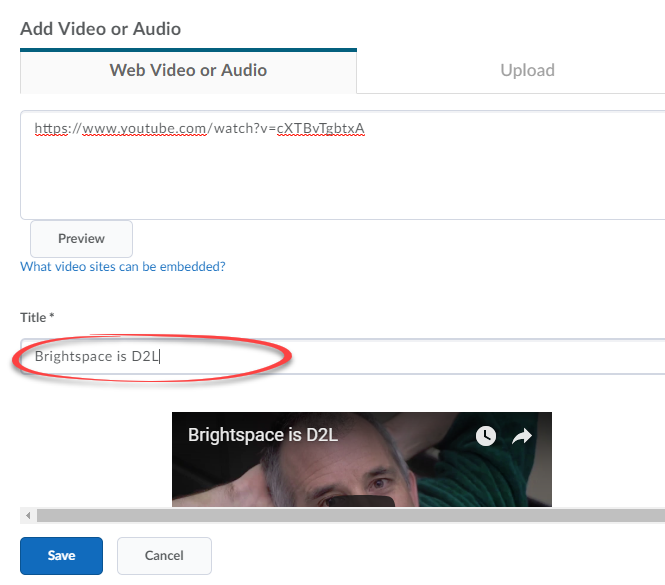
- Click Save.
2. Upload: Audio and video
Access and edit audio and video with multi-bitrate streaming and search functionality.
Note: Multi-bitrate streaming allows high-definition videos to be played at standard definition to reduce the bandwidth necessary for users to watch videos. The new search functionality allows users to locate key words in video captions and quickly navigate to those sections. D2L no longer transcodes MP3 and MP4 files. Please see Section 3 for directions on how to do this manually.
To use the new Audio-Video Editor:
- Access the Audio-Video Editor
- Select HD or SD Video Quality
- Search for Keywords
To access the Audio-Video Editor:
Note: The new Audio-Video Player can only be accessed via Content>Upload/Create>Video or Audio. You will only be able to use the advanced features with video you have uploaded with this player, not retroactively.
- In Content, click Upload/Create and select Video or Audio.
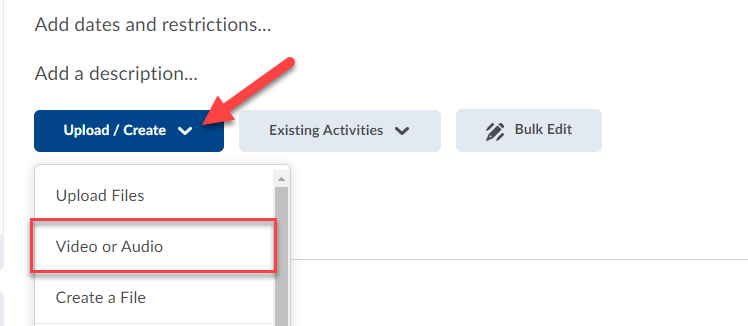
- In the Add Video or Audio window, select the Upload tab.

- Browse for your file, or drag your video file into the upload space.
- The upload process begins.
Note: The transcoding process starts when the file reaches 70% upload and may result in a momentary pause.
- When the upload is complete enter a title and select Advanced Editing. If you are returning to a video you have already uploaded, click Edit Video.
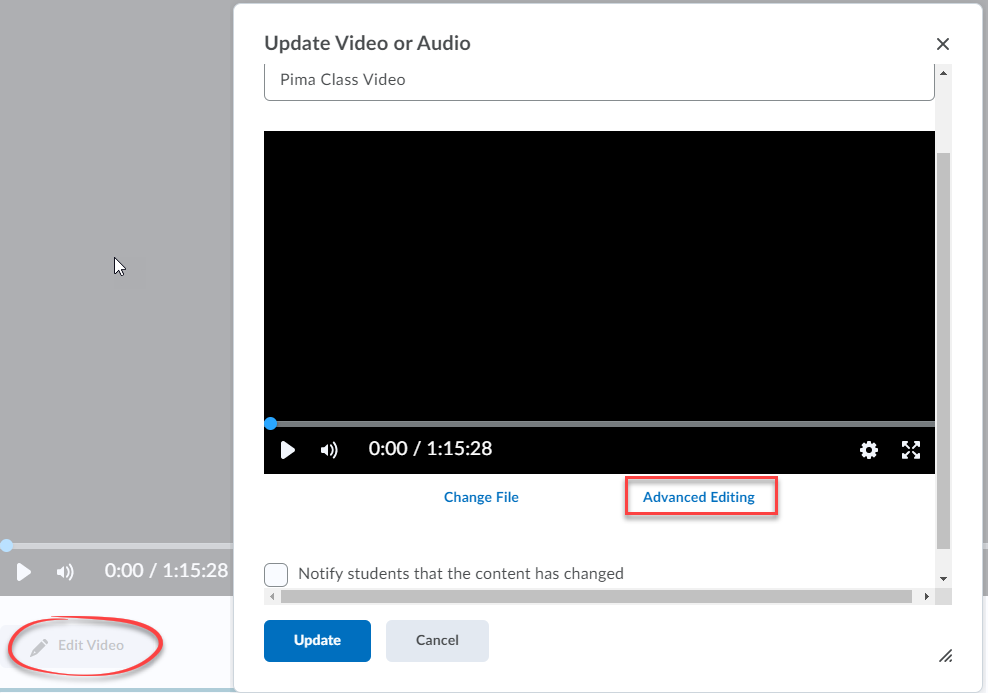
Select HD or SD Video Quality
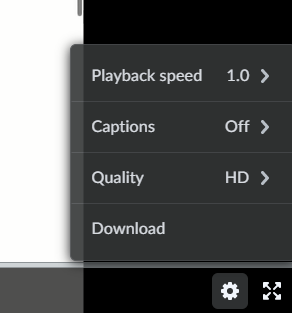
The updated Gear icon in the Audio-Video Player allows users to change the video quality settings for high-definition (HD) files. Viewing in standard definition (SD) assists with playback in situations with a slow or unstable network.
Search for Keywords
The search field allows users to search for a keyword in a video caption track and see those locations reflected as stars on the timeline. A caption track must be present for the video and the user must have Captions turned on to use the Search option.

For additional information on the Audio-Video Player and Editor, visit the Evolving the Audio-Video Experience Community blog post
3. Edit: Manual transcoding option
D2L no longer transcodes (converts) MP3 and MP4 files, since browsers can play those formats. Instead, you will have the option to manually transcode these files to reduce the file size and enable multi-bitrate streaming to make your videos accessible to more students.
To manually transcode your videos:
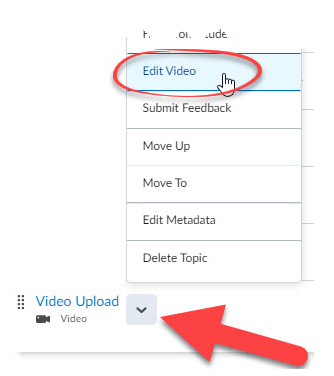
- Open the Actions menu (via the down-caret next to the topic name) and select Edit Video.
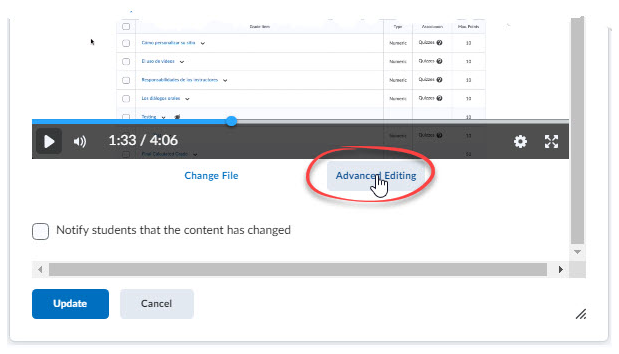
- Select Advanced Editing.
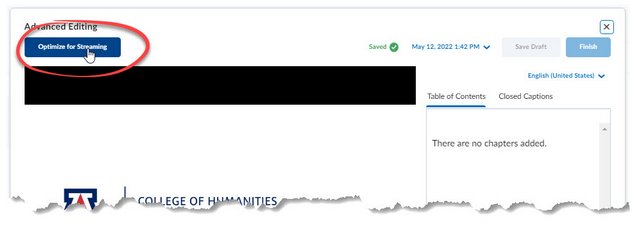
- Click Optimize for Streaming.
4. Edit: Uploaded audio and video
Use the new Audio-Video Editor to edit video timelines, create chapters, and add video captions.
Edit Timelines
- Use the Seek (arrow), Mark (line), and Cut (scissor) icons to make cuts from the timeline of the original upload/recording.

- It is also possible to expand the timeline by clicking and dragging on the timeline to make more precise edits. Click the small seek rectangle below the timeline and pull downward. The cut section between the mark lines indicates the space that will be cut.

- Make sure to click Finish when you are ready to save your edits.

- Advanced Editor will save your original version and mark the edits. The timeline in Editor will stay the same as the original version, and if you auto-generate captions, they will follow the original version in Editor. This all changes in Player where you only see the edited, saved version and the captions match. To undo your edits, remove the marks and your version will revert to the original.

Add Captions
Note: Always check auto-generated captions to ensure their accuracy.
On the Closed Captions tab, use the Auto-Generate or Upload options to add captions. If you select Auto-Generate, you will see the following message:
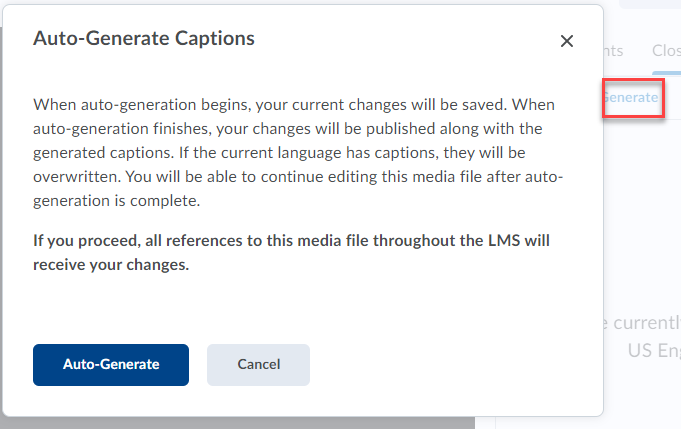
Note: Be prepared for the saving process to take some time.
In order to set the captions to "on" in the Player, you need to first select the language:
Add Chapters
On the Table of Contents tab, add chapter titles and set their locations.
- Enter a Chapter title (by the + sign above the timeline to the right of the video screen.) Don't hit return until you are ready to add it.
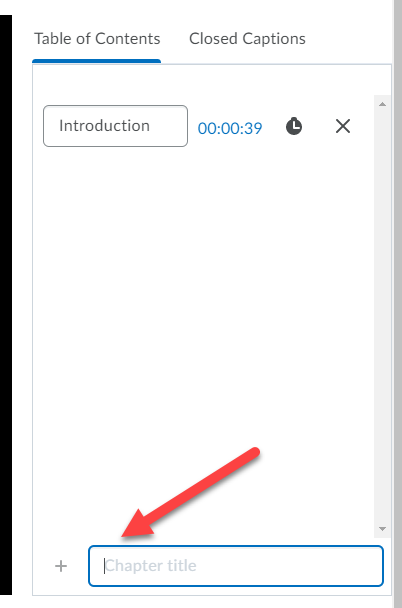
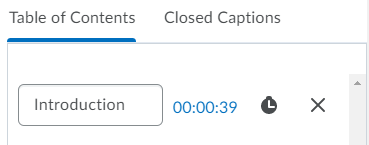
- Play the video. When you arrive at the precise second in which you would like to insert the chapter title, either hit return or click the plus sign next to the chapter title box. The chapter title will appear at the top of the box with the correct time stamp next to it.
Access Previous Versions
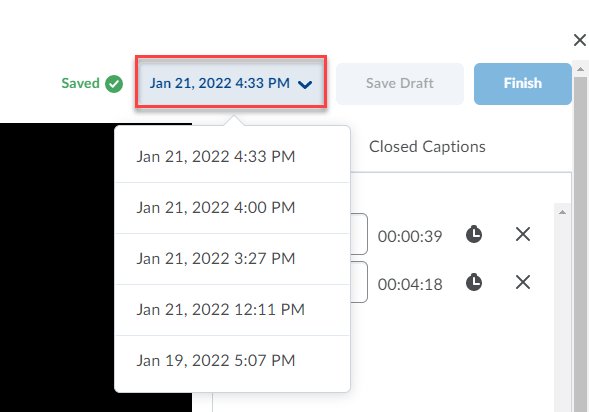
After changes have been saved, the date indicator allows users to open a menu and select from previous versions.

5. Create: Insert media from the web into a webpage
Embed a video in a web page.
- Locate and copy the embed code for the video (instructions to find an embed code for a youtube video)
- Create a webpage (instructions to create a web page) OR edit an existing webpage.
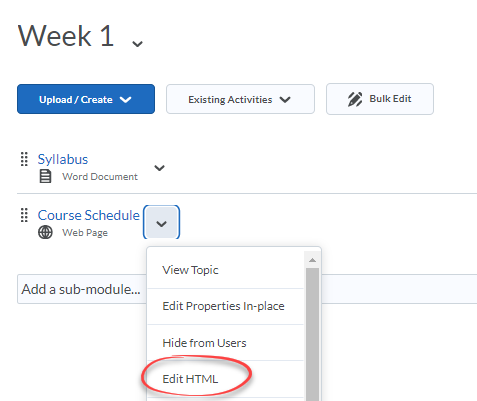
- Click on the arrow to the right of the HTML page title.
- Select Edit HTML.
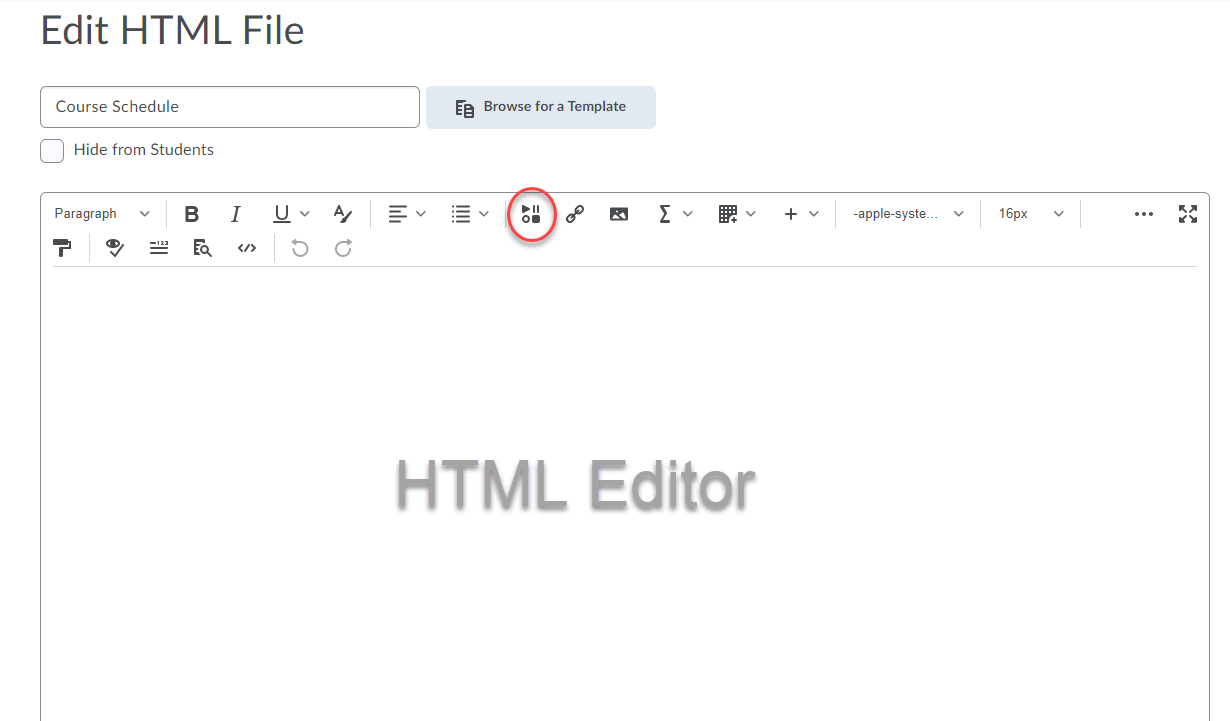
- In the HTML editor click Insert Stuff.
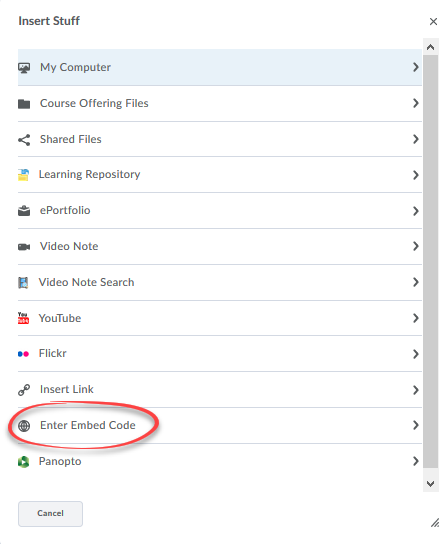
- Click Enter Embed Code. You may need to scroll down to find it.
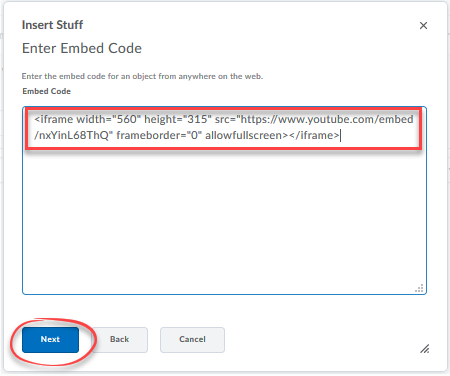
- Paste the embed code in the Embed Code box and click the Next button.
- The next screen shows a preview of the embedded video. Click on the Insert button.
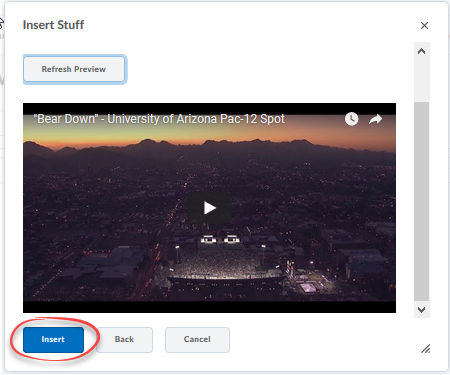
- Click Save and Close.
Note: Most embed codes are not "responsive" meaning when viewed on a small screen such as a phone the video does not resize. If you want your video to work on all devices copy your embed code, go to https://iframely.com/embed and paste it into the box, click the Embed Now button, then copy and paste the resulting code into your post using the above steps.
6. Create: Insert Panopto videos into a webpage
Embed Panopto videos in your course.
- Within a Module, create a new webpage by clicking Upload/Create and selecting Create a File.
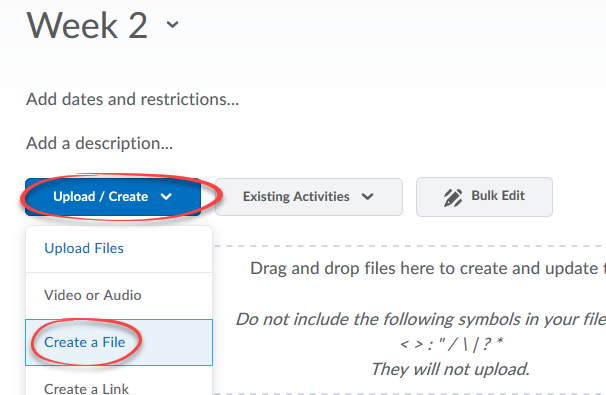
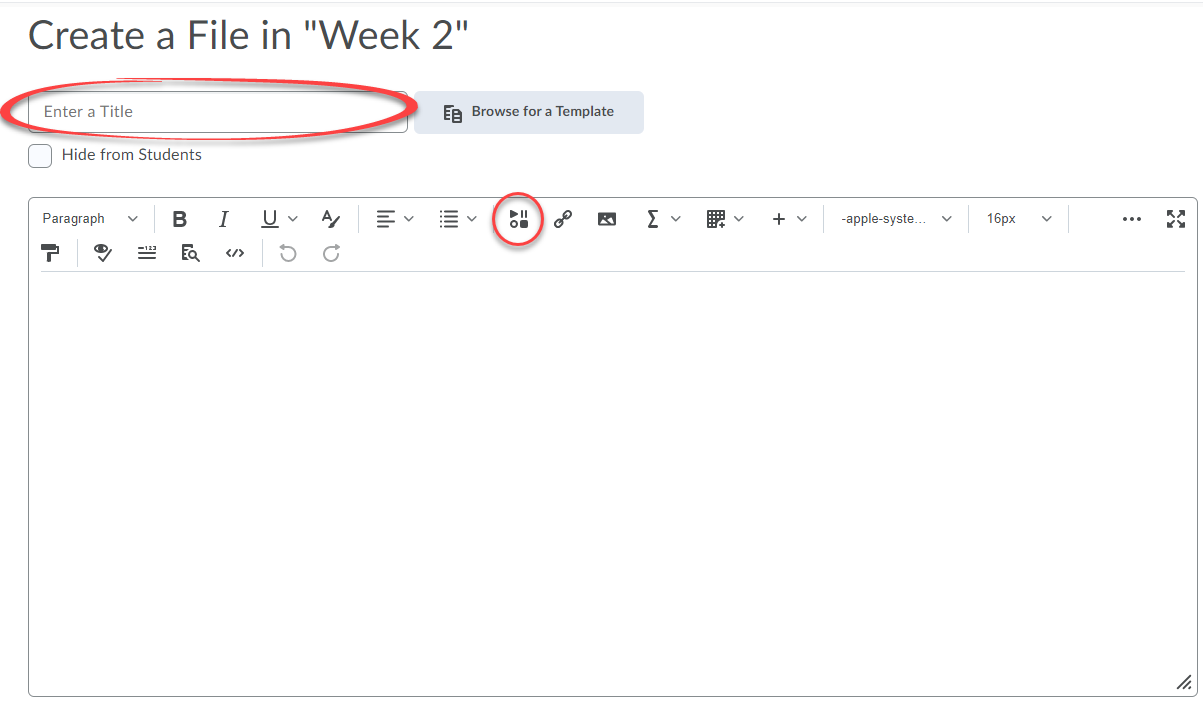
- Enter a title for the page.
- Click Insert Stuff (the icon that is circled).
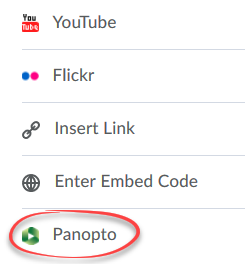
- Select Panopto from the list of options on the left side of the page. You may have to scroll down to the bottom of the list to find the Panopto option.
- Select the Panopto video you would like to embed by clicking the check box to the left of the video.
- Click Insert.
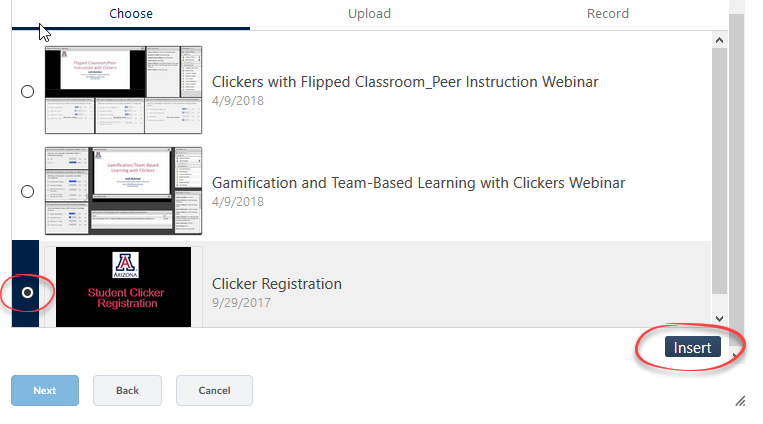
- Click Insert.
- You now see a preview of the embedded video. Click Save and Close.
Note: This is the recommended way to provide access to Panopto videos in your course. This prevents problems with student access. Just pasting a link to the video in your course does not handle authentication and students cannot easily access the video.
7. Create: Insert media from Media Library via Existing Activities
Insert a link to media from Media Library to create a new topic.
To access Media Library through Existing Activities:
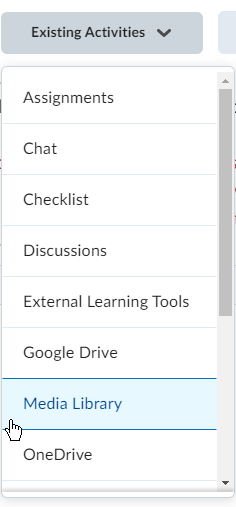
- Within a module, from Existing Activities, choose Media Library.
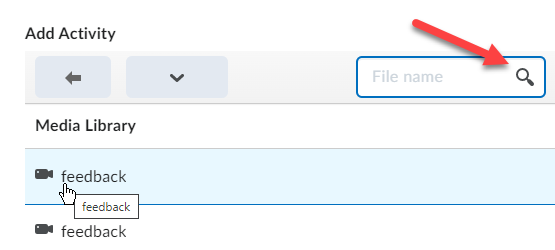
- Select a video or audio file from the Media Library or search via the search box. Filters are not available here.
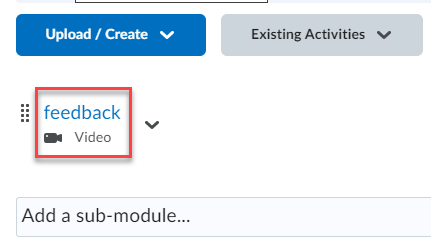
- You will now have the file linked into your module as a topic.
8. Create: Insert media from Media Library via HTML Editor
Insert media from Media Library via the HTML Editor.
Media Library can be accessed via the HTML Editor from two icons: Insert Stuff and Quicklinks. Using Insert Stuff will embed the media into the topic, while using Quicklinks will create a link.
To embed Media Library in a topic through Insert Stuff:
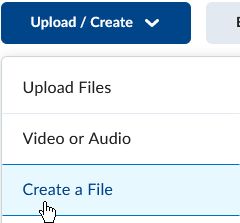
- Within a module, from Upload/Create, choose Create a File.
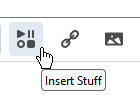
- Select Insert Stuff.
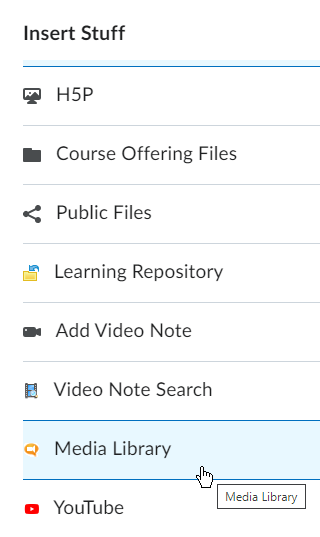
- Select Media Library.
- Type in the name of the recording you want or click Show Search Options to bring up the menu of filters.
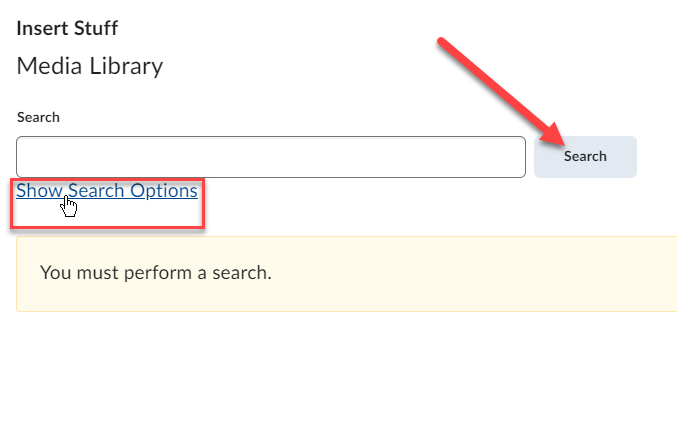
- Set your filters as desired, then click Search. It may take time to load, then you can select from among the search results.
- Select a video or audio file, then click Next.
- You will be able to set the Aspect Ratio if you want. Then click Insert.
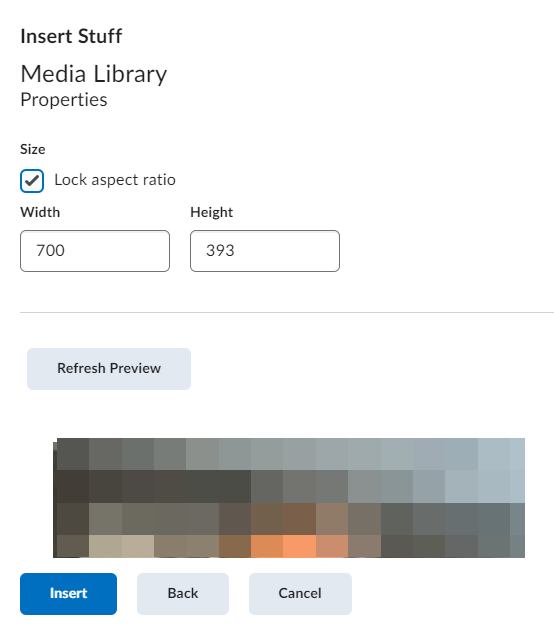
- Save and Close.
- To enable captions, or to view the Transcript, select the gear icon for "settings".
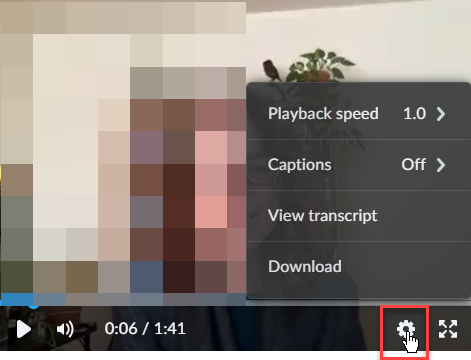
- The option to download the transcript is located at the top center of the video.

9. Create: Insert a Quicklink to media in Media Library
Insert a link to media from Media Library via Quicklink.
To insert a link to Media Library in a topic through Insert Quicklink:
- Within a module, from Upload/Create, choose Create a File.

- Give the topic a title.
- Select Insert Quicklink from the HTML Editor.
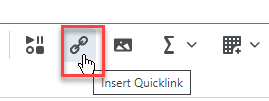
- Select Media Library.

- Set Filters as needed, then select the video or audio you want the link for.
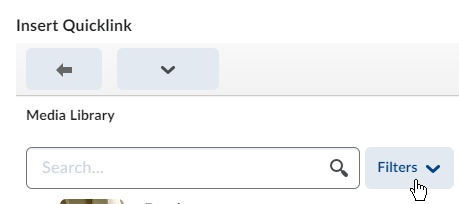
6. Click Insert. The link will now be on the topic webpage. Save and Close when you are done working on the page.

