The HTML editor bar works similarly to word processing programs, except the end result is a webpage rather than a document.
You can access it in Content by selecting Upload/Create and choosing Create a File. You can also access it when adding a description to a module. Learn more about the HTML editor by visiting our HTML editor help page.
Note: HTML editors exist in every tool: Module & Topic descriptions, Discussion Topic descriptions, Quiz descriptions, Quiz questions, Assignment instructions, email body, and so forth.
1. Create: Add media from a variety of sources
Use the Insert Stuff button to embed content, typically a Panopto or other video or audio file.
If you use insert stuff to insert media, it will appear within D2L, rather than link students out to Panopto or a different website.
- Select the Insert Stuff icon.

- Select what you want to insert from the menu. You can choose to insert files from your computer, from course or shared files, or from external sources.
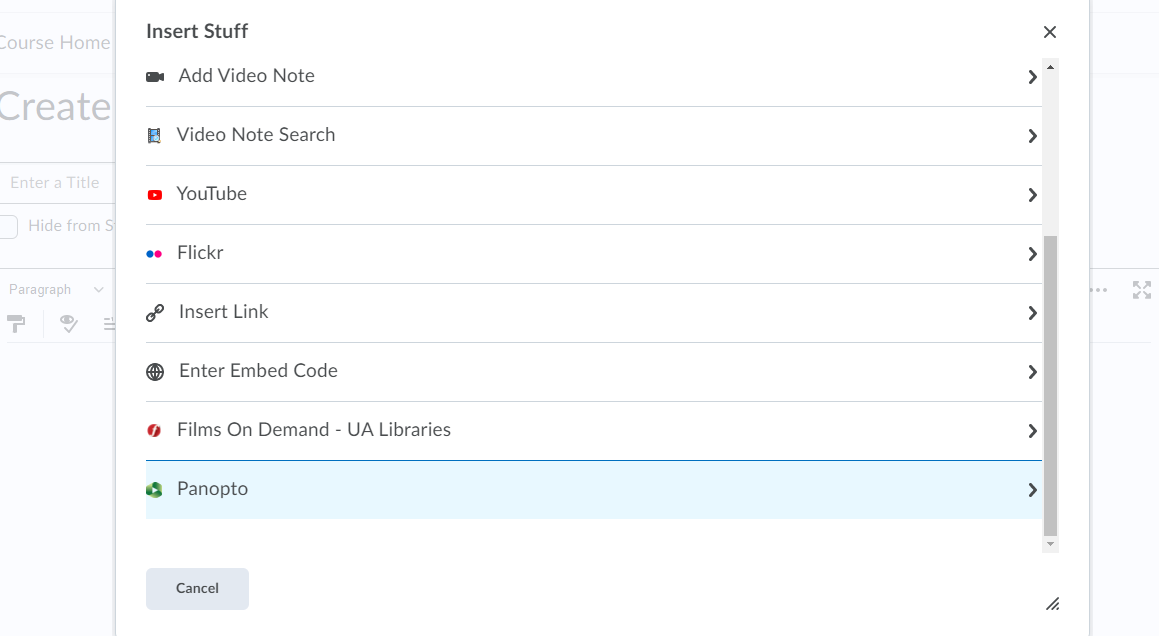
- Follow the directions, and select either Upload (for files from your computer) or Insert (all other sources).
2. Create: Add images
Use the Insert Image tool to insert a picture into the webpage.
- Select the Insert Image button.

- Choose the place where the image is stored. If using images from your computer, click the Upload button or drag the file into the box.
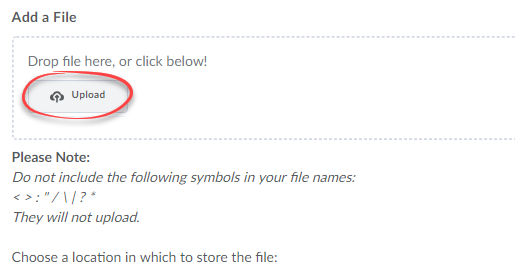
- Select Add.
- Follow the instructions to either provide alternative text for your image or mark it as decorative. Alt text allows participants with visual impairments to navigate your content. Some tips for 'alt text'.
3. Create: Add links
Use the Insert Quicklink button to embed links to course material or external websites.
- Highlight the text, image, or symbol on the page that you want to turn into a link.
- Select the Insert Quicklink icon.

- Click on the item to which you want to link.
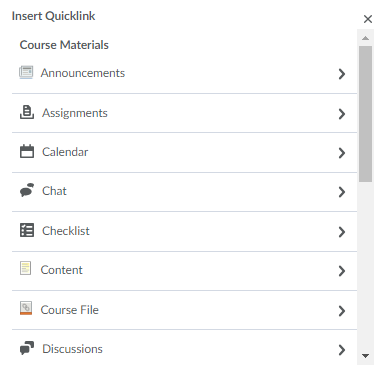
- Follow the prompt specific to the tool which you selected.
- To link to a website:
- In the URL box, paste or type the link.
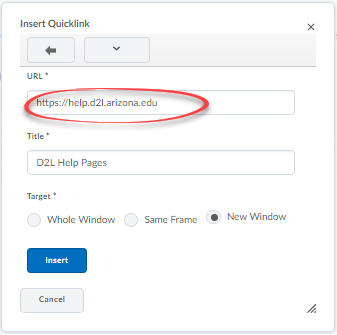
- In the Title box, include a description of the link.
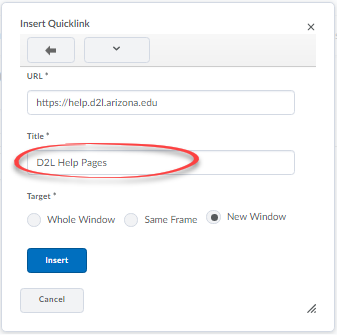
Note: To make your content as accessible as possible, use meaningful text in the title box. Phrases such as "Read More" that are out of context can be ambiguous. For tips on creating meaningful link text,click here to open the WebAIM page on Links and Hypertext in a new window.
- Choose one of the following as your Target. The "target" tells D2L where to open the webpage.
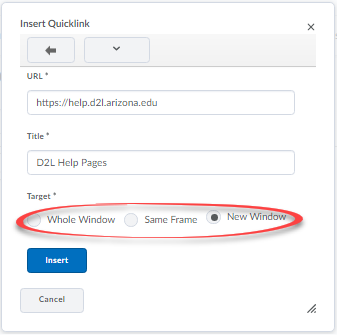
- Whole Window: opens the page full-screen (students will have to use the "back" button to navigate back to D2L).
- Same Frame: opens the page, but it appears within the D2L "window" (students can still use the D2L navigation buttons, but the webpage appears in place of the D2L content).
- New Window: (Recommended) opens the page full-screen, but in a new tab, allowing students to have D2L and the new page open at the same time.
- In the URL box, paste or type the link.
- Click the Insert button.
- Depending on the tool you are using, click Publish (or Save) to make the content available to learners, or Save as Draft to save your unpublished work.
To preview, edit, or break the link while in HTML Editor, click on the link to pull up the quick edit menu.
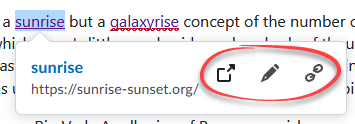
Note: While in HTML Editor, if you highlight text, you will also be presented with a shortcut for embedding links to external websites. Be aware that the shortcut link (image below) will not open into a new window.

4. Copy: Copy text from Microsoft Word
Copy/Paste text from Word files into a webpage.
- Highlight the text you want to copy and select Ctrl-C (Command-C on a Mac) to copy.
- In the HTML Editor, select the place where you want to paste the text. Select Ctrl-V or Command-V to paste it in.
- Select Remove Formatting.
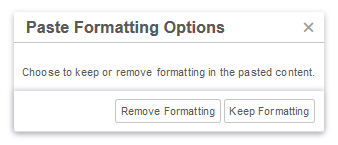
Note: To understand more about issues with styles and formats when copying, including why we highly recommend to select Remove Formatting, check out this blog post by technical writer Shauna Kelly.

