1. Create: Add existing content
Add items from Manage Files.
Note: D2L stores all files in a course in a virtual "file cabinet" called Manage Files that is located under Course Admin on the navbar. This means that removing a file from a module does not remove it from the course because it remains in Manage Files unless you deliberately remove it from there.
When you upload a file from your computer to create a topic in Content, that file is uploaded to your D2L course files and a link is placed in Content to that file. Likewise, when you create a file (webpage) the page is stored in course files and a link to that file is created in Content. These files are stored in an area called Manage Files. You can create links in different parts of your Content to the same file in Manage Files, so you don't need to upload the same file multiple times.
- In a module in Content, click on the Upload/Create button.
- Select Add from Manage Files.
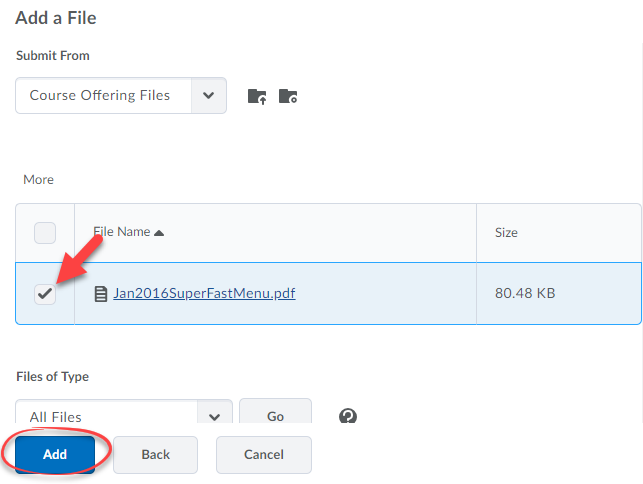
- On the next screen you will see a file structure for the course. For most people it is just a long list of files. Scroll to the file you want to add to Content and click the checkbox to the left of the file name.
- Click the Add button.
2. Create: Add course activities
You can add activities (discussions, quizzes, etc) you've already created into your Content modules.
You can also link to External Learning Tools such as Panopto or Zoom to make them easy for students to access.
- In a module in Content, click on the Existing Activities button.
- Select the type of activity or tool you'd like to link to.
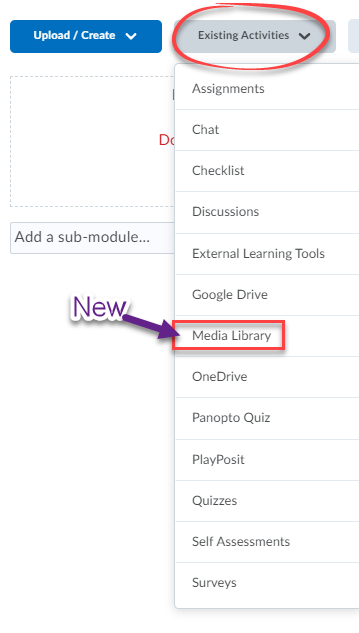
- Select the specific activity or tool to create the link in Content.
3. Add: Connect multiple topics to one file
You can connect different topics in Content to one file located in Manage Files.
This allows you to repeat a topic in multiple modules.
Start by uploading a new file into Manage Files. You can use files that you have already imported via Content, but it is a good organizational practice to start by uploading into Manage Files and maintain your virtual filing system.
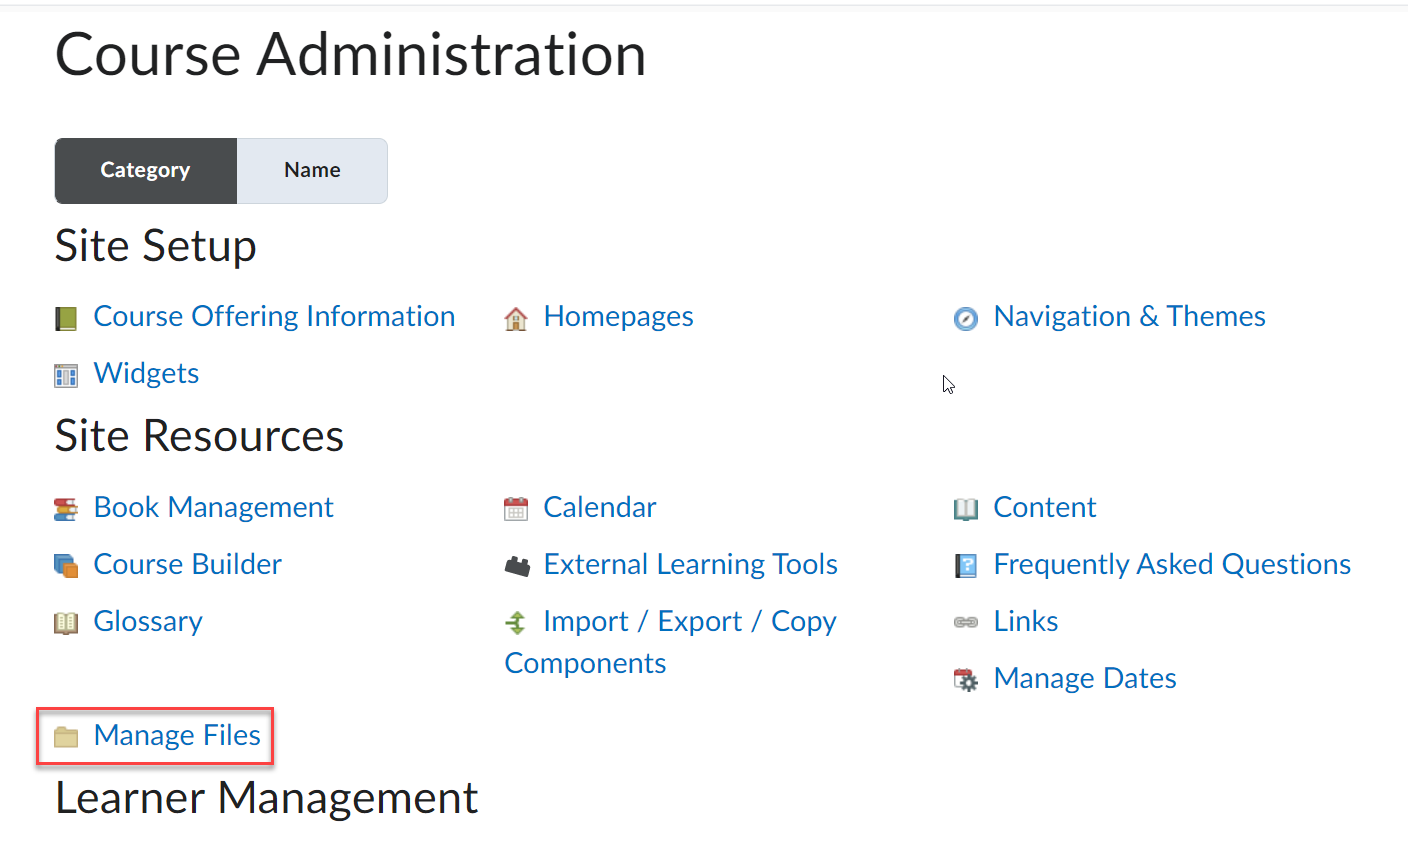
- Go to Course Admin --> Manage Files.
- Click Upload, select a document to upload, and Save.
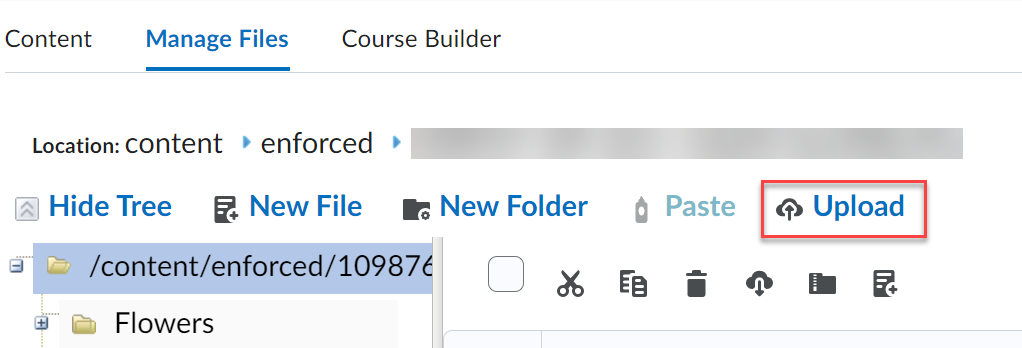
- Scroll down to the file that you have uploaded (this is the same process with a New File that you have created), click the down caret next to it, and select Add Content Topic.

- A menu offers the opportunity to Add Multiple Topics. You can place your file as a topic into one of your existing modules or add a new module. Repeat this process as often as you wish.
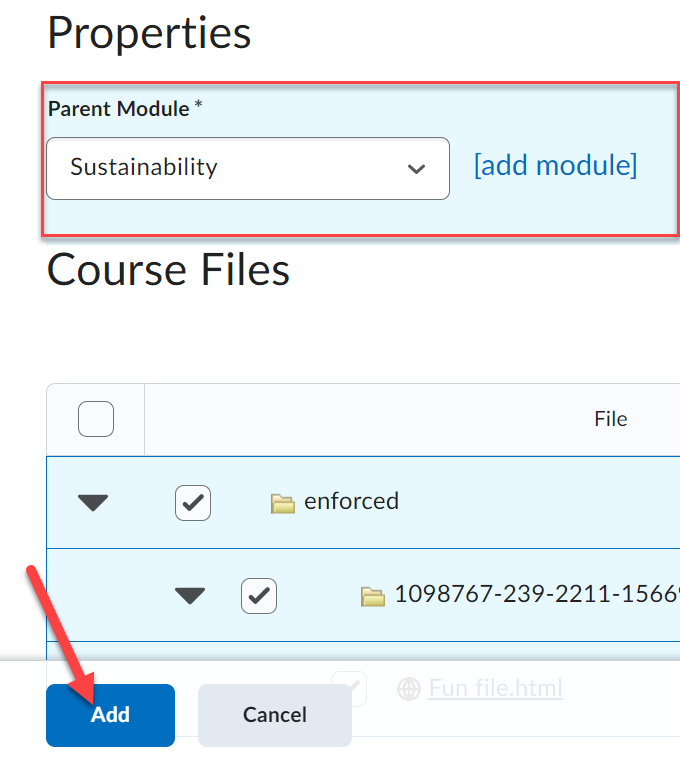
- You can also use the process in this Help Page Section #1 to add any file in Manage Files as a topic to any module.
4. Edit: Change or disconnect a file from its topic
You can change the file connected to a topic or disconnect it altogether.
- Go to a topic that you would like to change. Click the down caret next to it, and select Change File.
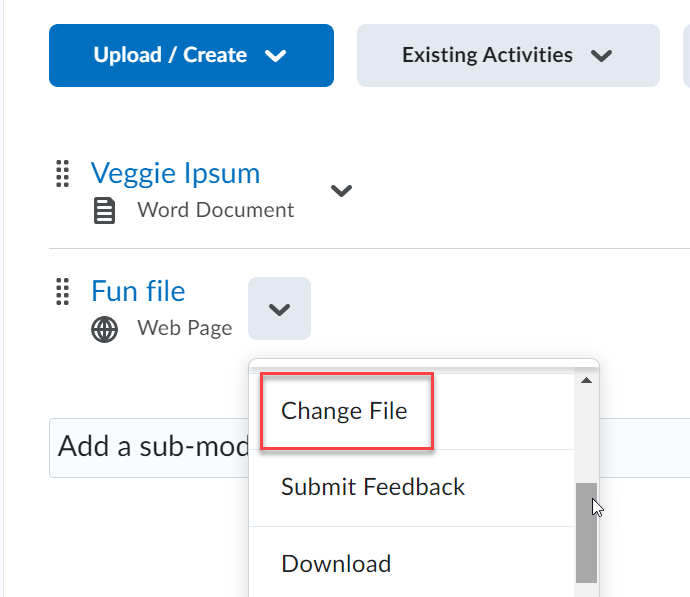
- You can choose to Create, Record, Upload or Choose an existing file.
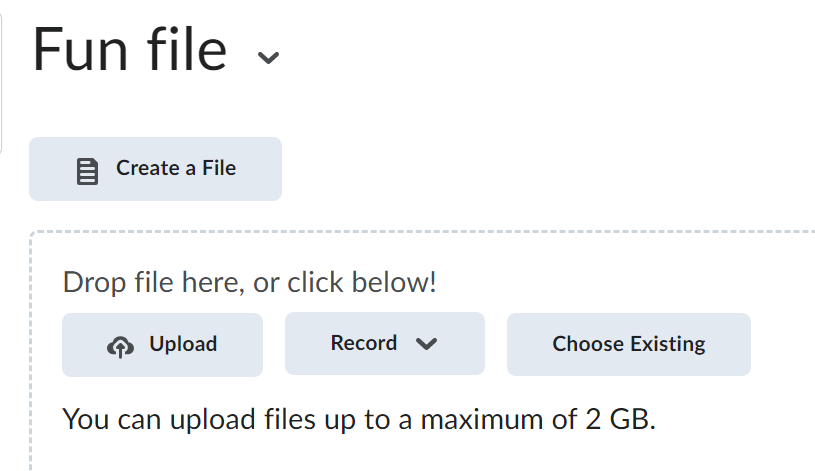
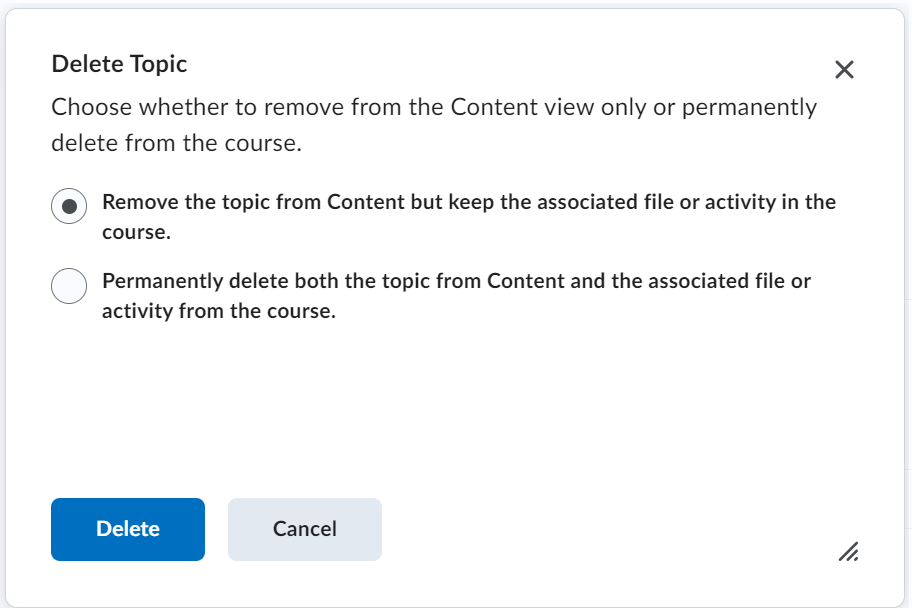
- If you want to disconnect the topic from the file, you can delete the topic by going to the down caret and selecting Delete.
- You will be given the choice whether to remove the file just from the module in Content, or whether to entirely remove it from the course by deleting it from Manage Files.
