1. Locate: Grade Settings
Locate Settings to configure global settings for the gradebook.
- Select Grades from the Navbar.

- Select Settings (top right, blue wheel icon).
 Continue to the next instruction on this page to configure global settings for your gradebook.
2. Edit: Determine Grading System
Decide whether the Gradebook will use a Points or Weighted Grading System.
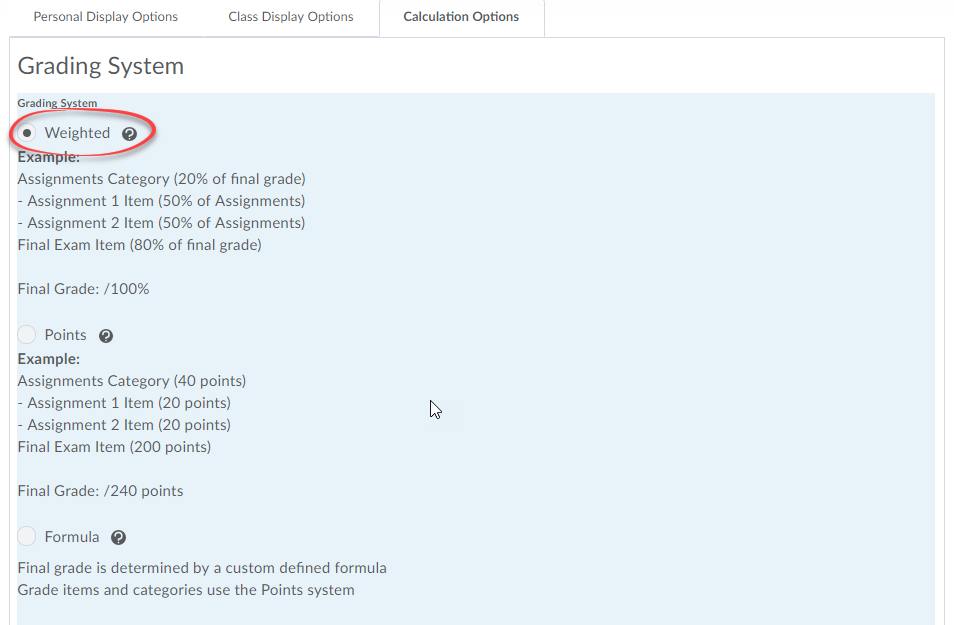
The default Grading System in D2L is Points; however, a Weighted Grading System is also available. Weighted grades allow you to use both points (for grading) and percentages (for assigning weight to categories). For example, you can have Quizzes Category that totals to 30% of the Final Grade.
To switch to a Weighted Grading System:
- Select Grades.
- Select Settings.
- Select the Calculation Options tab.
- Select Weighted under Grading System.

- Select the Save button.
- Select Yes.
- Select Yes to confirm the change.
- Select Close.
Note: You can change the Grading System at any point in the semester - even if grades have already been entered.
3. Determine: Grade Scheme Symbol Visibility
Verify that the Grade scheme symbol option is selected.
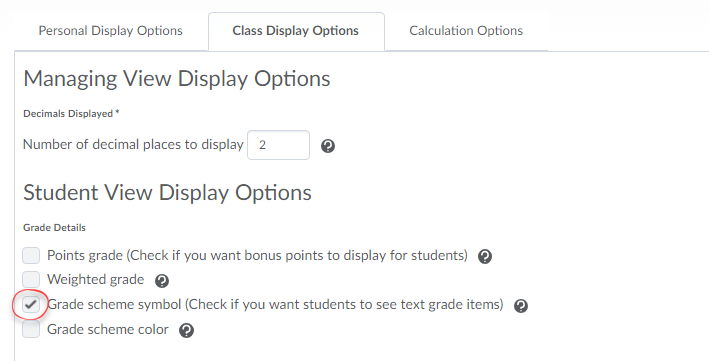
The Grade scheme symbol option, on the Class Display Options tab, must be selected when exporting grades to UAccess. It must also be selected when using text grade items to leave comments.
- Select Grades.
- Select Settings.
- Select the Class Display Options tab.
- Check the box next to Grade scheme symbol under Student View Display Options.

- Select Save.
4. Determine: How Ungraded Items are Calculated
Choose how D2L calculates the Final Grade.
D2L can either Drop ungraded items from the Final Grade Calculation or Treat ungraded items as 0. Drop ungraded items is the default.
Note: Changing the Grade Calculation setting to Treat ungraded items as 0, is a two-day process. Change the setting, wait 24 hrs (or next day), and verify that Treat ungraded items as 0 remains selected. If the setting has reverted to Drop ungraded items, change it one additional time. The setting will now "stick."
To verify or change the setting:
- Select Grades.
- Select Settings (top right, blue wheel icon).
- Select the Calculation Options tab.
- Scroll down to the Grade Calculations section select either:

- Drop ungraded items:
- What it means: Items are not calculated into the Final Grade until a grade (including a zero) is entered. Students start with a 100% in the gradebook and work down.
- Benefit: Only activities that have been turned in and assessed are calculated in the Final Grade.
- Drawback: You must enter zeros anytime a student does not submit their work. Also, when Drop ungraded items is selected (and if you have released the Calculated Grade [section 5 below]), students may see an inaccurate snapshot of their performance - especially if more heavily-weighted activities occur later in the semester.
- Treat ungraded items as 0:
- What it means: Students receive zeros for all assignments until the zero is replaced with a grade. Students start with 0% in the gradebook and work up.
- Benefit: You do not have to enter zeros anytime a student does not submit their work. Also, when Treat ungraded items as 0 is selected (and if you have released the Calculated Grade [section 5 below]), students know exactly what their grade is at any point in time if they were to stop doing work.
- Drawback: If you release the Calculated Grade, students appear to fail the course until they have completed a significant number of activities.
- Drop ungraded items:
- Select Save.
- Select Close.
Note: If your course site combines undergraduate and graduate sections, and if those students have different required activities - you can use the Drop ungraded items setting as an alternative to manually exempting students from grade items.
5. Visibility: Release Grade to Students
Enable students to see their current, cumulative grade.
By default, students cannot see their current, cumulative grade (Final Calculated Grade). Instructors must release this grade item if they want students to see a current grade. Releasing the grade item is a two-part process.
Note: The phrase, Final Calculated Grade, is misleading. It is not a final grade; but rather, it is the D2L term for students' current, cumulative grade.
Part I, Confirm which Final Grade is to be Released:
- Select Grades.
- Select Settings.
- Select the Calculation Options tab.
- Scroll down to the Final Grade Released section, select Final Calculated Grade.

Note: The Final Calculated Grade is typically released during the semester to show students' current, cumulative grade. The Adjusted Final Grade is typically released at the end of the semester when rounding or curving has been applied.
- Select Save.
- Select Close.
Part II, Release the Final Grade to students:
- Once you verify which Final Grade is to be released, select Grades from the Navbar.
- Verify you are on the Manage Grades page.
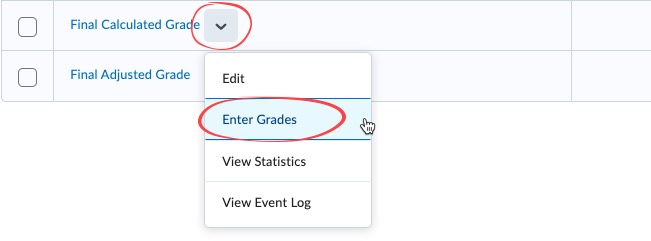
- Scroll to the bottom of the page and locate the Final Calculated Grade or Final Adjusted Grade (depending on settings in Part 1).
- Select the down caret to the right of the item, select Enter Grades.

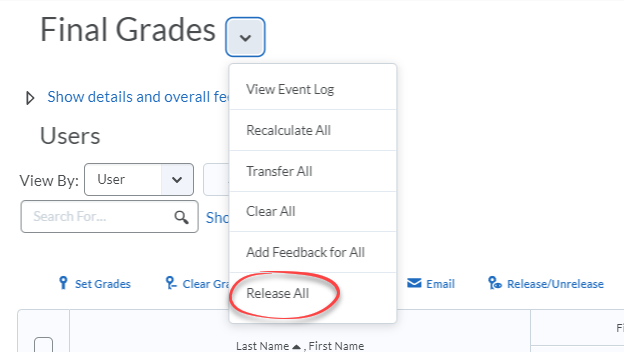
- Select the down caret to the right of Final Grades (top left) and select Release All.

- Select Save and Close.
Note: The Final Grade Release icon (eyeball) displays in the Final Calculated Grade column when released. Alternatively, the Final Grade Not Released icon (eyeball with line through it) displays at all other times.

