Note: The default Grade Calculations setting is set to Drop ungraded items. If you would like all ungraded items to automatically receive zeros, you must change the setting to Treat Ungraded Items as Zero (see, Determine: How Ungraded Items are Calculated).
1. Verify: Grade Scheme Symbol is enabled
To import grades into UAccess, the Grade Scheme Symbol in D2L must be enabled.
To verify this setting:
- Select the Settings link in the top right corner of the Grades tool.

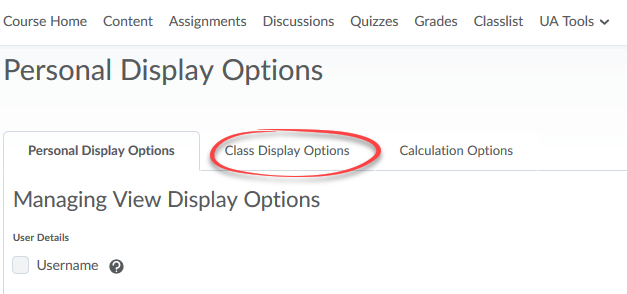
- Select the Class Display Options tab.
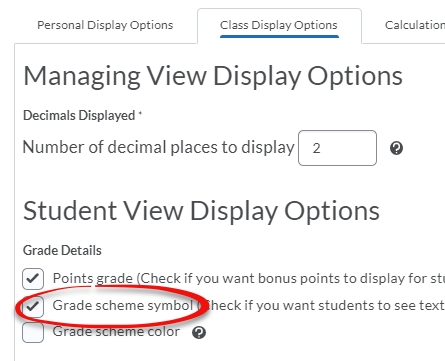
- Make sure the Grade scheme symbol option is checked.
- Select Save.
2. Verify: How Ungraded Items are Calculated
Choose how D2L calculates the Final Grade. Double-check that the correct setting is selected.
D2L can either Drop ungraded items from the Final Grade Calculation or Treat ungraded items as 0. Drop ungraded items is the default setting.
Note: Changing the Grade Calculation setting to Treat ungraded items as 0, is a two-day process. Change the setting, wait 24 hrs (or next day), and verify that Treat ungraded items as 0 remains selected. If the setting has reverted to Drop ungraded items, change it one additional time. The setting will now "stick."
To verify or change the setting:
- Select Grades.
- Select Settings (top right, blue wheel icon).
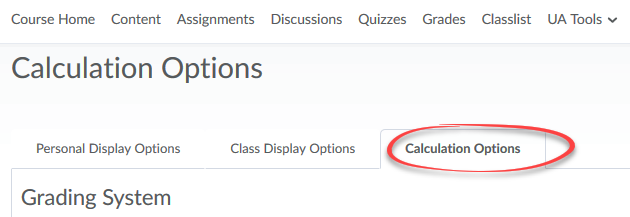
- Select the Calculation Options tab.
- Scroll down to the Grade Calculations section and select either:

- Drop ungraded items:
- What it means: Items are not calculated into the Final Grade until a grade (including a zero) is entered. Students start with a 100% in the Gradebook and work down.
- Benefit: Only activities that have been turned in and assessed are calculated in the Final Grade.
- Drawback: You must enter zeros anytime a student does not submit their work. Also, when Drop ungraded items is selected (and if you have released the Calculated Grade [section 5 below]), students may see an inaccurate snapshot of their performance - especially if more heavily-weighted activities occur later in the semester.
- Treat ungraded items as 0:
- What it means: Students receive zeros for all assignments until the zero is replaced with a grade. Students start with 0% in the gradebook and work up.
- Benefit: You do not have to enter zeros anytime a student does not submit their work. Also, when Treat ungraded items as 0 is selected (and if you have released the Calculated Grade [section 5 below]), students know exactly what their grade is at any point in time if they were to stop doing work.
- Drawback: If you release the Calculated Grade, students appear to fail the course until they have completed a significant number of activities.
- Drop ungraded items:
- Select Save.
- Select Close.
Note: If your course site combines undergraduate and graduate sections, and if those students have different required activities - you can use the Drop ungraded items setting as an alternative to manually exempting students from grade items.
3. Verify: Final Grade (Calculated or Adjusted)
Choose which Final Grade you will post in UAccess.
Are you satisfied with students' Final Calculated Grades, or do you wish to make adjustments? If you would like to make manual adjustments, you must choose to release the Final Adjusted Grade instead of the the Calculated Final Grade.
- Select Grades.
- Select Settings (top right, blue wheel icon).
- Select the Calculations Options tab.
- Under the Final Grade Released area, select which grade you want to send to UAccess:
- Calculated Final Grade (no adjustments to the Final Grade)
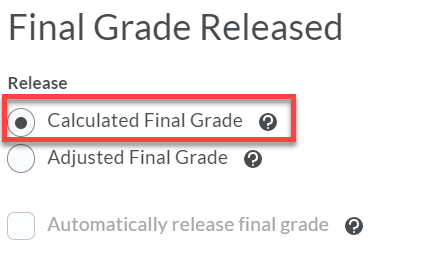
- Adjusted Final Grade (manual adjustments to the Final Grade)
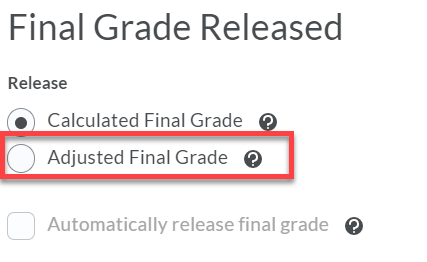
- Calculated Final Grade (no adjustments to the Final Grade)
- Select Save.
4. Transfer: Final Calculated Grade to Final Adjusted Grade (optional)
Move the Final Calculated Grade to the Final Adjusted Grade column.
This is only necessary if you have selected to release the Final Adjusted Grade.
- Select Grades.
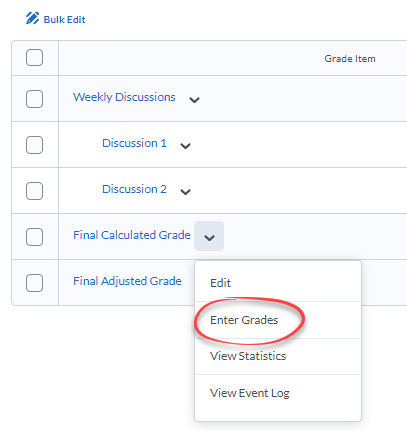
- Select the down caret to the right of Final Calculated Grade.
- Select Enter Grades.
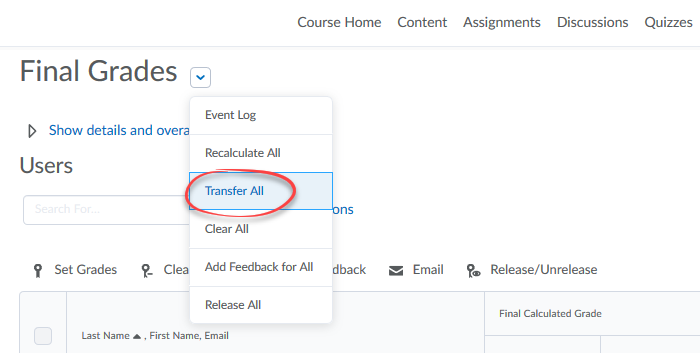
- From the down caret menu to the right of Final Grades, select Transfer All.
- Choose Yes on the confirmation window that opens.
- Make adjustments to students' grades in the Final Adjusted Grade column.
- Save and Close
5. Release: Final Grade to students (optional)
Make Final Grades visible to students in D2L.
Final grades, whether Calculated or Adjusted, are not visible to students unless released by the instructor.
It is not required to release Final Grades. Grades will be imported into UAccess whether they are released to students or not.
- Select Grades.
- Select Settings (top right, blue wheel icon).
- Select the Calculations Options tab.
- In the Final Grades Released section, select Adjusted Final Grade (if you made or plan to make adjustments) or Calculated Final Grade (no adjustments).
- Select Save.
- Select Close.
- From the Manage Grades view, locate Final Calculated Grade and select the down caret (inverted triangle, right).

- Choose Enter Grades.
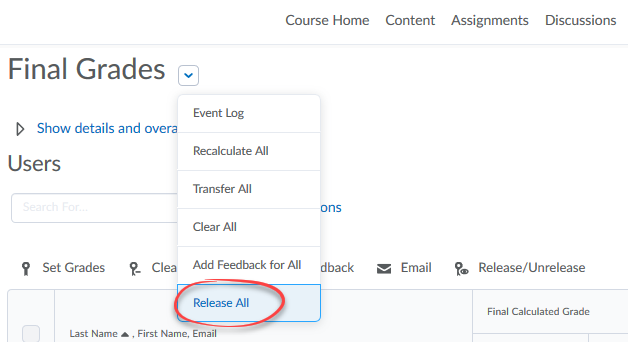
- At the top of the page, select the down caret to the right of the title, Final Grades.
- Select Release All.
- Save and Close.
6. Import: Send Grades from D2L to UAccess
Transfer and post Final Grades from D2L into the UAccess Instructor Center.
Final Grades are only official once they have been imported into UAccess. The import is completed within the Instructor Center portal in UAccess.
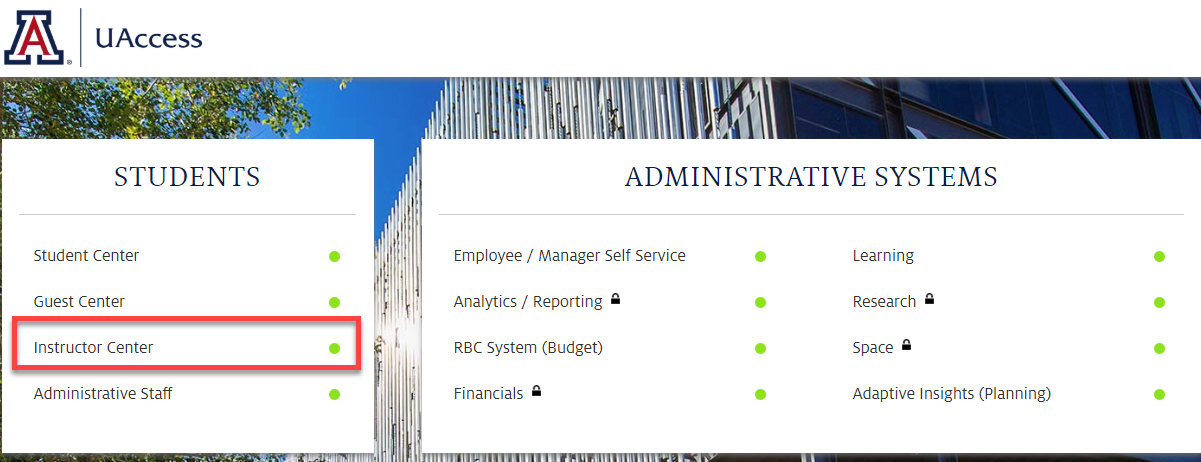
- Go to http://uaccess.arizona.edu/
- Under the Students tile, select Instructor Center.
- Make sure that you are looking at the current term's schedule. If you are not, select the Change Term button to choose the correct term.

- Select the Grade Roster icon to the left of the course/section you'd like to import grades to.
Note: The Registrar determines when the Grade Roster icon will appear. Contact the Registrar's Office if you have questions.

- Select the Import Grades from D2L button.
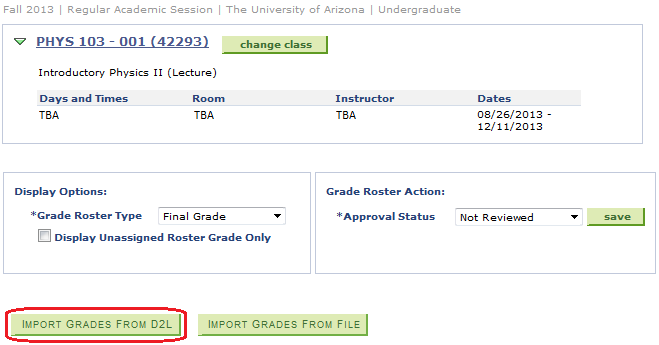
- Review the letter grades that have been imported from your D2L Gradebook Final Grade column. Pay particular attention to any scores that may have been adjusted through a D2L Grade Scheme or by hand.
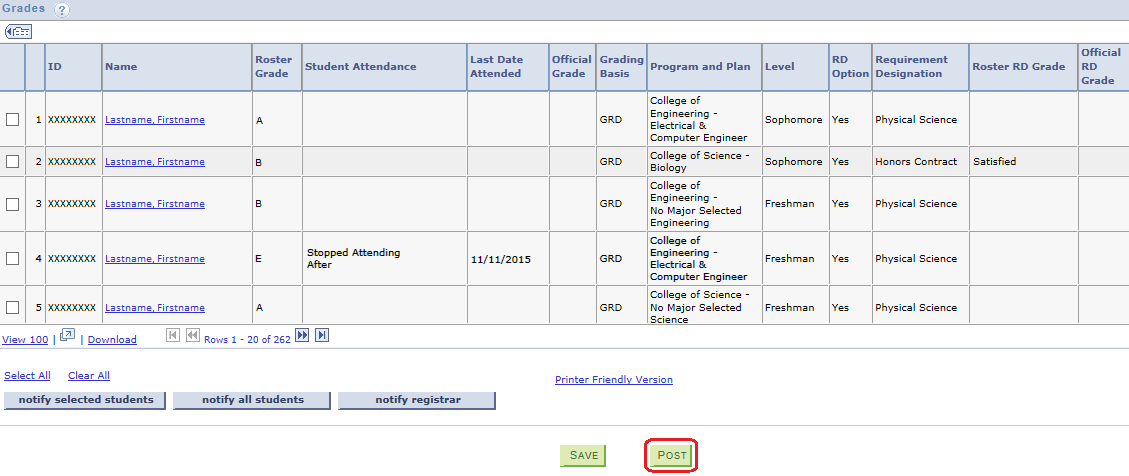
- If there are any students in your course that are receiving a grade of E, you must use the Student Attendance dropdown menu to select how each student attended the course. If you select Stopped Attending After, you must then also enter the Last Date Attended.

- If there are any students in your course that have an Honors Contract, you may be required to enter a requirement designation grade. This is done using the dropdown menu in the Roster RD Grade column. Note that this dropdown menu will not be visible to you until you have entered a grade for that student.
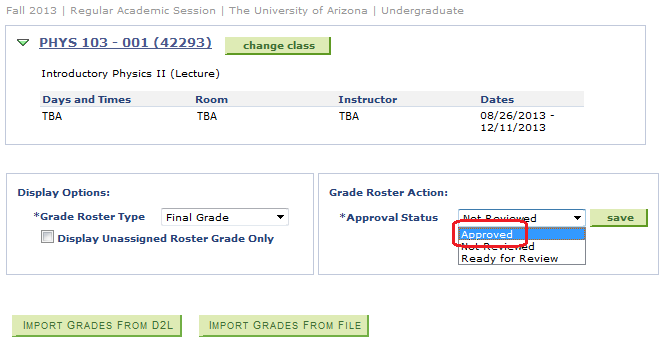
- Once you are satisfied with your Final Grades in Grade Roster, use the Approval Status dropdown menu located near the top of the screen to select Approved.
- After the status has been changed to Approved, a Post button will appear at the bottom of the screen. Select the Post button to submit your students' official grades.
- If you need to change a student's grade after posting official grades, select the Request Grade Change link located just under the Approval Status dropdown menu. Any changes made using this link are immediately visible to students.
NOTE: For more detailed help in posting grades in UAccess, visit the Registrar's help page for the Instructor Center.

