1. Add: Password Protection
Require students to type in a password before they can take a quiz.
-
Click on Quizzes in the navbar.
-
Click on the quiz name.
-
Select the Restrictions tab.

-
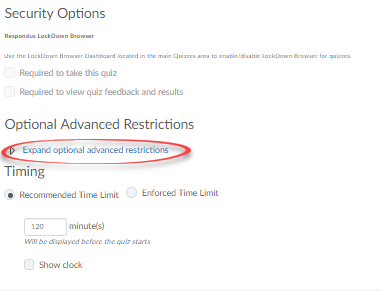
You may need to click Expand optional advance restrictions.
-
Type in the Password you want to use.
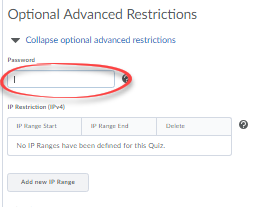
Note: Passwords must contain between 1 and 20 characters, and can include letters, numbers, and special characters. Passwords are case sensitive.
-
Click the Save button to remain in the quiz (or Save and Close to save your changes and exit the quiz).

2. Use: Respondus LockDown Browser
Prevent students from printing, surfing the Internet, taking a screenshot, or opening applications during a quiz.
Important: Instructors are required to take the D2L Respondus LockDown Browser training course in Discover prior to the D2L Consulting Team activating LockDown Browser in your course.
Lockdown browser does not work with Chromebooks, iPhones, Linux, or XBox.
We recommend using the LockDown Browser first on a low stakes quiz to make sure everyone is comfortable with it before taking a high stakes exam.
Important: Students can still use their phones to look up answers and take pictures of the quiz. They can also install applications that still allow them to record their screens. Therefore the LockDown browser works best in a proctored setting and when students use a lab computer.
Note: Students using iPads will have to download the "LockDown Browser" app.
- Select Quizzes from the course navbar.
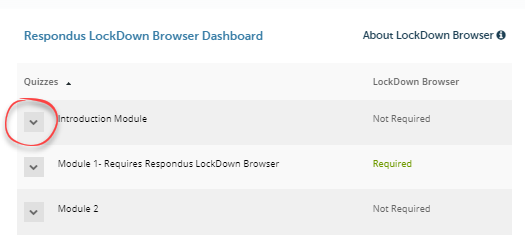
- Click the LockDown Browser tab.

- Click the down-facing triangle next to the Quiz name.
-
Select Settings.

-
Select Require Respondus LockDown Browser for this exam.

-
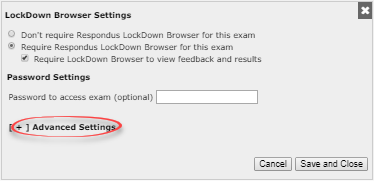
Click Advanced Settings.
-
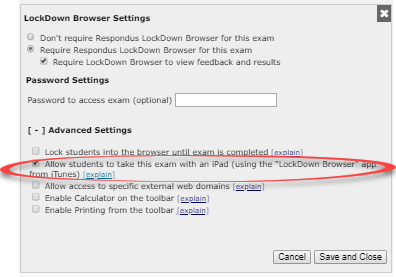
Select Allow students to take this exam with an iPad (and any other settings you want).
-
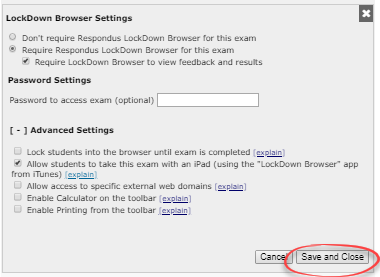
Click Save and Close.
3. Add: IP Restrictions
An IP address is similar to a home address for your computer or other device.
An IP address is comprised of a series of numbers and periods. If you know the IP address for a room's router (what allows you to connect to the Internet using WiFi), you can narrow down where students can take the quiz.
Note: IP addresses on campus are not specific to one room or building, and some spaces may be served by more than one IP address. Thus, you cannot use IP addresses to require students take the quiz from an exact location; they may be down the hall from your classroom, or in a neighboring building and still able to connect to a router within the defined IP address range.
-
Click on Quizzes in the navbar.
-
Click on the quiz name.
-
Select the Restrictions tab.

-
You may need to click Expand optional advance restrictions.

-
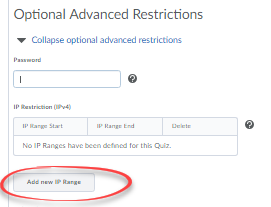
Click the Add new IP Range button.
-
Enter the IP Range Start and End.
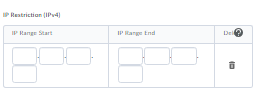
Note: The first box must contain the 3 starting numbers of the IP address. Each additional field is optional depending on how specific you want the IP address restrictions to be.
-
Click the Save button to remain in the quiz (or Save and Close to save your changes and exit the quiz).

4. See: The IP Address Where a Student Took a Quiz
The IP address gives you information about where a student took a quiz.
For example, if the student changes locations during the quiz, the IP address will change also.
Note: If only the last several digits change, the student may have been in a single, large room that uses multiple routers. Because one space can be served by multiple IP addresses and because IP addresses are not specific to one room or building (they cover a much wider territory), it is not possible to know exactly where a student was when they took the quiz.
- Click the Quizzes tab in the course navbar.
- Click the caret to open the quiz's Action menu.

- Select Grade from the menu.
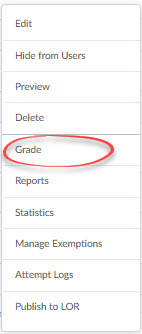
- Click the Attempt # beneath a student's name to open their quiz attempt.

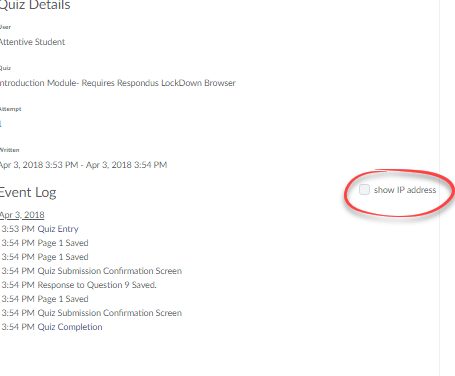
- Click on the Quizzes Event Log.

- Check Show IP Address.
