1. Create: Bonus Question(s)
Students are not penalized if they skip a Bonus question or answer it incorrectly.
Note: Randomly drawn questions from a Question Pool cannot be bonuses.
- Select Quizzes from the navbar.
- Select on the quiz name.
- If you have not already done so, add questions by importing them from your question library.
- Select the checkboxes corresponding to the bonus question(s) in your quiz. Select the More Actions button.

- Select the Toggle Bonus button.
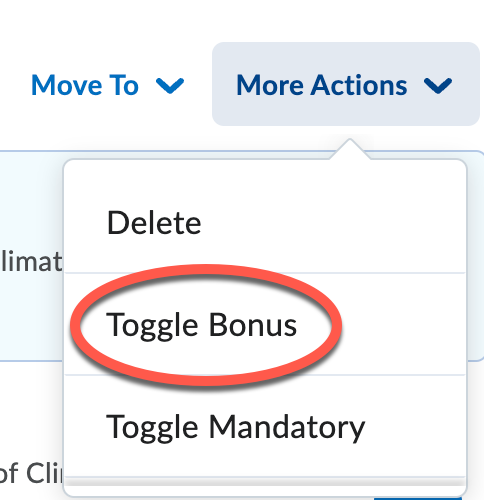
Note: You must designate specific questions to be bonus questions.
- Click the Save button to remain in the quiz (or Save and Close to save your changes and exit the quiz).

If your goal is to have the the Bonus question replace a missed question in the quiz (in other words, the highest score a student can earn is 100%), then you are finished. If students can earn higher than 100%, proceed.
- Click Grades in your course navbar.
- Make sure you are in the Manage Grades view.
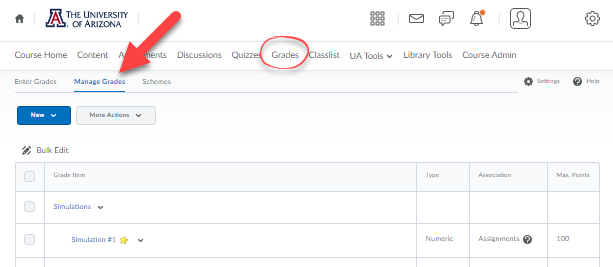
- Click on the grade item.

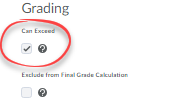
- Click Can Exceed.
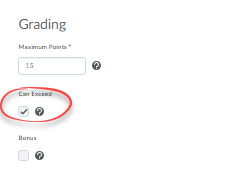
- Click Save and Close.

In the gradebook (if your grade item is nested under a category): if you want any bonus points to replace missed points in that category (in other words, if the max score students can earn for that category is 100%) you are finished. If you want students who earn higher than a 100% in that category to bump up their final grade, then proceed:
- Click on the category.
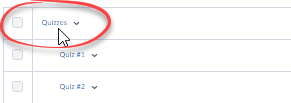
- Click Can Exceed.
- Click Save and Close.

2. Create: Questions Referring to an Image
Use this if you have multiple questions referring to a diagram, map, or other image.
- Select Quizzes from the course navbar.
- Click on the Question Library tab.
- Click the New button.

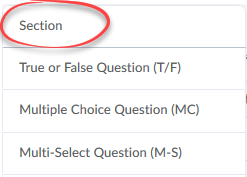
- Select Section from the menu.
- Type in a Section Title that will help you to identify the questions stored inside this section.

Note: By default, the title is visible to students. To change that, click the Hide Section Text from students option.
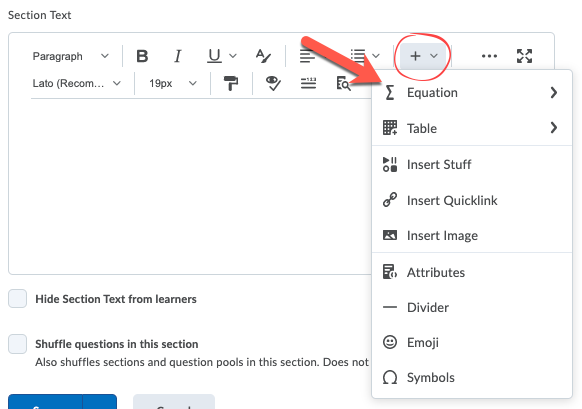
- In the Section Text box, click on the Insert Other Options button and the Insert Image button.
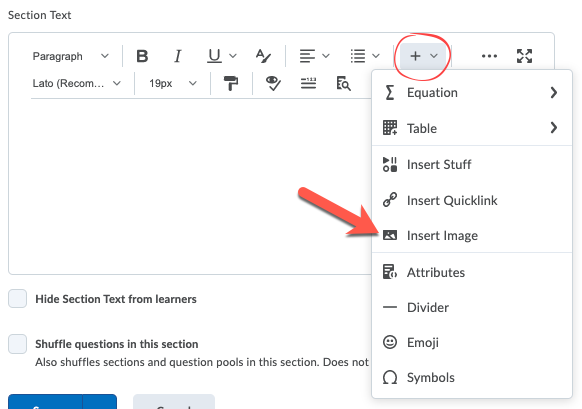
- Follow the help page instructions for adding and formatting an image.
- Click Shuffle questions in this section if you want to randomize the order of the questions.

- Click Save.
- Click on the Section folder to open it.

- Create your questions related to the image inside this folder.
- When you are finished, click Done Editing Questions.

- Click on your quiz to open it.
- Import the section from the question library.
Note: Make sure you check both the section (so the image displays) and the questions.

3. Create: Multiple Questions Referring to an Item of Text
Use this option if you have multiple questions referencing a poem, instructions, article of the constitution, and so forth.
- Select Quizzes from the course navbar.
- Click on the Question Library tab.
- Click the New button.

- Select Section from the menu.

- Type in a Section Title that will help you to identify the questions stored inside this section.

Note: By default, the title is visible to students. To change that, click the Hide Section Text from students option.
- Add your text to the Section Text field; follow the help page instructions for using the HTML Editor to format your text so that it is accessible.
- Click Shuffle questions in this section if you want to randomize the order of the questions.

- Click Save.
- Click on the Section folder to open it.
- Create your questions related to the text inside this folder.
- When finished, click Done Editing Questions.

- Click on the quiz.
- Import the section from the question library.
Note: Make sure you check both the section (e.g. so the section text is visible) and the questions.

4. Create: Multiple Questions Referring to a Video
Use this option if you have multiple questions referencing a video, audio clip, or other multi-media.
- Select Quizzes from the navbar.
- Click on the Question Library tab.
- Click the New button.

- Select Section from the menu.

- Type in a Section Title that will help you to identify the questions stored inside this section.

Note: By default, the title is visible to students. To change that, click the Hide Section Text from students option.
- In the Section Text toolbar, click on the Insert Other Options button and the Insert Stuff button.
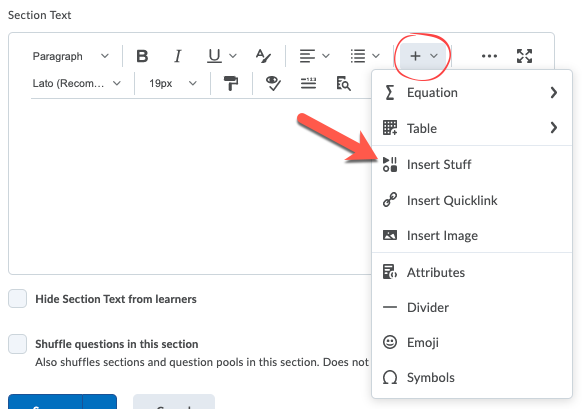
- Follow these instructions for adding multi-media using the HTML editor.
- Click Shuffle questions in this section if you want to randomize the order of the questions.

- Click Save.
- Click on the Section folder to open it.
- Create your questions referencing the multi-media clip inside this folder.
- When finished, click Done Editing Questions.

- Click on the quiz.
-
Note: Make sure you check both the section (e.g. so the multi-media is imported into the quiz) and the questions.

5. Create: Multiple Questions Referring to an Equation
Use this option if you have multiple questions referencing an equation.
- Select Quizzes from the course navbar.
- Click on the Question Library tab.
- Click the New button.

- Select Section from the menu.

- Type in a Section Title that will help you to identify the questions stored inside this section.

Note: By default, the title is visible to students. To change that, click the Hide Section Text from students option.
- In the Section Text box, click on the Insert Other Options button and the Equation button.
-
Follow these instructions for adding scientific and mathematical expressions using the HTML editor.
- Click Shuffle questions in this section if you want to randomize the order of the questions.

- Click Save.
- Click on the Section folder to open it.
- Create your questions referencing the equation inside this folder.
- When finished, click Done Editing Questions.

- Click on the quiz.
-
Note: Make sure you check both the section (e.g. so the equation is imported into the quiz) and the questions.

6. Allow: Students to Use Recorded Answers, Links, and Equations
This option is great for music classes, language students, oral tests, entering equations and more.
Note: The option in only available with the Written Response question type.
- Select Quizzes from the course navbar.
- Click on the Question Library tab.
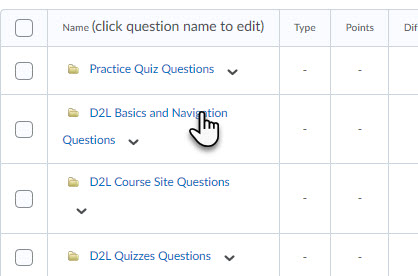
- Click on the name of any Section folder to open it.
- Follow these instructions for creating a Written Response question.
- Select Enable HTML Editor for student responses.

Note: Students cannot upload images into a quiz question. If they click the Insert Image icon, they are directed to enter a URL (web address).

- Click the Save button.

