1. Create: Quiz Categories
Quiz Categories are not necessary, but they can be a useful organizational tool if you have a lot of quizzes.
Note: Both you and your students will see any categories you create.
- Select Quizzes from your course navbar.
- Click on the Edit Categories button.

- Click on the Add Category button.

- Give your category a Name.

- Use the Sort Order menus to put your categories in the order you want them.

- Click Save and Close.

- To nest a quiz under that category, click on the quiz name.
- Under Category, use the drop-down menu to select the category.

- Save and Close.

2. Regrade: Quiz Question
Oops! You found a bad question in your quiz. Don't worry. There are steps you can take to fix the grades.
Note: We strongly recommend waiting until everyone has taken the quiz before regrading any questions, otherwise things can get quite complicated in D2L.
- Click the Quizzes tab in the course navbar.
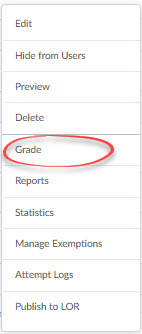
- Click the caret to open the quiz's Action menu.

- Select Grade.
- Click the Questions tab.

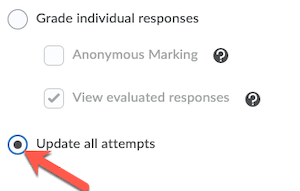
- Select Update all Attempts.
- Click on the Question you want to regrade.
- Now, you have two options:
- Give everyone who took the quiz points for this question: select Give to all attempts ___ points and enter the number of points in the empty field.

- Give points to everyone who gave a particular answer: select Give to attempts with answer ___ points, use the drop-down menu to choose the answer, and enter the number of points in the empty field.

- Give everyone who took the quiz points for this question: select Give to all attempts ___ points and enter the number of points in the empty field.
- Click Save.

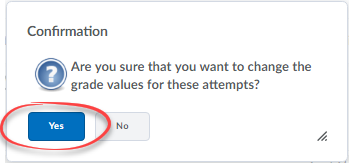
- Click Yes in the confirmation window.
- Click the Go Back to Questions button.

- Click Close.
Note: Quiz grades will automatically update. If you have your quiz set to automatically transfer grades to the gradebook, then the score will update in the gradebook also.
3. Submit: Student's "Quiz Attempt in Progress"
Sometimes students do not successfully submit their quiz. They may miss a click or, depending on the quiz settings, run out of time and lose the ability to submit. For the quiz to be graded, it has to be submitted. The solution is for the instructor to submit the quiz on behalf of the student.
Note: Once you submit the quiz, it will be graded according to the settings you have chosen for the quiz.
- Click the Quizzes tab in the course navbar.
- Click the caret to open the quiz's Action menu.

- Select Grade.

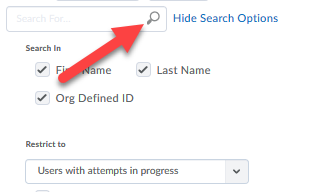
- You may have to click Show Search Options to access the menu for step 5.
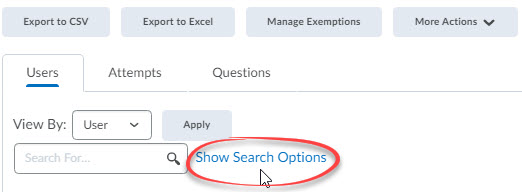
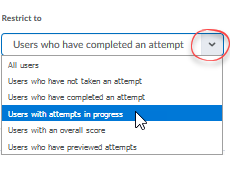
- In the Restrict to dropdown menu, select "Users with attempts in progress".
- Click on the search icon (magnifier glass in the "Search For" field).
- Click on the Enter Quiz as User icon.

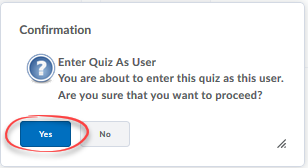
- In the confirmation window, select Yes.
- Scroll all the way to the bottom of the page, and click Go to Submit quiz.

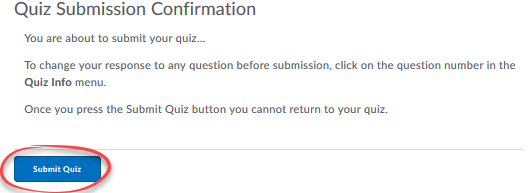
- Scroll to the bottom of the page again, and select Submit Quiz.
4. Reset: Student's Quiz Attempt
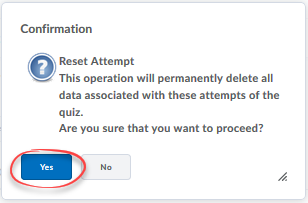
There may be instances when you want to delete a student's attempt so they can take can take the quiz again.
Note: This process deletes the attempt completely. Any answers the student provided and any grade they received will be deleted. Please only precede if this is the desired outcome. You can keep the first attempt and grant the student a second attempt at the quiz, using the Special Access features.
- Click the Quizzes tab in the course navbar.
- Click the caret to open the quiz's Action menu.

- Select Grade.

- Click the checkbox next to the attempt(s) you want to delete.

- Click the trash can icon.

- In the confirmation window, click the Yes button.
5. Restore: Deleted Quiz Attempt
Use the Quiz Attempt Log to restore a student's deleted quiz attempt.
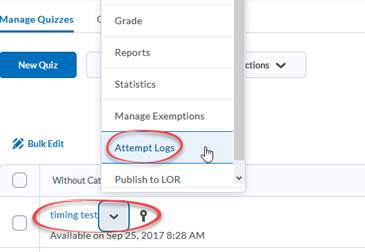
- Click the caret to open the quiz's Action menu.

- Select Attempt Logs.
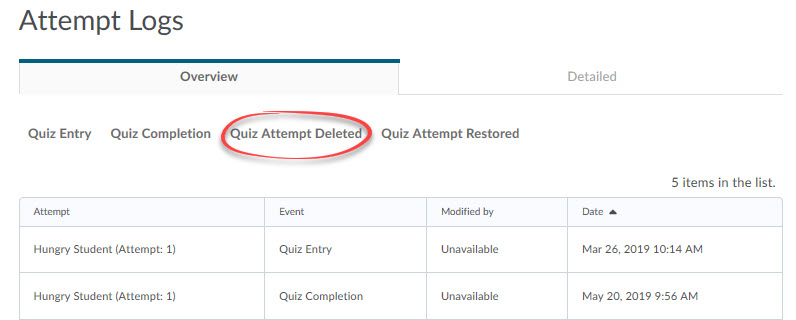
- Click on the Quiz Attempt Deleted tab.
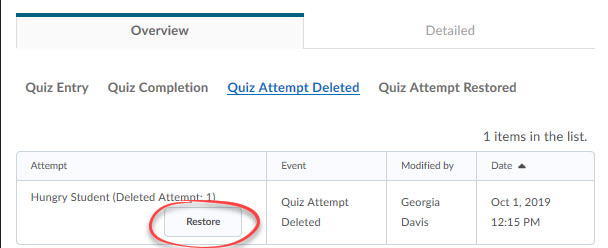
- Click Restore.
6. Problem: Scores not in Gradebook/not visible to students
Typically, there are two reasons students' quiz scores do not transfer or are invisible to students: 1) a missing quiz setting; and/or 2) the scores have not been Published.
Missing Setting
- Click Quizzes in the navbar.
- Click on the quiz name.
- Click the Assessment tab.

- Make sure:
- If you want D2L to grade the quiz for you, Auto-publish attempt results immediately upon completion is checked;

- If you want the grade to transfer to the gradebook and your quiz is linked to a grade item, select the checkbox for Automatically update evaluations in grade book when published is selected.

- Click the Save and Close button.

Publish Grades
- Select Quizzes from your course navbar.
- Click the caret to open the quiz's Action menu.

- Select Grade from the menu.

- Set the per page to a high enough number that you can see all of your students on one screen.
- Click the Select all rows box; all students on this screen should now have a check mark.
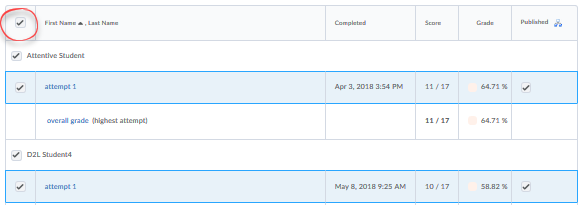
Note: If you have a very large class, you may have to repeat this process for every page of students.
- Click Publish Feedback.

- Click the Save and Close button.

- If you want D2L to grade the quiz for you, Auto-publish attempt results immediately upon completion is checked;
7. Assess: Save or print quiz questions & answers
Copy quiz questions and answers into a file.
There is no text export feature for quiz questions or the question library, but you can follow these steps to get a quiz question preview (including correct answers) that you can then copy and paste into a file (such as a Word document) for saving or printing purposes.
Note: This changes the submission view for anyone who has taken the quiz. If you do not want students to see the correct answers on this quiz, change the submission view back to your previous settings once you've finished saving your questions.
- Click the Quizzes tab in the course navbar.
- Click the title of the Quiz that contains the questions you want to save.
- Click to expand the Evaluation & Feedback section.
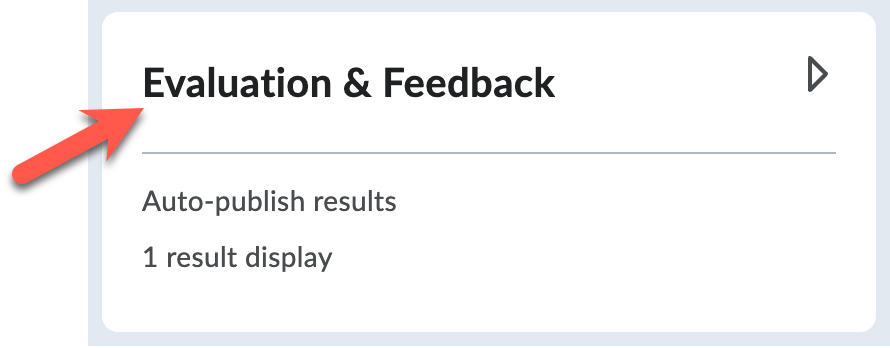
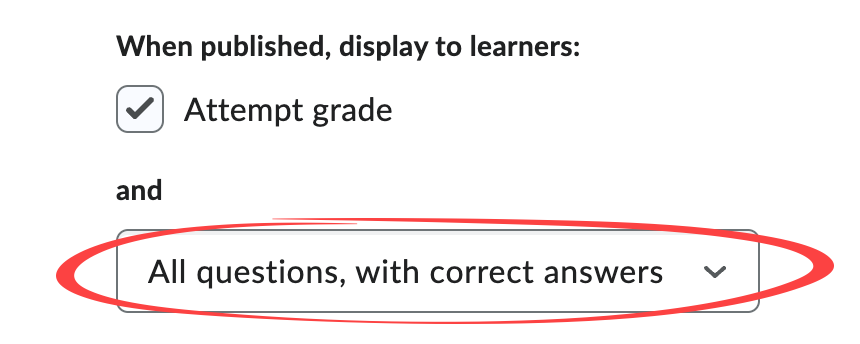
- Under "When published, display to learners", select All questions, with correct answers in the dropdown menu.
- Check the box next to "Auto-publish attempt results immediately upon completion".

- Click Save.
- On the left side of the screen, in the Questions bar, select Preview.

- Click Start Quiz!
- Scroll to the end of the quiz, click Submit Quiz.
- Click Submit Quiz again, ignoring any warnings.
- Select all questions and answers on the screen (CTRL+A or CMD+A on a Mac).
- Copy the selected text (CTRL+C or CMD+C on a Mac).
- Paste the text into a Word document.
8. Assess: Save or print paper quiz
Copy a quiz with questions into a file that can be printed.
There is no text export feature for quiz questions or the question library, but you can follow these steps to get a quiz question preview that you can then copy and paste into a file (such as a Word document) for saving or printing purposes.
- Click the Quizzes tab in the course navbar.
- Click the title of the Quiz that contains the questions you want to save.
- Make sure all questions are visible on the same page (see how to add or remove page breaks).
- On the left side of the screen, in the Questions bar, select Preview.

- Select all questions and answers on the screen (CTRL+A or CMD+A on a Mac).
- Copy the selected text (CTRL+C or CMD+C on a Mac) OR print the selected text to a PDF (CTRL+P or CMD+P on a Mac).
- If copying, paste the text into a Word document (CTRL+V or CMD+V on a Mac).

