1. Add: Page Breaks
For a long quiz, it's a good idea to add page breaks. Every time a student advances to a new page of the quiz, all answers are saved.
Note: Caution! Do not use only one question per page. That format can break things and adds significant loading times for students.
Too many questions on a page requires a lot of scrolling. Too few questions and students must change pages constantly, which consumes time as each page loads. Somewhere between 4-8 questions per page is usually a good number, though that may vary if you want to group like questions together.
- Select Quizzes from the course navbar.
- Click the down-facing triangle to the right of the Quiz you want to edit. Select Edit from the drop-down menu.
- In the Quiz Editor, select the Timing & Display section in the right pane of the screen to open the options.
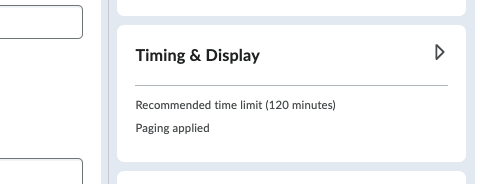
- Locate the Paging Section.
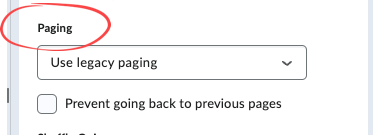
-
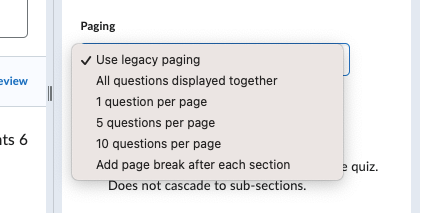
You will have a few options to create page breaks:
-
Use legacy paging: You will only have this option if your quiz was created previously using the classic quiz experience. Legacy paging will retain the paging settings that were in effect prior to the new quiz creation interface.
-
All questions displayed together: All questions will be on one page.
-
1 question per page: We generally do not recommend one question per page as it makes for longer loading times for students.
-
5 questions per page: This will display 5 questions per page in your quiz, regardless of sections in your quiz.
-
10 questions per page: This will display 10 questions per page in your quiz, regardless of sections in your quiz.
-
Add page break after each section: Use this setting if you would like to break up your quiz into multiple pages. This setting allows you to have a different number of questions per page to group your exam by topic or question type.
-
-
Click the Save button to remain in the quiz (or Save and Close to save your changes and exit the quiz).

2. Add: Sections
You can divide a quiz into different sections. Each section can have a title and set of instructions.
- Select Quizzes from the course navbar.
- Click the down-facing triangle to the right of the Quiz you want to edit. Select Edit from the drop-down menu.
-
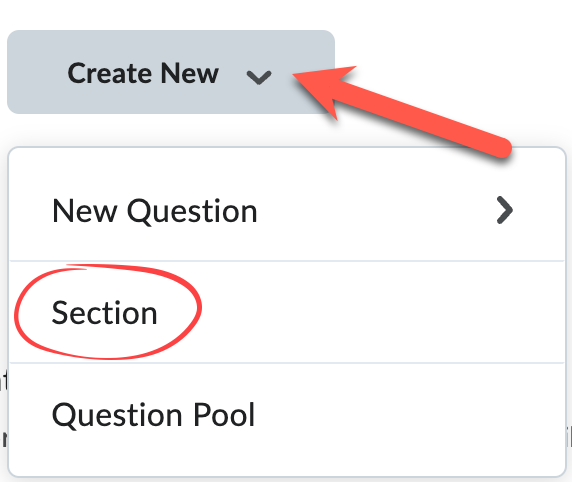
Under the Questions heading, click on Create New and choose Section from the menu.
-
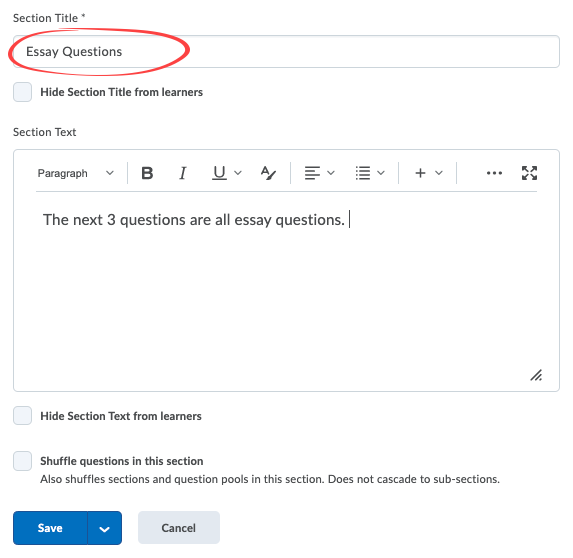
Give the section a Title.
Note: By default, the title is visible to students. To change that, click the Hide Section Title from students option.
-
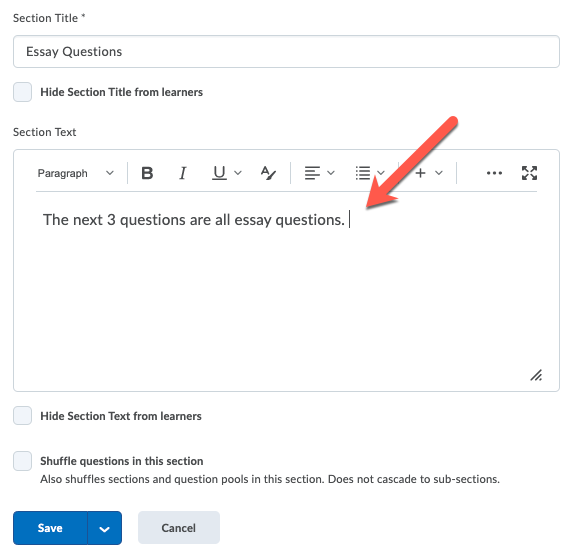
(Optional) Add a set of instructions in the Section Text field.
Note: By default, these instructions are visible to students. If you want the instructions to be visible to the instructional team only, click Hide Section Text from students.
-
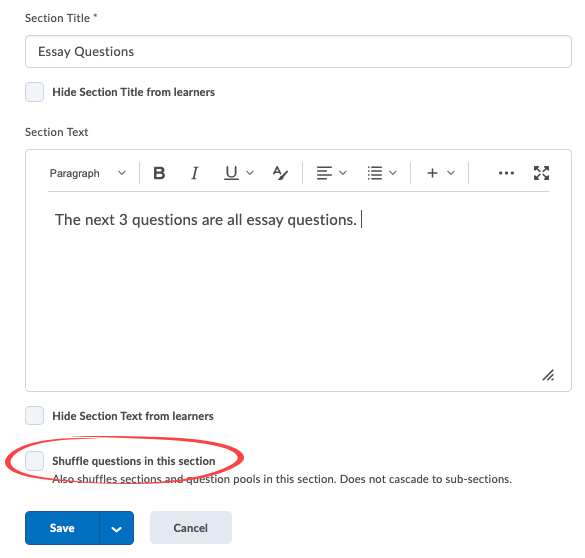
Click Shuffle questions in this section if you want to randomize the order of the questions.
-
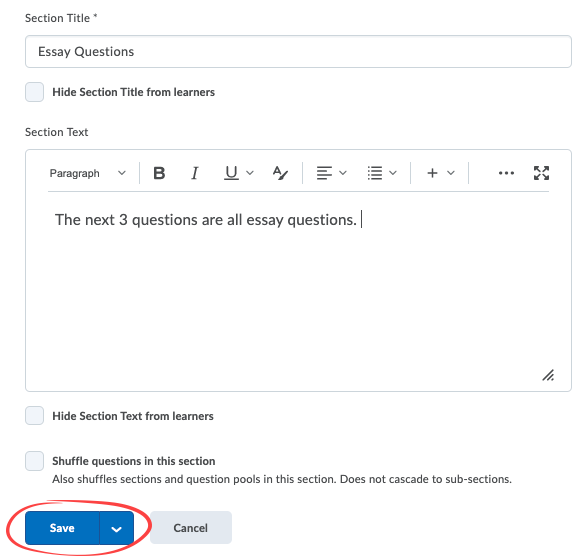
Click the Save button.
- Next, import questions from the Question Library into your quiz (skip to step 3 on the "Import Questions" help page). Then, drag and drop questions into the section.

