1. Add: Captions
Add captions to your videos to ensure they are accessible to deaf and hard-of-hearing students.
Who this helps
- Anyone with mild to profound hearing loss
- People with with decreased hearing due to aging
- People with damaged hearing from exposure to loud noises
- People with infections or injuries who may experience temporary or permanant hearing loss
- People taking medications that can affect hearing
Who this also helps
- Foreign language learners who may have diffculty understanding spoken words
- People working in noisy or sound-sensitive environments
- People with learning disabilities, attention deficits, and autism who use captions to help maintain concentration
- Everyone who may have trouble comprehending mumbled words, fast speech, or dialogue when there is background noise
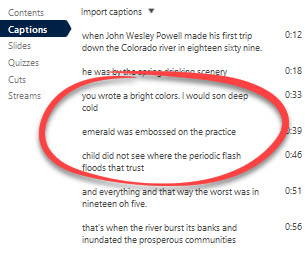
Note: If you auto-generate captions, review them for accuracy. Panopto (like all auto-captioning services) does not always get it right.
Steps
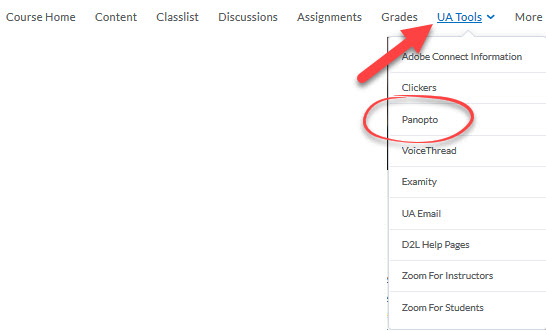
- Click UATools in the Navbar and select Panopto from the list.
- Hover your mouse over the video and click the Edit button.

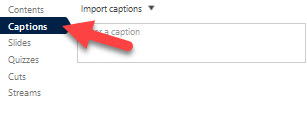
- Choose Captions from the menu.
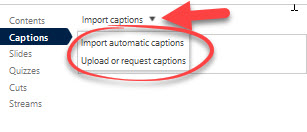
- Click Import Captions and choose one:
- Upload Request Captions (to upload a caption file).
- Import automatic captions (to auto generate captions).
- To edit a caption, simply click on the text and type in your changes.
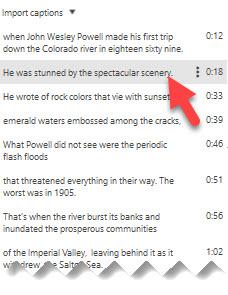
Note: Videos created in (or uploaded to) Panopto before December 17, 2016, do not have the autocaption option. You can download the video and re-upload it to get the option, or submit an email request to the Panopto Support Team (AcadTech@arizona.edu) to have your video "reprocessed". Include the name of your course site (as it appears in D2L) and the name of your video.
2. Add: Descriptive Captions
Descriptive captions include added information to communicate meaning that is not part of the narration. They are often indicated by the "AD" icon (for audio description) or "extended AD" icon (when the transcript includes lengthy descriptions).
A descriptive transcript might include information about,
- Music (including genre and feelings invoked)
- Ambient sounds
- Descriptions of what someone is doing
Note: Video is a visual medium, meaning if you use video, the visual may be as important as the audio for conveying meaning.
Who this helps
- People who are hearing or visually impaired
- All students who can see what visual and auditory cues are considered significant
Who this also helps
- Note-takers who may benefit from better focus, comprehension, and retention
- Students who do not have enough mobile data or bandwidth to stream a video
- Everyone who uses notes as a study aid
Steps
- Navigate to your Panopto video.
- Click the Edit button.

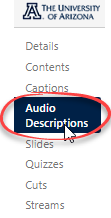
- Select the Audio Descriptions tab
- Type your text into the Enter audio description field
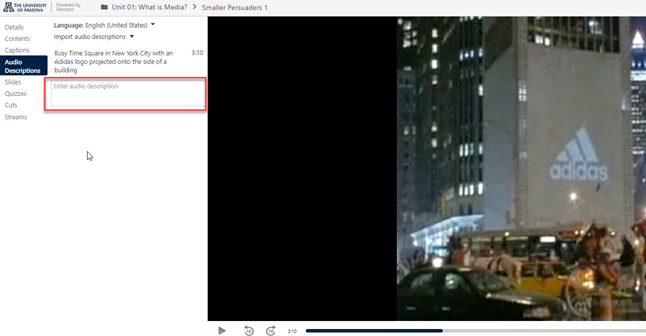
- Press the Enter key when the scene ends and you are ready to enter a new description
- When you are finished, click the Apply button

3. Use: Panopto Notes
Let students share notes using a Panopto channel.
For many students, notes are an essential study aid. However, not all students can pay attention to a lecture or video and take notes at the same time.
Who this helps
- Students with auditory processing problems whose notes may be sparse or unclear
- Deaf and hard-of-hearing people who need to watch captions
- Students with physical disabilites who find typing or writing difficult
Who this also helps
- Note-takers who may benefit from better focus, comprehension, and retention
- Everyone who uses notes as a study aid
In Panopto, users can take notes using a channel.
Steps
- Navigate to your Panopto video (and click to open it).
- Click the Notes tab in the navigation panel.
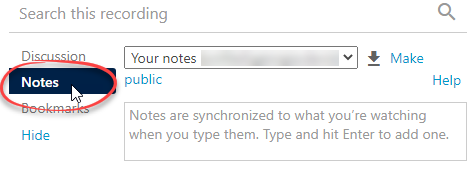
Note: You have the option to make any notes you add here either public (visible to students) or private (visible to yourself only).
- Click the Channel menu to open it.
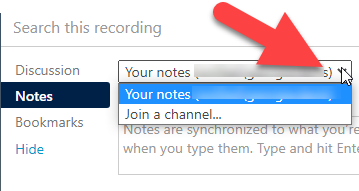
- Select Join a Channel.
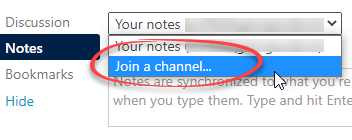
- Give your channel a name.
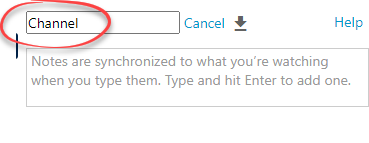
Note: Students can find and add notes by following the same steps 1-4 above, and selecting the group name. Be sure to tell them about the notes feature and how to find it.

