1. Edit: Rename your course site
Rename your course.
You can rename your D2L course site using the following steps:
- Select Course Admin in the navbar.

- Select Course Offering Information.

- Enter the new name for the course site in the Course Offering Name field.
- Select Save.
2. Edit: Add or remove links from the navbar
Edit the navbar so just the links you use are present.
The navbar can be edited at any time and doesn't have to be "set" prior to the start of a course.
- Hover over the navbar and select the menu to the right (box with three dots).
- Select Customize This Navbar.

- If the dialog box appears asking "Create a Copy?" select Yes! I'll work with a copy of the navbar button. If this box does not appear continue with the next steps.

- Edit the Name of the navbar.
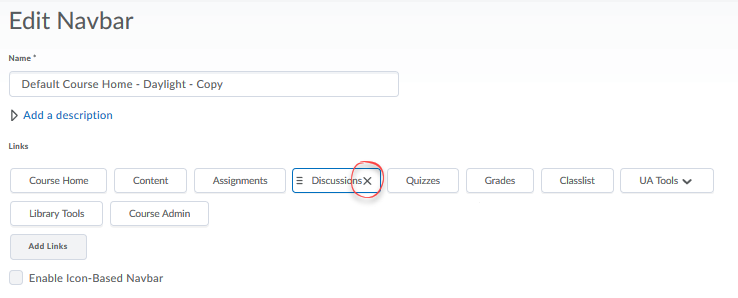
- To remove links on the navbar: hover over the link you want to remove and click the X.
-
To change the order of the links, click a link and drag it to a different position on the navbar.

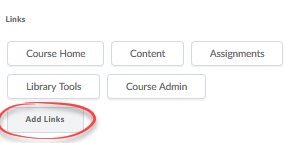
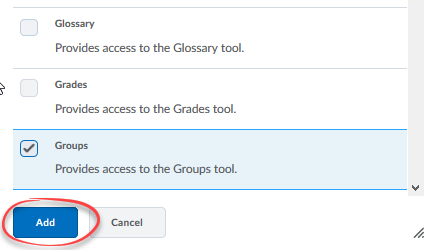
- To add a link to the navbar: click the Add Links button, select the link you wish to add from the list, and click the Add button.
- Click Save and Close to save the changes to your navbar.
3. Add: Banner image to your course homepage
Add the course tile image (My Home Page) as a banner on your course homepage.
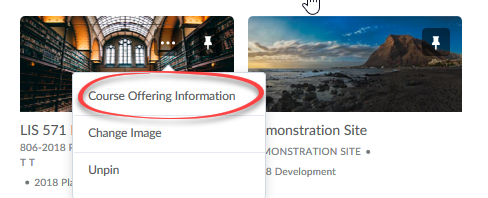
- Hover over the tile image of the course on your D2L home page (where the course tiles are listed).
- Select the menu (box with three dots).
- Select Course Offering Information.
- Scroll down to the section that says Homepage Banner.
- Select the checkbox "Display the image in a banner on the course homepage".
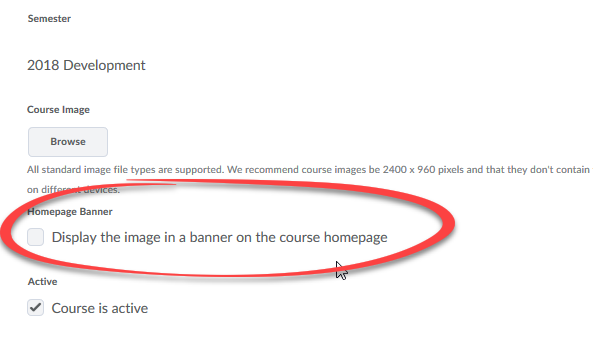
- Click Save.
4. Change: Remove or select a different image for your course banner
You can remove or change the randomly selected course image to better represent the course.
Option I: Remove the banner or select a new one from the existing bank of images
- Select the dropdown settings menu on the far right of the image (box with three dots).
- To remove the banner altogether, select Remove this Banner.
- To change the image, select Change Image.

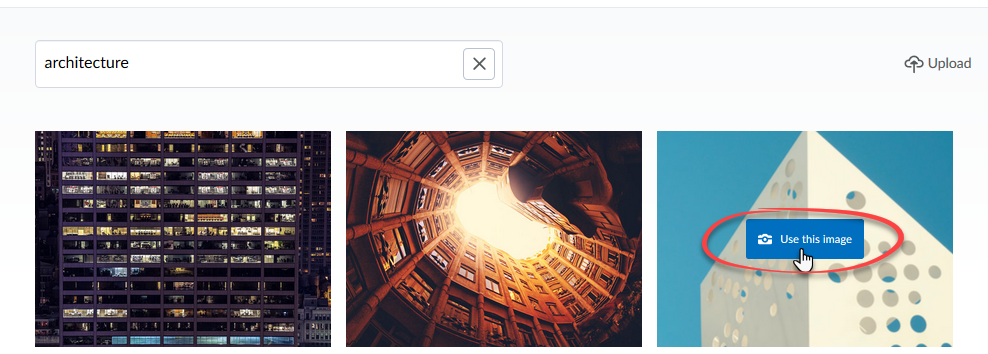
- After selecting Change Image, find an image from the image bank by entering a search term and clicking the search icon.

- Select Use this Image button on the banner you would like to use.
Option II: Upload a banner from your computer
- Select the dropdown settings menu on the far right of the image (box with three dots).
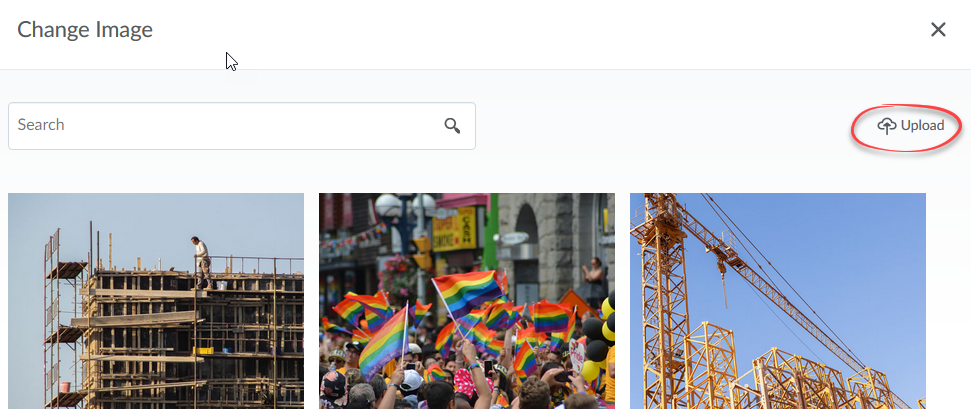
- Click Change Image.

- Click Upload.
- On the next page scroll down to the Course Image section and click the Browse button.
Note: The recommended image size is 2400 x 900 pixels.
- Select My Computer.
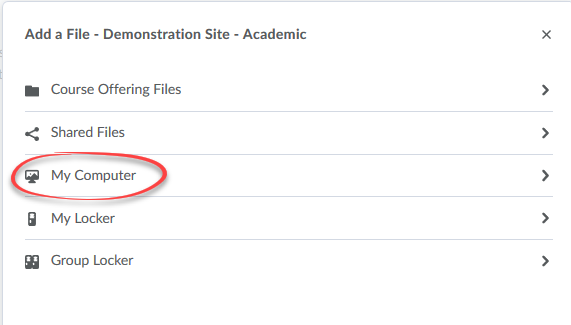
- Click Upload (or drag and drop an image into the box and skip to step 9).
- Select the image on your computer.
- Click Open.
- Click Add.
- Click Save.
5. Post: Place an announcement on your course homepage
Steps to put an announcement on your homepage.
These steps explain how to quickly place an announcement on your homepage. More detail about using announcements is located on the Announcements help page.
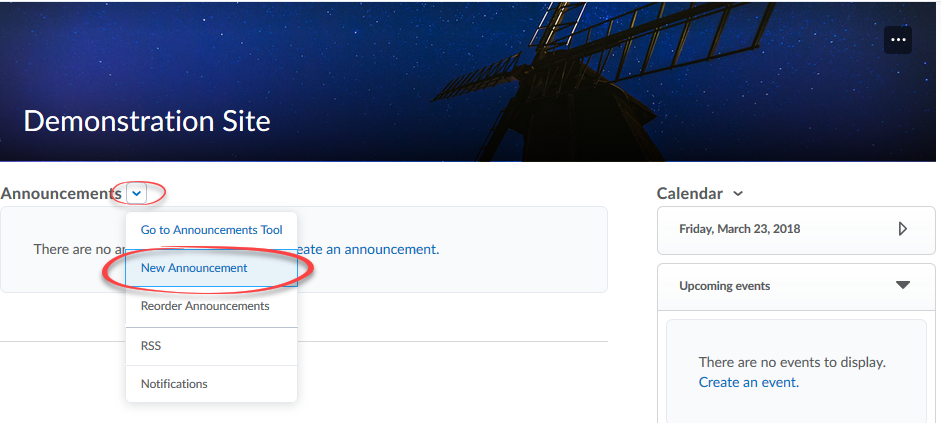
- Select the actions for announcements dropdown menu (inverted chevron).
- Select New Announcement.
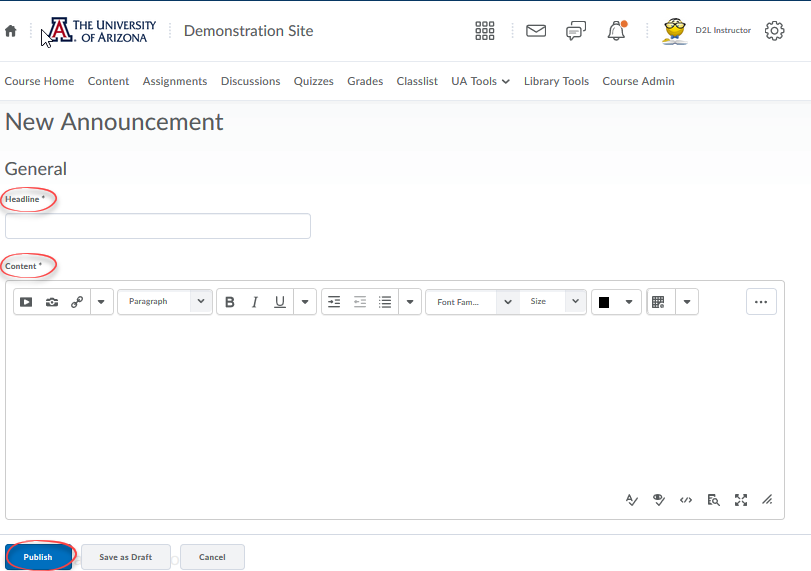
- Enter a title for the announcement in the Headline box.
- Enter the announcement text in the Content box. You can format text, add links and add images using the html editor.
- Click Publish to post the announcement.
6. Access: Add, move, or remove a widget on the course homepage
Steps to edit an existing homepage.
Each course homepage is made up of the navbar, the banner (optional), and widgets. You can add, move, and remove widgets on the home page to customize it. The first four steps are needed to edit any homepage. When you have completed all desired edits, check step 3 under To remove a widget at the bottom of this page.
- Go to the Course Admin and select Homepages.

- The active homepage is marked as default to the right. If the name of the homepage is clickable (blue text), click on it and skip to step 4. If not clickable (grey text), select the actions (inverted chevron) to the right of the homepage title. Select Copy to make a copy of the homepage.

- Click on the copy of the homepage (Same name as the homepage you made a copy of with - Copy appended.

- Edit the course name to your desired title.
Steps to add a widget.
- Click the Add Widget button in the column where you want to add the widget.
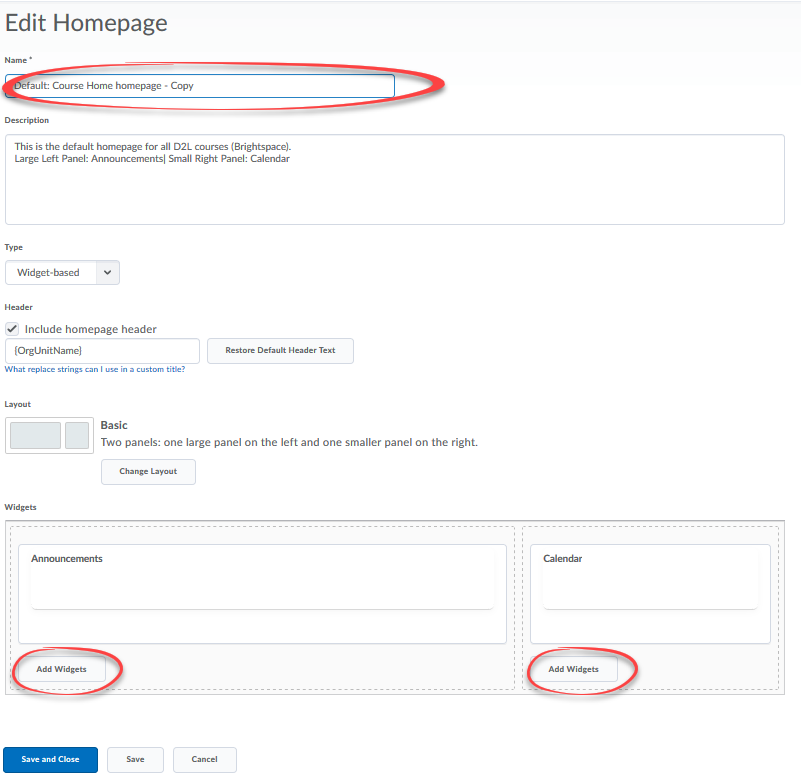
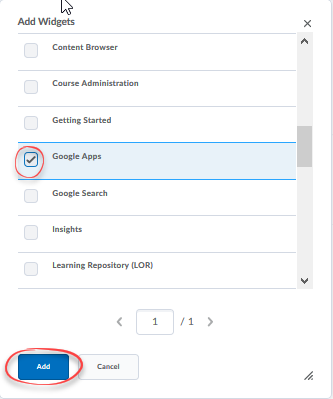
- Select the widget you want to add by checking the box to the left of it and clicking the Add button.
Steps to move a widget.
- To move a widget, hover over the widget you want to move until 8 small dots appear at the left edge

- With your cursor, drag the widget to your desired location anywhere on the homepage. The bar that appears above other widgets lets you know where it will insert.

Steps to remove a widget.
- To remove a widget hover over the widget and click the X at the top right.

- Click the Save and Close button.
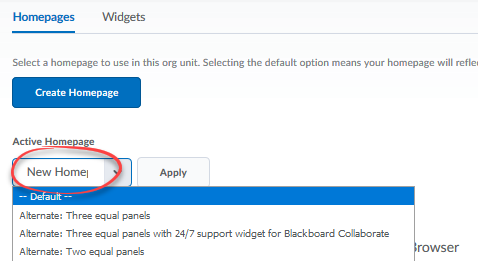
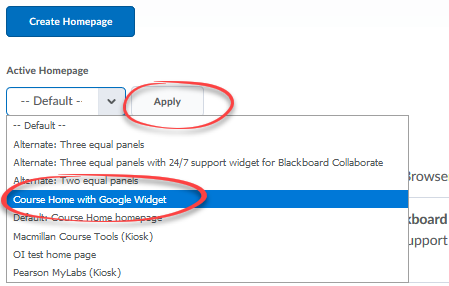
- If you made a copy of the homepage, activate the homepage by clicking on the Active Homepage dropdown menu at the top of available homepages, selecting your new homepage, and clicking the Apply button.
7. Add: Custom international clock widgets
Add international clock widgets to your homepage to show the time in selected countries.
Note: Click this link to the help page for how to display time (User Settings>Section 3 "Account Settings">Local & Language).
- Follow the steps in Section 6 above for adding a widget to a homepage.
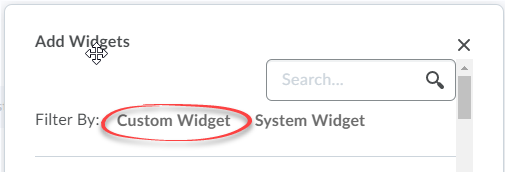
- At Step 2 for "Add a widget", select Custom Widget.
- Scroll down and select the clock widget/s that you need.
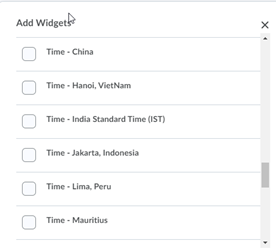
Note: If you do not see the country you need represented, contact the D2L Consulting Team.
8. Add/Remove: Microsoft Teams widget for class communication
By default, the Microsoft Teams widget in on all course home pages.
Note: The Teams widget is a way for you to provide a chat environment for your class. It is not a channel to contact D2L Help. Please use the regular email, phone and Zoom channels instead.
Add Teams to your course My Home page:
- Follow the steps in Section 6 above for adding a widget to a homepage.
- At Step 2 for "Add a widget", select System Widget.

- Scroll down and select the Microsoft Teams widget.
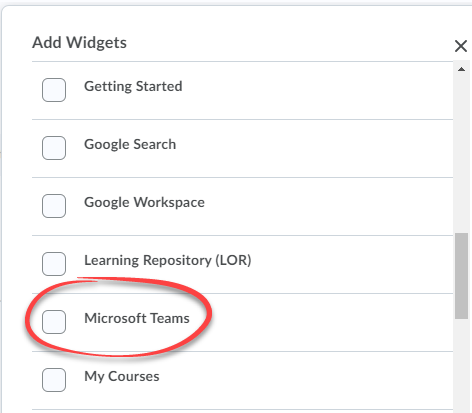
- See the steps in Section 6 above for "move a widget" if you have questions about how to arrange the widget on your homepage.
- Click Edit Settings if you would like to enable learners to create new private channels for communication.
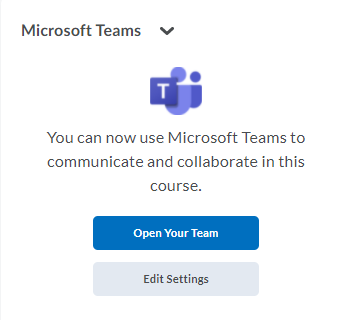
- Click Open Your Team if you are ready to start inviting members (using Add member), then you can begin using Teams.
To remove the Teams app, follow the steps to Remove a Widget in Section 6 of this Help Page.
Note: For help with the Teams app, please contact 24/7 IT Support.
9. Create: Custom widgets
Create a custom widget for your course homepage.
Note: Each widget is essentially a mini-webpage with its own HTML Editor at the top.
- Go to Course Admin and select Widgets.

- Select Create Widget.
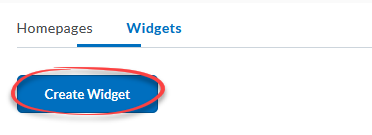
- Give the widget a Name.
- Click Content.
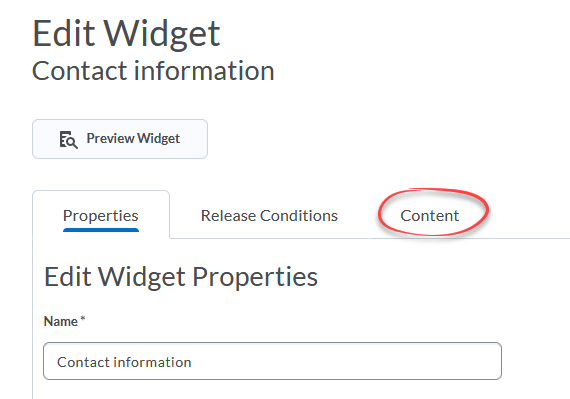
- In the HTML Editor, add what you want to the widget - this can include text, video, images, and links.
- Click Save and Close. For instructions on how to add your new custom widget to a home page, see Section #6 of this Help Page.
10. Edit: Custom widgets
Edit an existing widget for your course home page.
Note: you can only edit custom widgets, not system widgets created by D2L.
- Go to Course Admin and select Widgets.

- Click the pencil icon (Edit) next to the widget you want to edit.
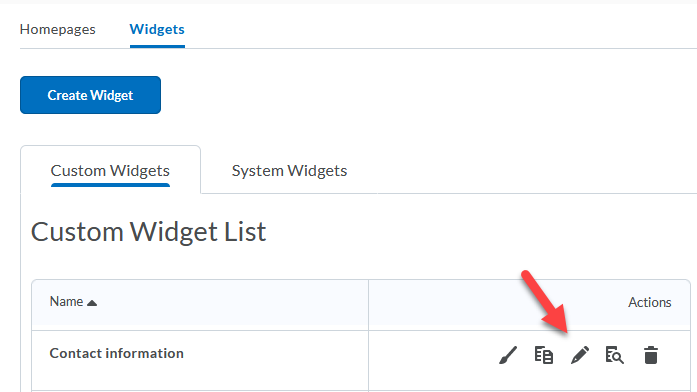
- Click Content.

- Make desired changes.
- Click Save and Close.
11. Create: Design your own homepage
Steps to create a new course homepage.
Each course homepage is made up of the navbar, the banner (optional), and widgets. You can create a custom homepage with your own widgets and layout.
- Go to Course Admin and select Homepages.

- Select Create Homepage.
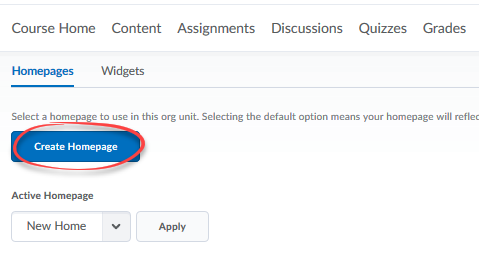
- Give the homepage a Name.
- If you want to update the layout, select Change Layout and pick one of the options. Click Update.
- Add Widgets to the different panels below. You can adjust their position at any time, by clicking and dragging from one panel to another.
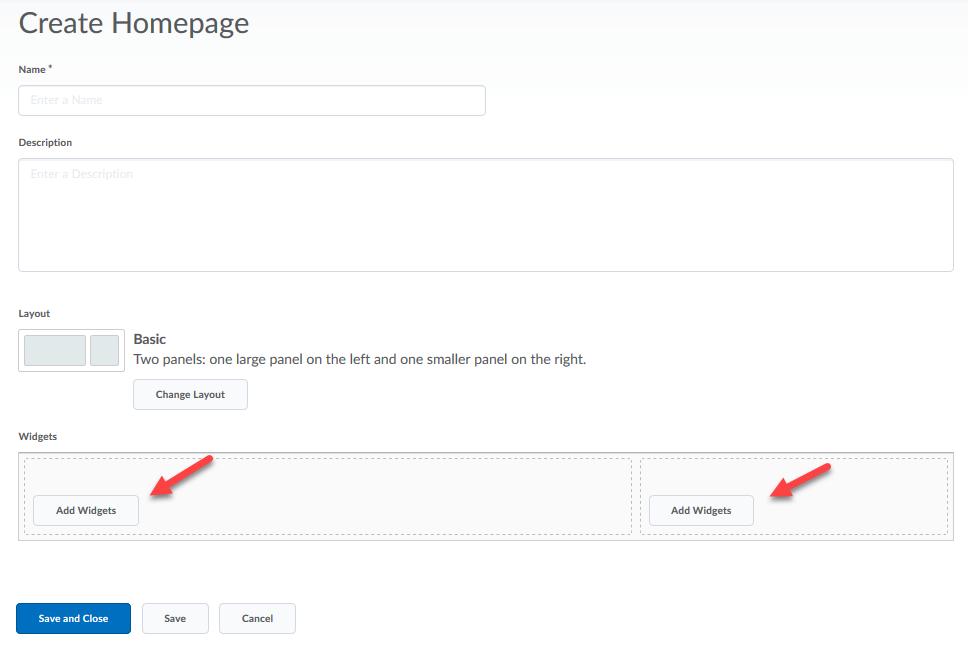
- Save and Close.
- To use the new homepage, select it from the dropdown beneath Active Homepage, and click Apply.
