1. Create: Individual Assignment
Create file, text, paper-based and observed in person assignments.
To create:
- Select Assignments from the navbar.
- Select New Assignment.

- Enter a Name for the assignment.
- (Optional) If grading, enter a score in the Grade Out Of box. This will automatically create a grade item in Grades.
- (Optional) Add a Due Date to put this assignment in the Course Calendar. Students can submit after the due date, but will be marked as late.

- (Optional) In the Instructions section enter any instructions the students need to know to complete the assignment.
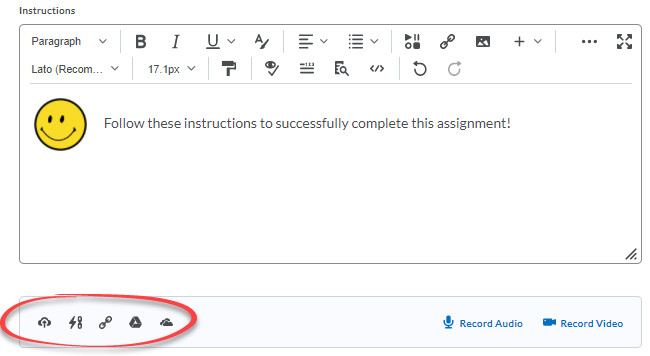
- You can attach required documents or links by using the different attachment options.
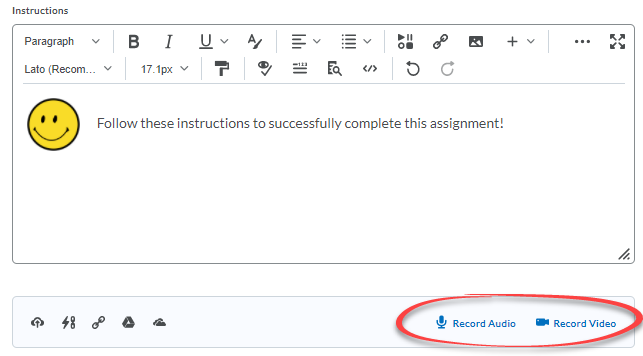
- You can also attach a video or audio recording if you want to provide instructions verbally for the assignment.
- You can attach required documents or links by using the different attachment options.
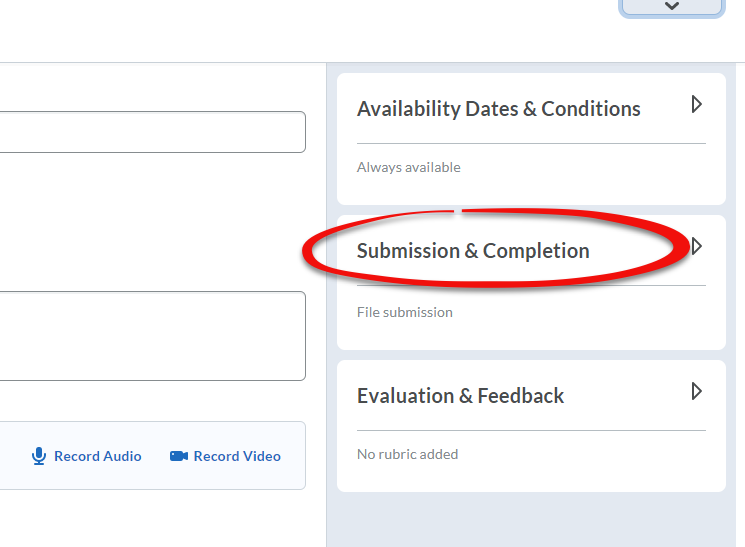
- Select Submission & Completion.
- Select the Submission type for the assignment:
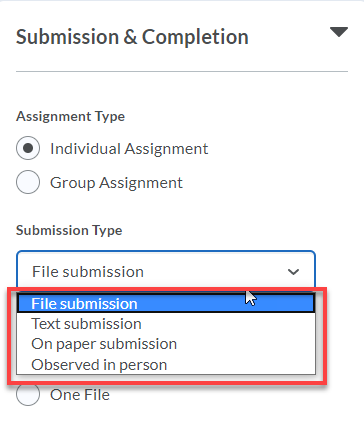
- File submission - students submit a file in D2L (Word, PDF, etc.).
- Text Submission - students write their response in a textbox.
- On paper submission - students turn in the assignment to the instructor.
- Observed in person - the assignment is performance based (presentation, recitation etc.).
NOTE: You may also list an assignment under a category to improve organization of your course. Click here to find instructions for Assignment Categories.
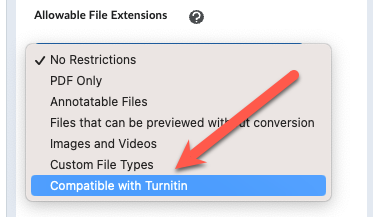
- If you choose a Submission Type of "File submission" you have the option of restricting the file type. Select the box under Allowable File Extensions to choose one of the five (5) options. This page provides detailed information about each of the options.
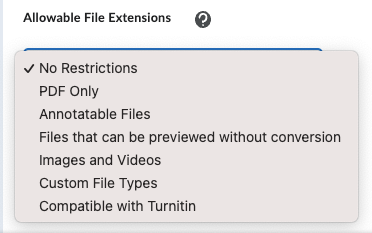
- Click Save and Close.
2. Create: Group Assignments
Create file, text, paper based and observed in person assignments for students working in groups.
Group assignments are useful if you have students working in groups and each student gets the same grade for the assignment. You can enter one grade for a group assignment, and each student in the group receives the grade. A group assignment is used in conjunction with the Groups tool in D2L.
To create:
- Select Assignments from the navbar.
- Select New Assignment.

- Enter a Name for the assignment.
- (Optional) If grading, enter a score in the Grade Out Of box. This will automatically create a grade item in Grades.
- (Optional) Add a Due Date to put this assignment in the Course Calendar. Students can submit after the due date, but will be marked as late.

- (Optional) In the Instructions section enter any instructions the students need to know to complete the assignment.
- You can attach required documents or links by using the different attachment options.
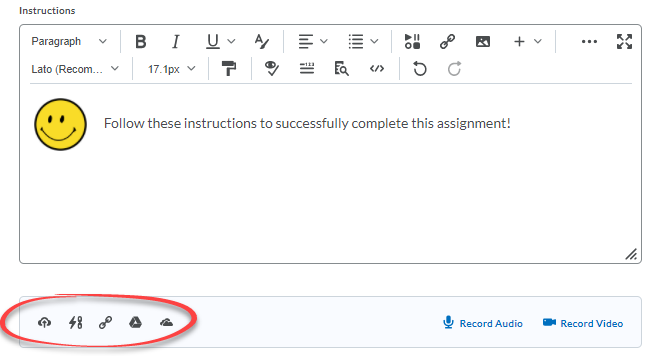
- You can also attach a video or audio recording if you want to provide instructions verbally for the assignment.
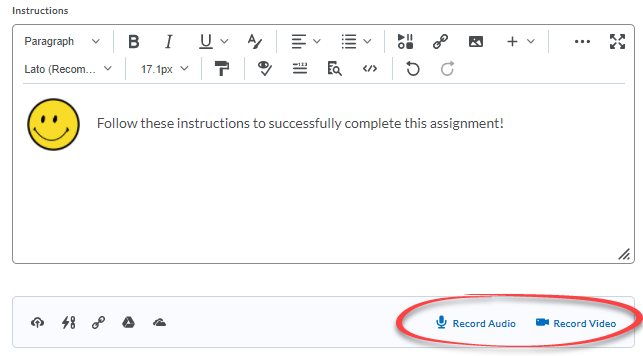
- You can attach required documents or links by using the different attachment options.
- Select Submission & Completion.

- Select Group Assignment, and select the group category. (If no group categories exist, go to Groups to create one.)
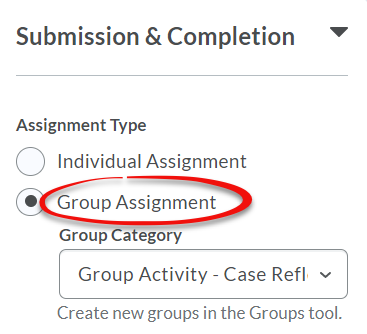
- Select the Submission type for the assignment:
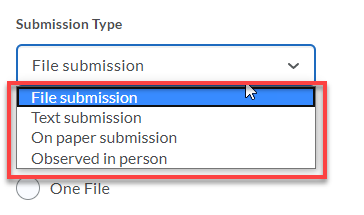
- File submission - students submit a file in D2L (Word, PDF, etc.).
- Text Submission - students write their response in a textbox.
- On paper submission - students turn in the assignment to the instructor.
- Observed in person - the assignment is performance based (presentation, recitation etc.).
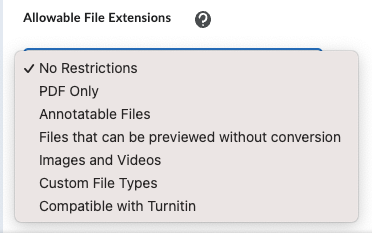
- If you choose a Submission Type of "File submission" you have the option of restricting the file type. Select the box under Allowable File Extensions to choose one of the five (5) options. This page provides detailed information about each of the options.
- Select Save and Close.
3. Visibility: Date Restrictions
Hide folder or add Start/Due/End Dates to new or existing folder.
To hide the Assignment from students:
- Click Edit Assignment.
- Select the check mark to change status from Visible to Hidden (this makes the assignment invisible to students).

To add dates to the Assignment:
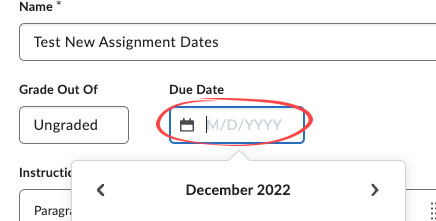
- Select Due Date if you want to add this assignment to the Course Calendar. If students submit after this date, it is marked late.
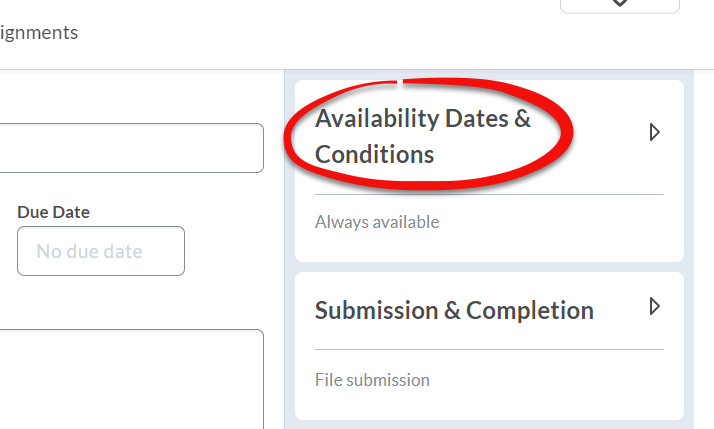
- If you want to restrict student access to the Assignment, select Availability Dates & Conditions.
- Select Start Date to allow students to begin submitting at a specific date and time. Prior to this date and time students will be able to see the assignment but not submit to it (if Visible).
- Select End Date to close the assignment from further submissions. After this date, students will see the assignment but cannot submit to it.
- Select Save and Close.
About Availability Date Options
Immediately after setting Start or End Dates, you'll see the default student access option displayed just under the date.
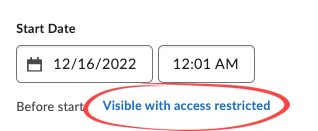
You can change the student access options by selecting the blue text that describes the currently selected option (circled in red). This will open a dialog window.
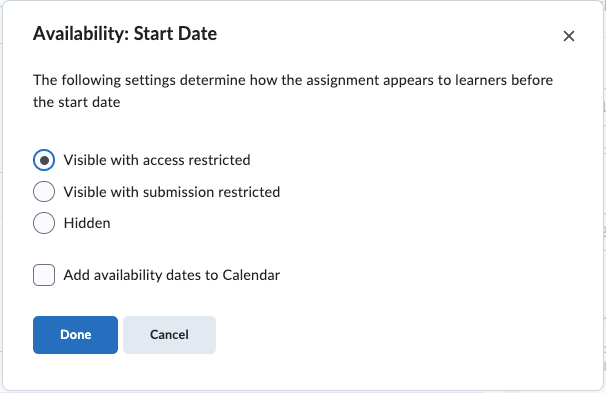
Each option will provide students a different access view of the assignment on the date selected.
- Visible with access restricted
The assignment will be visible to learners before the Start Date or after the End Date, but they cannot click or open it. Learners can see the name, dates, and restrictions but cannot see the assignment description or attachments.

- Visible with submission restricted
The assignment will be visible to learners before the Start Date or after the End Date and they can click or open it, but they cannot submit or mark it as complete. Learners can see all details about the assignment including description, attachments, and rubrics, but they cannot upload files, enter comments, or mark the assignment as complete (for observed in person/on paper submission).
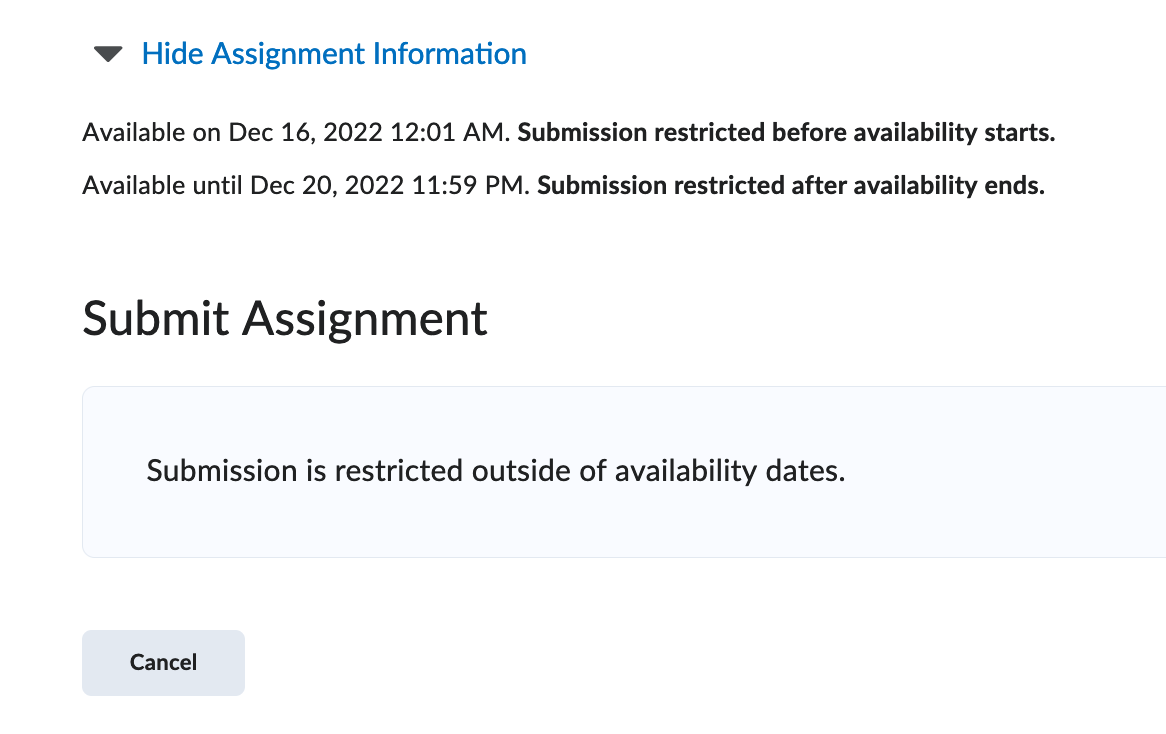
- Hidden
The assignment is hidden to learners until the start date is reached or after the end date passes. Learners can not see the assignment anywhere, including corresponding Calendar events and Notifications.
- Add availability dates to Calendar
If you would like the Start and End dates to appear in the Calendar as a reminder to students, select this box.
NOTE: You can change the default option for the date restriction views in the Availability Date Defaults. Go to Course Admin and look in the Site Setup section for this tool.
4. Assess: Link Assignments to your Gradebook
Link Assignments to Grade Items so you can transfer scores and feedback directly to the gradebook.
NOTE: By default, if you enter a score a new grade item will be created in Grades with the same name as the assignment. You can use this same process to edit that grade item.
If you have already created the grade item, you can link to that instead.
Link an assignment to an existing grade item
- Enter total number of points a student can earn for the assignment in the Score Out Of box.
- Select Not in Gradebook.
- Select Edit or Link to Existing.
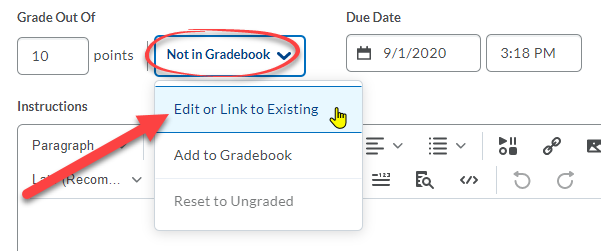
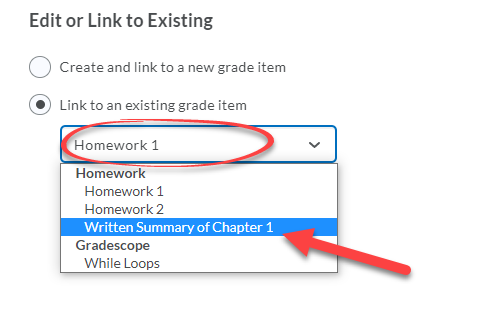
- Select Link to an existing grade item, then choose your item from the dropdown menu.
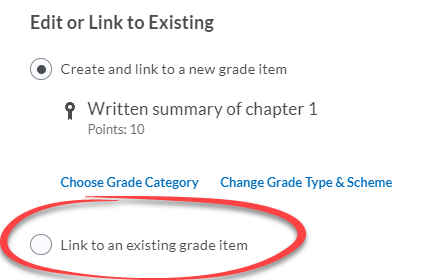
- Select the box below "Link to an existing grade item" and choose the grade item to which you wish to link.
- Select OK.
- Select Save and Close.
5. Enable: Turnitin Similarity Reports
Set up TurnItIn Similarity Reports on a new or existing assignment.
Note: While PDFs can be submitted to Turnitin, PDFs that contain text saved as images will not create reports.
To enable:
- Select Evaluation & Feedback.
- Select Manage Turnitin.
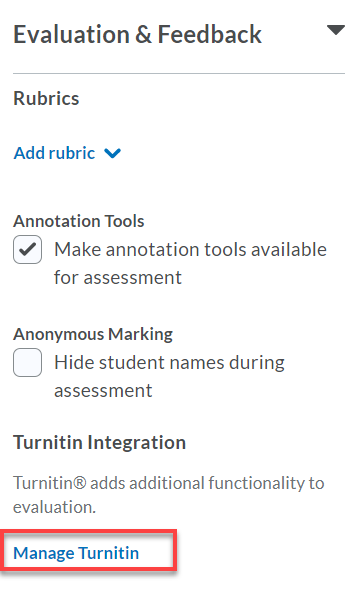
- Select Enable Similarity Report for this folder.

- Under Display, you can select Allow learners to see Turnitin similarity scores in their assignment if you want students to see their own originality report created by Turnitin.

- You can set the time and for whom submissions will be checked.
 Automatic checking will submit each submission to TurnItIn as soon as the student submits the assignment.
The second option allows the instructor to select certain students from the list to check. The only way to have all submissions sent to TurnItIn in the this option is for the Instructor or Grader to manually submit each paper.
- Optional: To limit the files submitted to this folder to Turnitin's acceptable filetypes, use the file restriction option in the Allowable File Extension option in the Submission and Completion section of the assignment.
- There are many more TurnItIn settings you can adjust. To access them, select the More Options button at the bottom of the TurnItIn integration dialogue window.

- Select Save when finished.
Please refer to this page from the TurnItIn site for more information on how to read and interpret a TurnItIn Similarity Report.

