1. Print: Classlist to printer or PDF file
Print a list of individuals listed in your Classlist.
To print a list of all individuals:
- Click on the Classlist tab on your course navbar.

- If you would like to print the entire Classlist click on the Print icon located at the top right hand of the page.

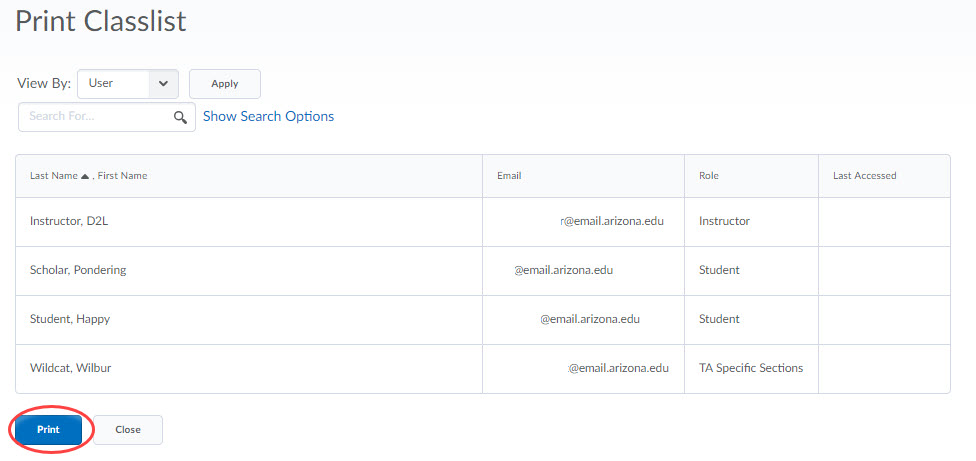
- You will be directed to a page where your Classlist appears, and will need to click Print at the bottom of the page.
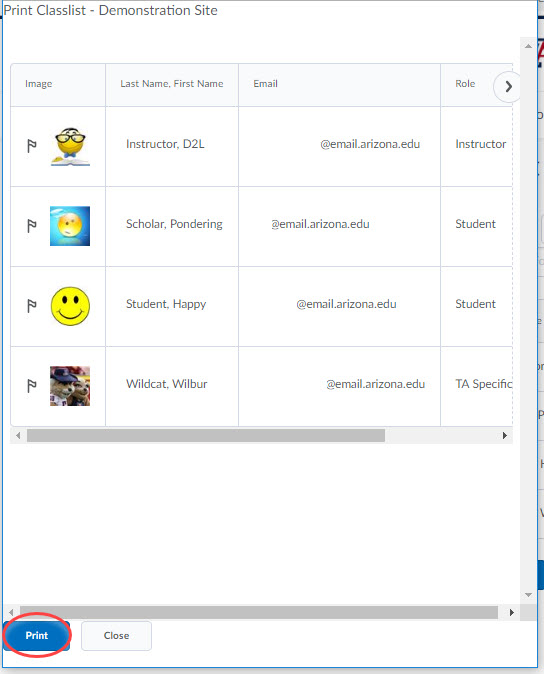
- A pop up screen will appear where you will need to click the Print button at the bottom of the screen.
To print a list of individuals within specific groups/sections:
-
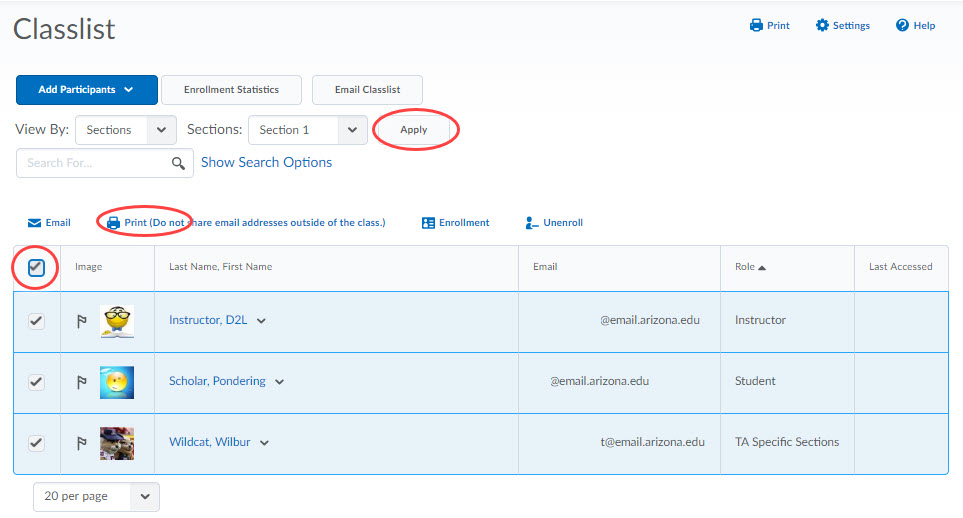
If you would like to print a list of individuals by specific Groups, or Sections, click the drop-down menu to the right of "View By" to select Group/Section and click Apply.
-
Select all individuals.
-
Click the Print link located at above the list of individuals.
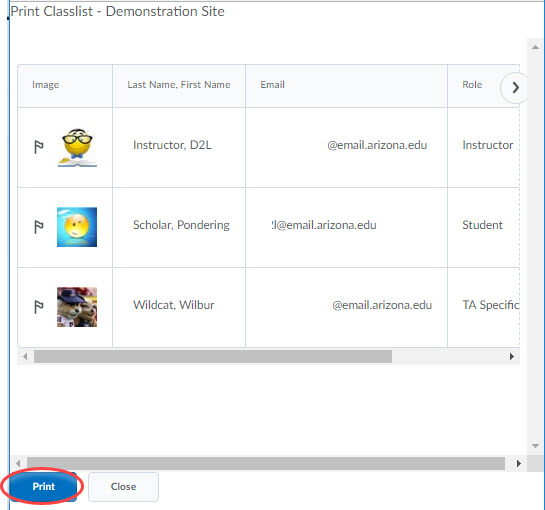
- A pop up screen will appear where you will need to click the Print button at the bottom of the screen.
2. Export: Classlist to CSV or Excel file
Print a list of individuals listed in your Classlist from Grades.
Note: This action can be used as a workaround to print out your Classlist in a spreadsheet format, since you can only do this from Grades, not from the Classlist itself.
- Click on the Grades link in the navbar.
- Click on Enter Grades.
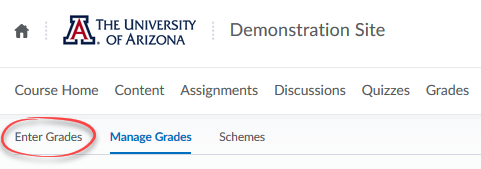
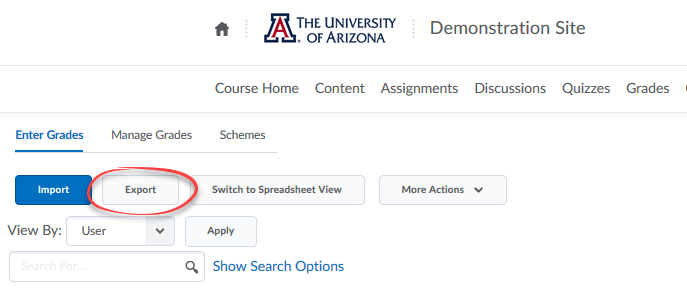
- On the Enter Grades page, click on the Export button.
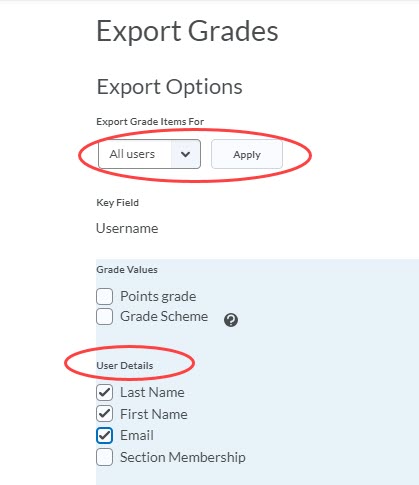
- On the export options page, use the filter at the top if you wish to export the Classlist for a specific section of students. Under User Details select the identifying information you wish to export.
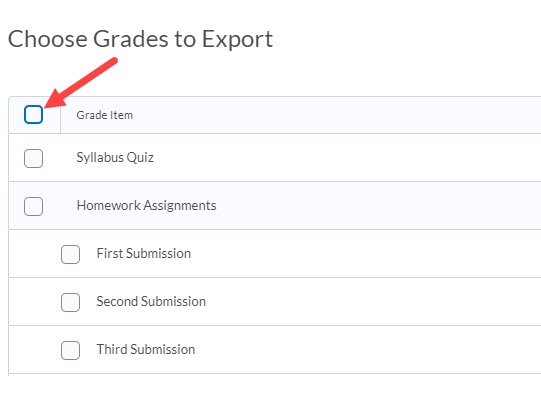
- Uncheck all the available grade items that are displayed in the Choose Grades to Export section of the page. Check and then uncheck the box in the top left of the items to deselect all.
- Click on either the Export to CSV or Export to Excel button depending on the required format.

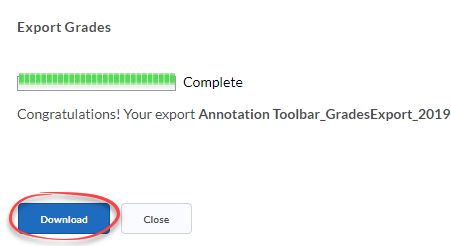
- When the export is complete, click on the Download button.
-
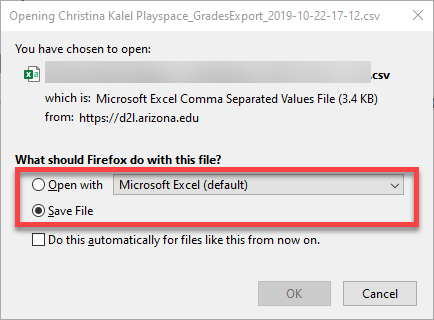
If applicable, choose to save the file to the computer or open it in Excel.
- Alternatively, you can go to your course roster in UAccess and click the button circled in the screenshot below:
 This will download the Enrolled Students Table for each course section to Excel.
Note: D2L Help does not support UAccess. Instead, see the UAccess Instructor Information page if you have questions about Step 9.
3. Access: View Progress
See how specific students are doing in your course (assignments completed, grades earned, etc,).
To view student progress:
- Click on the Classlist tab on your course navbar.

- Search for the individual within your list of participants.
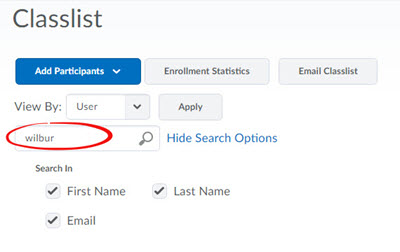
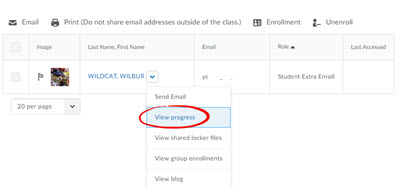
- Click the drop-down arrow to the right of the participant's name and select View progress.
- Once you are on the Progress Summary screen, you can then use the menu on the left side of the screen to sort by what you'd specifically like to see.
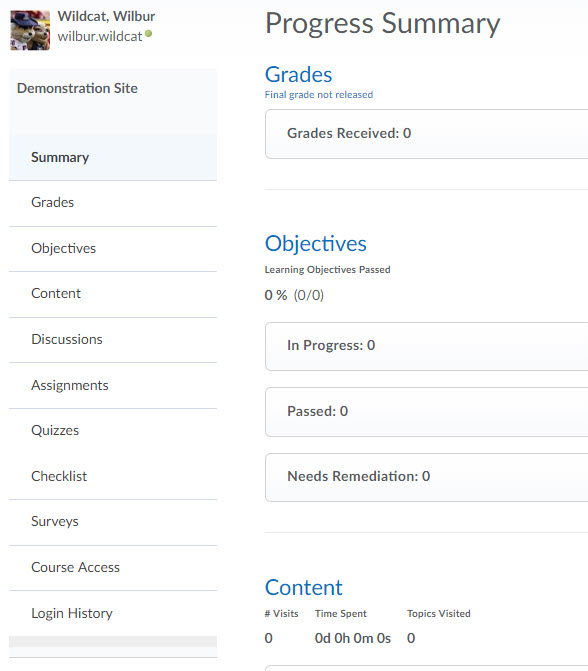
- Login History: In addition to the different course tools, View Progress also allows you to view a participant's system login history.
4. Access: Enrollment Statistics
See the number of participants enrolled in your course site broken down by role.
To view student enrollment stats:
- Click on the Classlist tab on your course navbar.

- Click the Enrollment Statistics button located near the top of the screen.
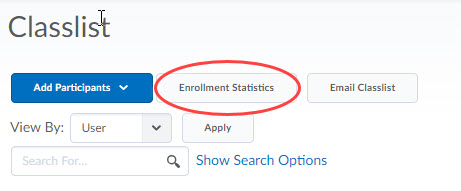
- You will see the number of participants enrolled in your D2L course site, broken down by role.
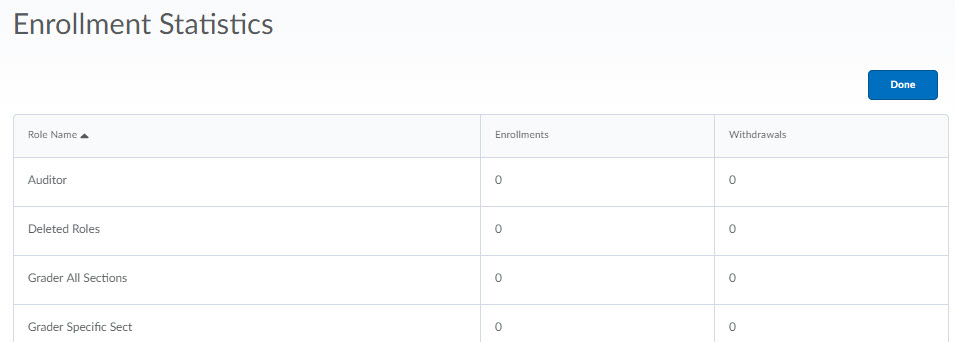
- You can see if any participants have been unenrolled from your course by scrolling down to the Withdrawals section.

5. Access: Withdrawals, grades and last accessed date
See the students who have withdrawn from your course site including any grades and the last accessed date.
To view withdrawn students:
- Click on the Classlist tab on your course navbar.

- Click the Enrollment Statistics button located near the top of the screen.

- Scroll down to the Withdrawals section to find participants who have been unenrolled from your course. Date = date of unenrollment, Last Accessed = last time clicking into the course site.

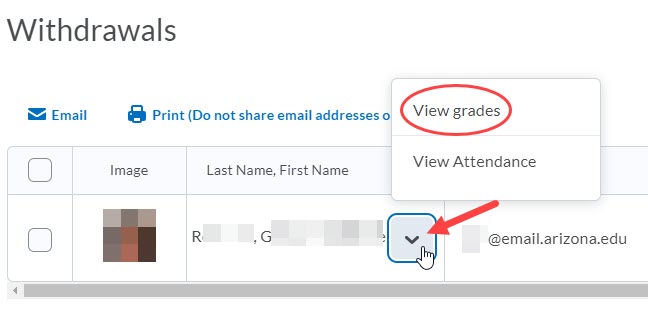
- To view the student's grades, click the down arrow next to their name and choose View grades.
6. Access: Quiz Accommodations
Set Quiz accommodations for individual students for all course quizzes.
To view Quiz accommodation settings for an individual student:
- Click on the Classlist tab on your course navbar.

- Click the down arrow next to the student's name for whom you'd like to set accommodations and select Edit Accommodations.
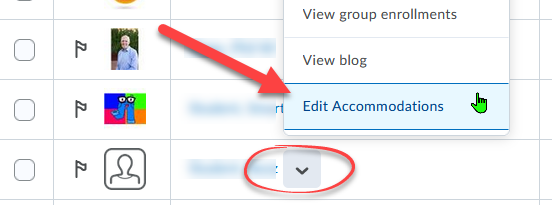
- This will open a window to allow you to set quiz accommodations for every course quiz for this student.
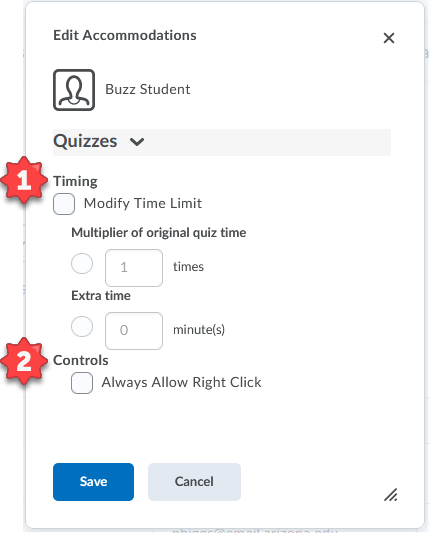
- The Timing section will modify the quiz time for this student by one of two techniques.
- The Multiplier option will multiply enforced time limit for a quiz by the number you provide. For example, if a student is allowed time and half to complete a quiz, you'll enter 1.5 for the multiplier.
- The extra time simply adds the number of minutes to the enforced time limit you set, regardless of the size of the enforced time limit.
- The Controls section allows you to disable the right click option for everyone in the class, but over-ride that setting for this one student and allow them to use the Right Click button on the mouse.
- The Timing section will modify the quiz time for this student by one of two techniques.
Note: Special Access settings in the Quiz tool override the Classlist accommodation.To give a student with a Classlist accommodation Special Access, set the Special Access time in the Quiz to match the accommodation time; e.g. for an accommodation of time and a half on a one hour exam, manually set the Special Access to 1.5 hours.

